


80
3. On the
File
menu, click
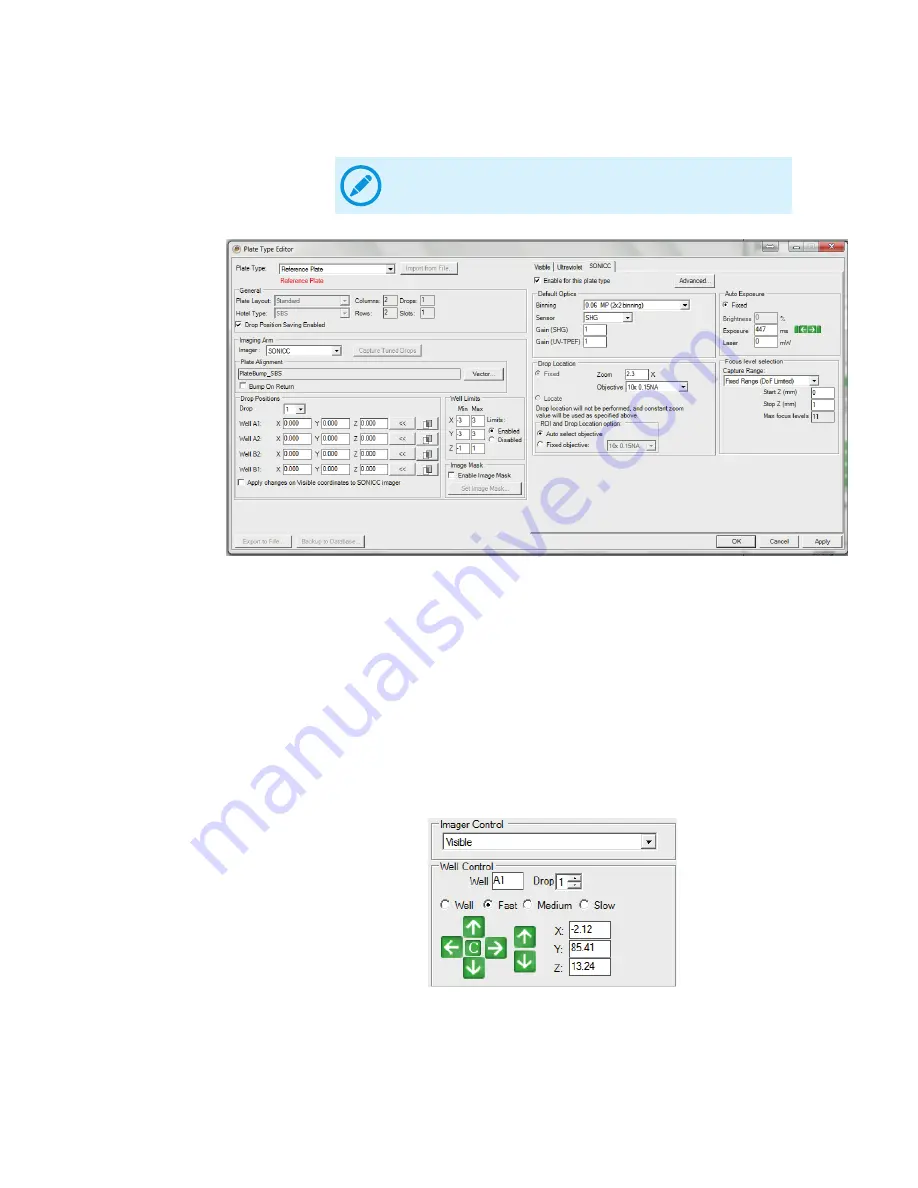
Plate Type Editor
. Make sure that
Well Limits
is set to
Disabled
and leave the Plate Type Editor open.
4. Under the
Drop Positions
, calibrate the
X
,
Y
,
Z
coordinates for the four corner well
locations accordingly.
a. Select a
Drop
from the
Drop
list. If your plate has multiple drops per well, make
sure to select the correct drop that corresponds with the drop you are currently
viewing in ROCK IMAGER. You must calibrate every drop for each of the four
corner wells.
b. On the
Imager
menu, select
Crosshairs
.
c. On the main ROCK IMAGER software window, go to the
Well Control
panel, and
select one of the speed options (
Fast
,
Medium
, or
Slow
).
d. Use the arrow buttons on the
Well Control
panel to move the imager to the first
well location (such as
Well A1
) and adjust its positions. Move the crosshairs to the
center of the well and use the Z axis control arrow buttons (located to the right) to
focus the drop image. You can also adjust the zoom if necessary in the
Optics
Control
panel. (see the image sample on the next page).
Note:
Do not click
Apply
or
OK
in the Plate Type Editor menu at
this time.
SONICC Plate Type Editor
Well Control Panel
ROCK IMAGER User's Guide | Chapter 13: Improving Images


