17 - 7
G
ETTING
S
TARTED
To run Panelman for windows after it has been installed,simply click on the Panelman entry in the program menu
bar.
•
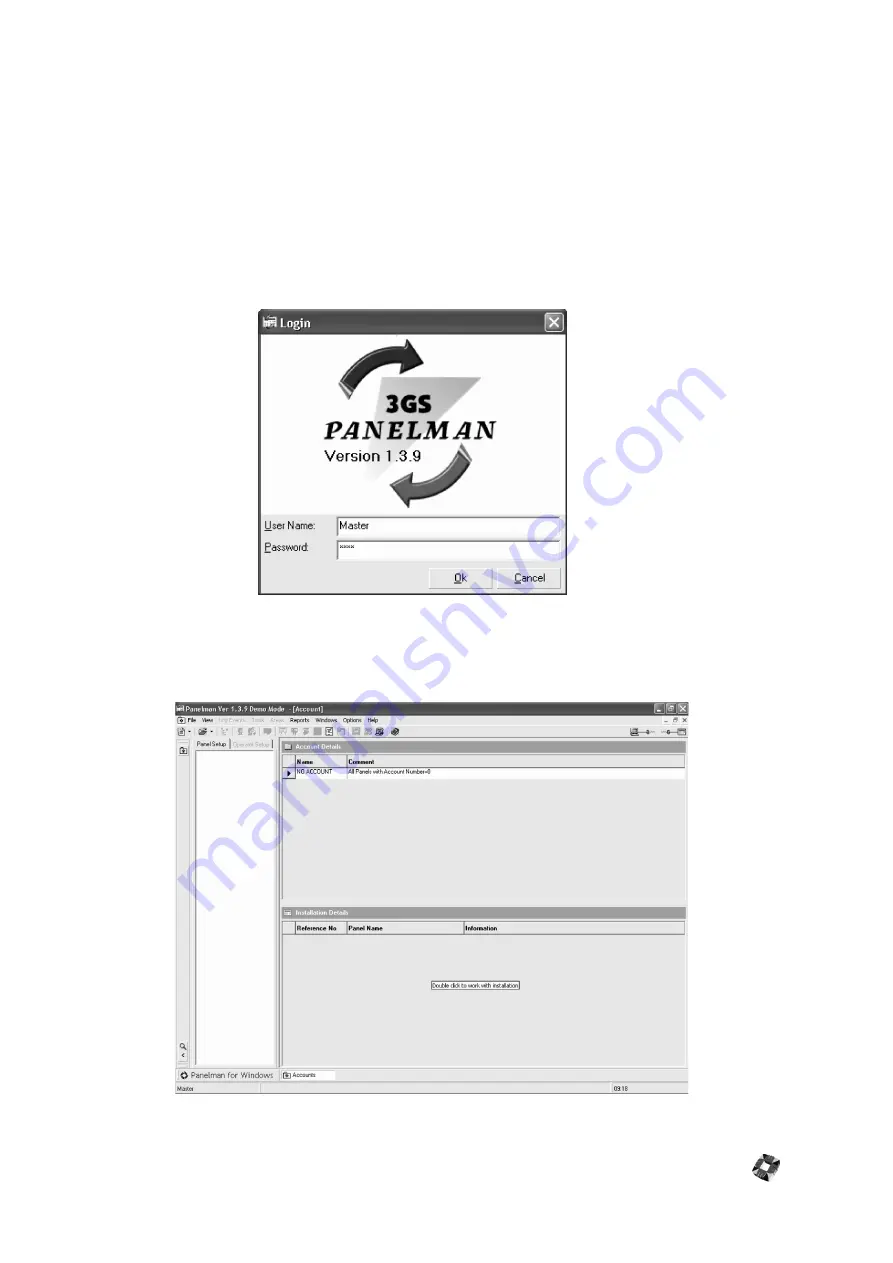
A login window appears (shown below), requiring you to enter your User Name and Password. The
default user name is Master and the default code is 1111.
Note
: The user name is case-sensitive.
•
For security reasons it is advisable to change this default code as soon as possible. This password can
consist of Letters and/or Numbers up to a maximum of 5 characters. Note however that if Letters are
used, they will be case sensitive.
Once successfully logged in, the application opens with the main Panelman Window (shown below)displaying the
Treeview window on the left (initially blank), and Account and Installation details on the right. When New
Accounts and Installations are created, their details can be viewed in these windows.
Содержание 3GS
Страница 4: ...Introduction iv...
Страница 12: ...Introduction 8...
Страница 14: ...1...
Страница 18: ...System Overview 1 6...
Страница 20: ......
Страница 22: ...Hardware Overview 2 4 SYSTEM CONFIGURATION The following diagram shows a typical configuration of the system...
Страница 26: ......
Страница 34: ......
Страница 38: ...Intelligent PSUs 4 6...
Страница 40: ......
Страница 97: ...Issue 4 5 August 2005 Nodes 5 59...
Страница 98: ...Issue 4 5 August 2005 Nodes 5 61...
Страница 100: ......
Страница 106: ...3GS Technical Manual...
Страница 116: ...3GS Technical Manual 7 12 Programming Overview Issue 4 5 August 2005 3GS Initial Setup Menu...
Страница 118: ...3GS Technical Manual...
Страница 146: ...3GS Technical Manual Issue 4 5 August 2005 Programming Menus 8 31 Node Configure Inputs Menu...
Страница 153: ...3GS Technical Manual Issue 4 5 August 2005 8 38 Programming Menus Service Mode Test Menu...
Страница 155: ...3GS Technical Manual Issue 4 5 August 2005 8 40 Programming Menus Service Mode Monitor Menu...
Страница 217: ...3GS Technical Manual Issue 4 5 August 2005 8 108 Programming Menus...
Страница 218: ...3GS Technical Manual Issue 4 5 August 2005 Programming Menus 8 109...
Страница 220: ......
Страница 222: ...3GS Version 5 User Guide 9 5 3GS SYSTEM KEYPAD DISPLAY...
Страница 254: ...3GS Version 5 User Guide 9 37 Some examples of Alert Messages...
Страница 262: ...3GS Version 5 User Guide 9 45 User name max 24 characters User no 17 18 19 20 21 22 23 24 25 26 27 28 29 30 31 32...
Страница 264: ......
Страница 265: ...I n t h i s c h a p t e r HHT Overview 10 3 Main Menu 10 5 HAND HELD TERMINAL HHT 10...
Страница 266: ......
Страница 280: ......
Страница 288: ......
Страница 290: ......
Страница 293: ...Issue 4 5 August 2005 DM1200 Digital Communicator Modem 12 5...
Страница 301: ...I n t h i s c h a p t e r Network Router Overview 13 3 Sample Connection Diagram Scenarios 13 4 NETWORK ROUTER 13...
Страница 302: ......
Страница 304: ...Network Router 13 4 SAMPLE CONNECTION DIAGRAM SCENARIOS...
Страница 308: ...Network Router 13 8...
Страница 310: ......
Страница 316: ...IntelliBell 14 8 SELF ACTIVATING BELL To connect a Self Activating Bell SAB to the 3GS system see the following diagram...
Страница 318: ......
Страница 338: ...Issue 4 5 August 2005 Technical Specifications 15 23...
Страница 339: ...I n t h i s c h a p t e r 3GS Overview 16 5 Installing 3GS 16 6 Installing the Dongle 16 7 Upgrading 16 8 16 PC SOFTWARE...
Страница 340: ...1...
Страница 346: ......
Страница 366: ...17 22...
Страница 367: ...I n t h i s c h a p t e r Introduction to CiTeC II 18 3 CITEC II INSTALLATION 18...
Страница 368: ......
Страница 370: ...CiTeC II Installation 18 4...
Страница 377: ...Issue 4 5 August 2005 19 7...
Страница 378: ...19 8...
Страница 385: ......
Страница 386: ......


