48
8. Hints & tips
8.1 Export and other features of client XML configuration
From the ERA Console, select any clients in the
Clients
tab
in ERA Console. Right-click and select
Configuration...
from the context menu. Click
Save As...
to export the assigned configuration of the given client to an .xml file
6
. The
.xml file can be used afterwards for various operations:
•
For remote installations, the .xml file can be used as a template for a predefined configuration. This means that
no new .xml file is created, and the existing .xml file is assigned (
Select...
) to a new install package.
•
For configuring multiple clients; selected clients receive a previously downloaded .xml file and adopt the settings
which are defined in the file (again, no new configuration is created, only assigned by the
Select...
button ).
Example:
An ESET solution is installed on only one workstation. Adjust the settings directly through the program’s
user interface. When finished, export the settings to an .xml file. This .xml file can then be used for remote
installations to other workstations. This method can be very useful for tasks such as fine-tuning firewall rules, if the
“Policy-based” mode is to be applied.
8.2 Combined update for notebooks and mobile devices
If there are any mobile devices in your local network (i.e., notebooks), we recommend that you configure a
combined update from two sources, ESET’s update servers and the local Update Server - Mirror. First, notebooks
contact the local Mirror server, and if the connection fails (they are outside of the office), they download updates
directly from ESET’s servers. To allow for this functionality:
•
Create two update profiles, one directed to the Mirror server (referred to as “LAN” in the following example) and
the second one to ESET’s update servers (INET)
•
Create a new update task, or modify an existing update task through the Scheduler (
Tools > Scheduler
from the
main program window of ESET Smart Security or ESET NOD32 Antivirus).
The configuration can be made directly on notebooks, or remotely using the ESET Configuration Editor. It can be
applied either during installation, or anytime later as a configuration
task.
To create new profiles in ESET Configuration Editor, right-click on the
Update
branch and select
New profile
from
the context menu.
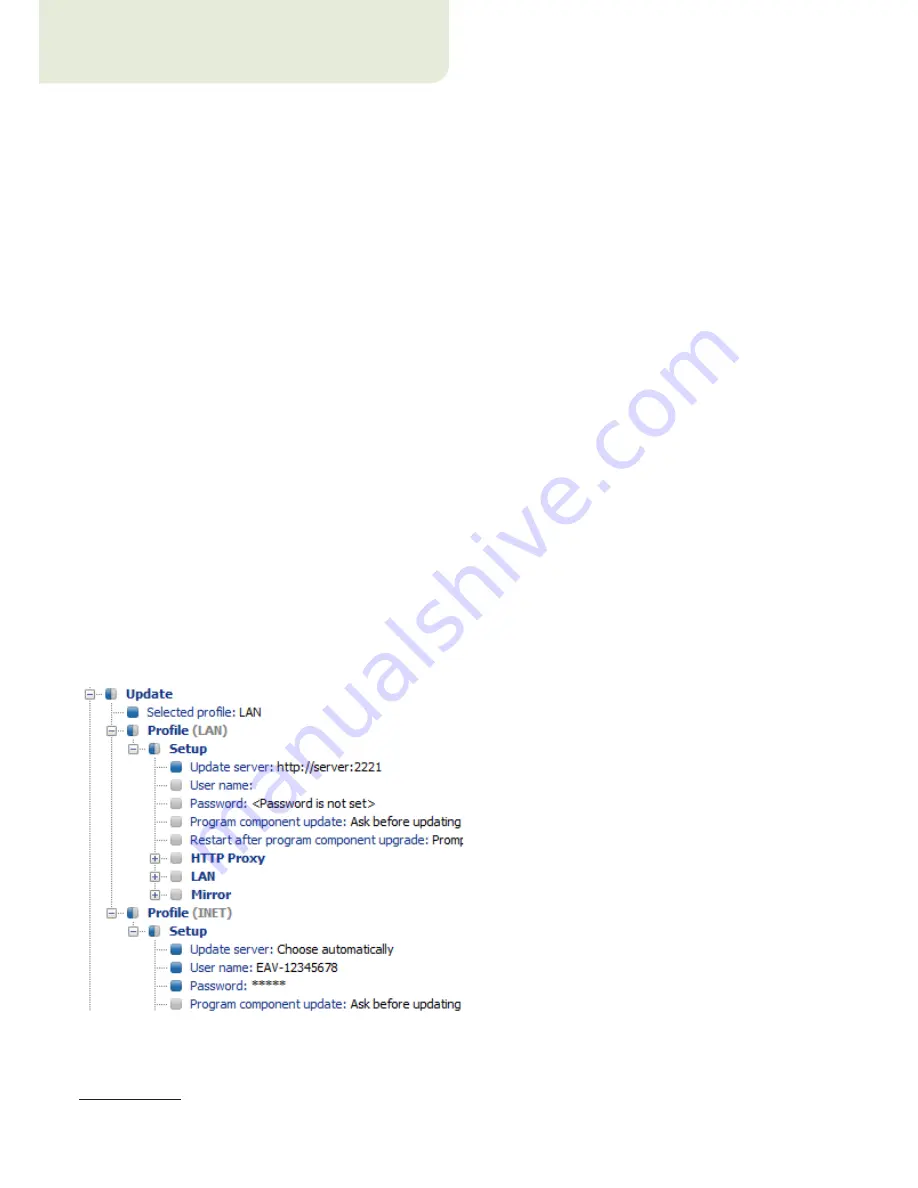
The result of modifications should resemble the one displayed below:
The profile
LAN
downloads updates from the company’s local Mirror server (
http://server:2221)
, while the profile
INET
connects to ESET’s servers (
Choose Automatically
).
Next, define an update task which runs each update profile in succession. To do this, navigate to
ESET Smart
6 .xml configuration files can also be extracted directly from the ESET Smart Security program interface.


