45
•
Click the
Edit
button to modify the .xml file created using the ERAC Editor in section 7.1.4.
•
Navigate to
ESET Smart Security, ESET NOD32 Antivirus > Update > Profile (My profile)
.
•
Right-click
Profile (My profile)
and select
New Profile...
from the context menu.
•
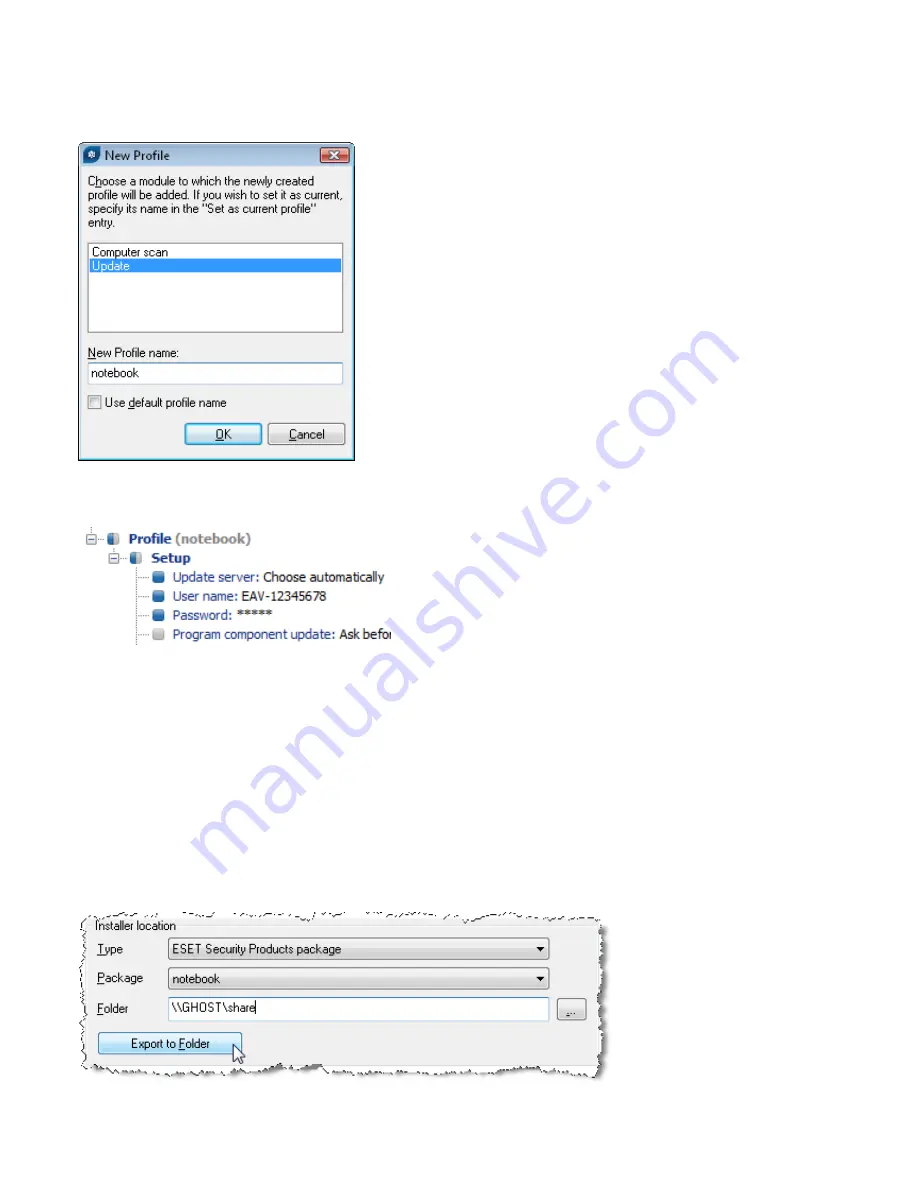
In the
New Profile
dialog window, verify that
Update
is highlighted and then deselect the
Use default profile
name
check box.
•
Enter a
New Profile name
, such as
notebook
.
•
Click
OK
to save the configuration. Now, in addition to
Profile (My profile)
,
the
Profile (notebook)
appears. Click
Profile (notebook) > Setup
and configure the following three attributes as seen below:
•
The
Choose Automatically
option allows updating from ESET’s servers rather than the local network (Mirror),
while authentication to the servers is granted by the
User name
and
Password
(supplied by ESET after
purchase).
•
Click
Console
on the right side of the ESET Configuration Editor to return to the
Installation Packages Editor
window.
•
Click
Yes
and then
Save as...
in the
Installation Packages Editor
window and save the modified installation
package as
notebooks
.
Click
Close
to return to the ERA Console.
Next, the einstaller.exe
agent needs to be added to the
notebooks
package in the logon script. Proceed as follows:
•
From the
Remote Install
tab, click
Export...
•
From the
Package
drop-down menu, select
notebook
and then click the
...
button to select a folder where the
agent einstaller.exe
will be saved. The selected folder should be accessible for notebooks when they connect to
the company’s network (or domain). For our purposes, let’s use the folder defined in the UNC path:
\\GHOST\share
•
Click the
Export to Folder
button and click
OK
. The einstaller.exe file now resides in the
\\GHOST\share
folder.


