15
4. ESET Remote Administrator Console in detail
4.1 Connecting to ERAS
Most features in the ERA Console are available only after connecting to an ERA Server. Before the first connection,
first define the server by name or IP address:
Open the ERA Console, click
File > Edit Connections
... and click the
Connection
tab.
Click the
Add/Remove...
button to add new ERA Servers, or to modify currently listed servers. Click
OK
after
adding or modifying servers and pick the desired server in the
Select connection
drop-down menu. Then, click the
Connect
button.
Other options in this window:
•
Connect to selected server on the console startup
If this option is selected, the console will automatically connect to the selected ERAS on startup.
•
Show message when connection fails
If there is a communication error between ERAC and ERAS, an alert is displayed.
Connections can be password protected. By default, there is no password to connect to an ERA Server, but we
strongly recommend that one be established. To create a password to connect to an ERA Server:
Click File > Change Password...
and then click the
Change...
button
to the right of
Password for Console
.
When entering a password, there is the option to
Remember password
.
Please consider the possible security risk
of using this option. To delete all remembered passwords, click
File > Clear Cached Passwords...
At the moment communication is established, the program’s header will change to
Connected
[
server_name
].
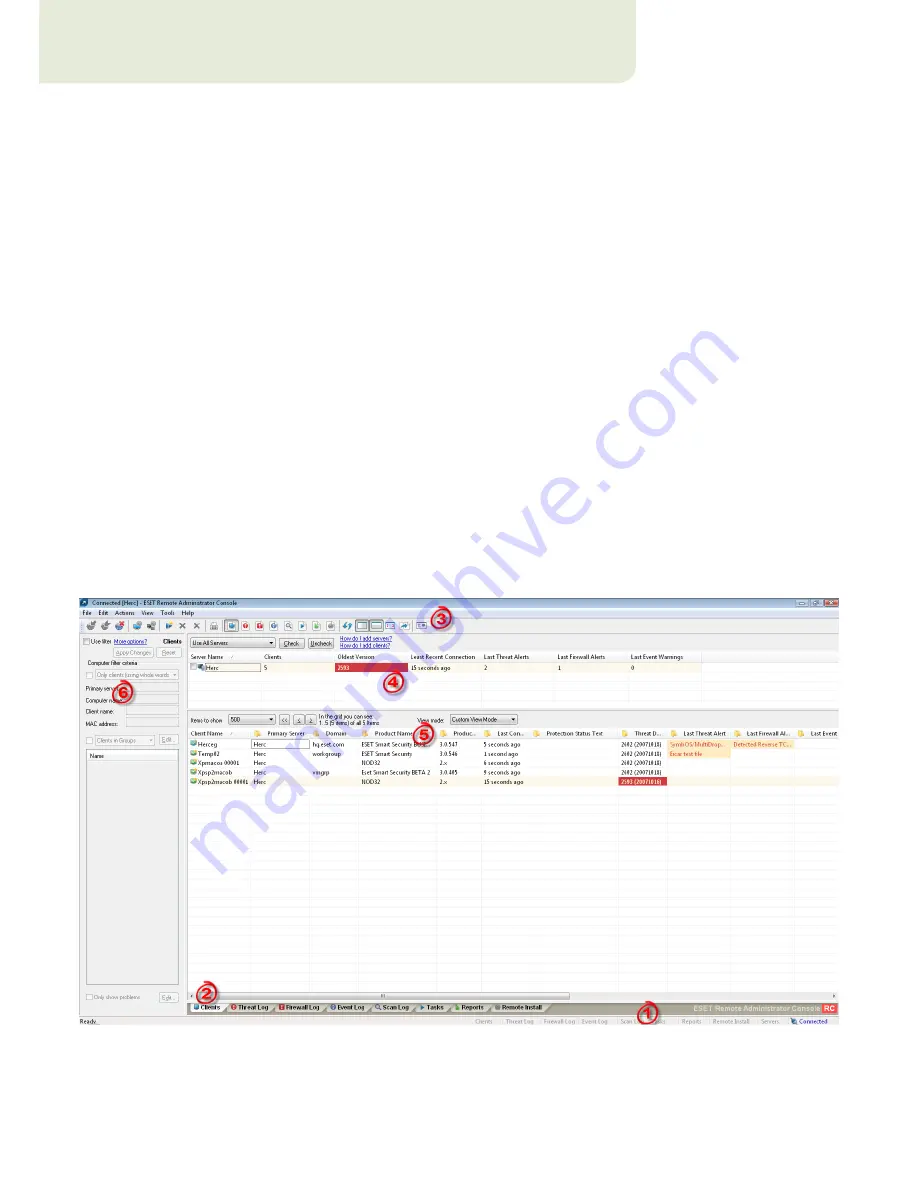
4.2 ERAC – main screen
Figure 4
The main screen of ESET Remote Administrator Console
A current status of communication between ERAC and ERAS is displayed in the status bar (1). All necessary data
from ERAS is refreshed regularly (Default is every minute. See
Tools > Console Options...
). The refresh progress can
also be seen in the status bar.
NOTE:
Press F5 to refresh displayed data.


