QuadroFXO Manual II: Administrator's Guide
Administrator's Menus
QuadroFXO (SW Version 3.0.x)
29
•
Send AA Digits to Routing Table
checkbox selection switches the Auto Attendant to the routing mode. Any inserted digits in the
Connection menu will be parsed through the Routing Table on the Quadro.
Please Note:
This checkbox affects ONLY Connections Menu (see Auto Attendant Services). In Call Relay Menu, the routing prefix needs
to be dialed (see Call Codes) to parse the dialed number through the Routing Table.
•
Attendant Welcome Message
-
this group allows updating the active Auto Attendant welcome message, downloading it to the PC, or
restoring the default one. The group offers the following components:
The
Restore Default Welcome Message
checkbox allows restoring the Auto Attendant default welcome message file if another one has
been previously selected. If the checkbox is selected, the file upload will be disabled.
Upload new welcome message
indicates the file name used to upload a new welcome message. The uploaded file needs to be in PCMU
wave format, otherwise the system will prevent uploading it with the “Invalid audio file, or format is not supported” warning message. The
system also prevents uploading if there is not enough memory available for the corresponding extension, which will cause the “You do not
have enough space” warning.
Browse
opens the file chooser window to browse for a new welcome message file.
The
Download Welcome Message File
link appears only if a file has been previously uploaded. The link is used to download the audio
file to the PC and opens the file chooser window where the saving location can be specified.
•
Routing Attendant Welcome Message
-
this group is available for default 00 attendant only and allows updating a welcome message
played when Auto Attendant acts in the routing mode (i.e., incoming calls to FXO line or ISDN timeslot are routed to the Routing agent),
downloading it to the PC, or restoring the default one. The group offers the following components:
The
Restore Default Routing Welcome Message
checkbox allows restoring the routing Attendant welcome message file if another one
has been previously selected. If the checkbox is selected, the file upload will be disabled.
Upload new Routing welcome message
indicates the file name used to upload a new welcome message. The uploaded file needs to be
in PCMU wave format, otherwise the system will prevent uploading it with the “Invalid audio file, or format is not supported” warning
message. The system prevents uploading also if there is not enough memory available for the corresponding extension. This will cause the
“You do not have enough space” warning.
Browse
opens the file chooser window to browse for a new routing welcome message file.
The
Download Routing Welcome Message File
link appears only if a routing welcome message has been previously uploaded. The link
is used to download the audio file to the PC and opens the file chooser window where the saving location can be specified.
•
Friendly Phones
-
the
Edit Authorized Phones Database
link refers to the
Authorized Phones Database
page where trusted external
phones are listed. If they are part of the Quadro Authorized Phones database, external IP or PSTN users are free to access the Quadro
Auto Attendant services without passing the authentication.
When adding a friendly phone to the list, an existing extension has to be
chosen whose parameters (extension number and password, as well as SIP and Speed Calling Settings) will be used automatically for the
trusted caller access of the Quadro Auto Attendant. A direct connection to the
Call Relay
menu can be provided optionally.
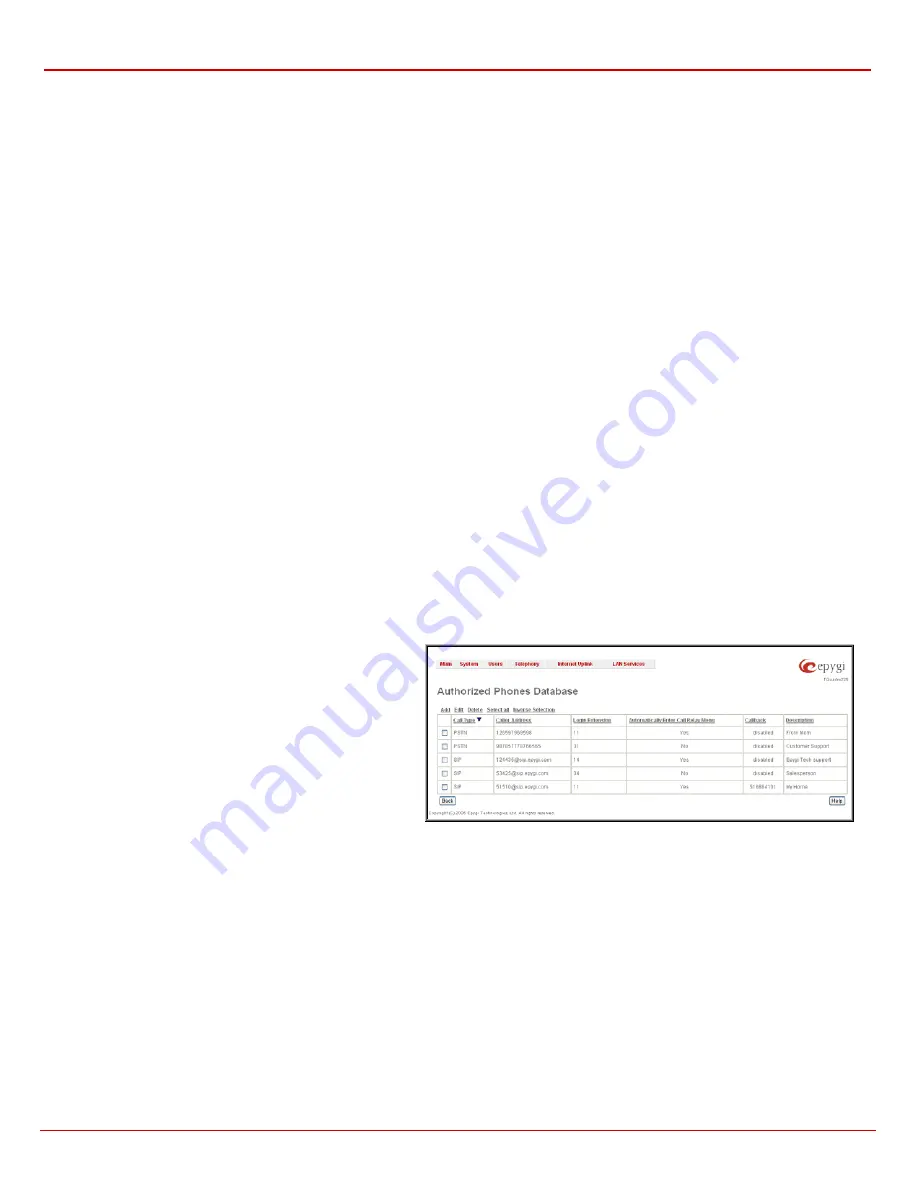
The
Authorized Phones Database
page displays the
Authorized Phones Database
table where the trusted phones
are listed. Only IP and PSTN users can be added to the
Authorized Phones Database
.
The
Authorized Phones Database
table displays all trusted
callers with their settings, e.g., call type, caller address,
extension they automatically login with, information if they have
automatic access to Auto Attendant (Call Relay Menu, etc.).
Fig. II-45: Authorized Phones Database
Each record in the table has an assigned checkbox. The checkbox is used to edit or delete the corresponding record. The “No records selected”
error occurs if the user activates the edit or delete button having no records selected. The error “One record should be selected” appears if the user
tries to edit more than one record. Each column heading in the table a link. By clicking on the column heading, the table will be sorted by the selected
column. Upon sorting (ascending or descending), arrows will be displayed close to the column heading.
The
Add
functional button refers to the
Authorized Phones Database- Add Entry
page where new trusted users may be entered.


