EPSON Stylus
&2/25
800
Rev. A
3-10
3.5 Printhead Removal
1. Remove the upper housing. (Refer to Section 3.4.)
2. Open the ink cartridge covers and remove the ink cartridges from the CR assembly.
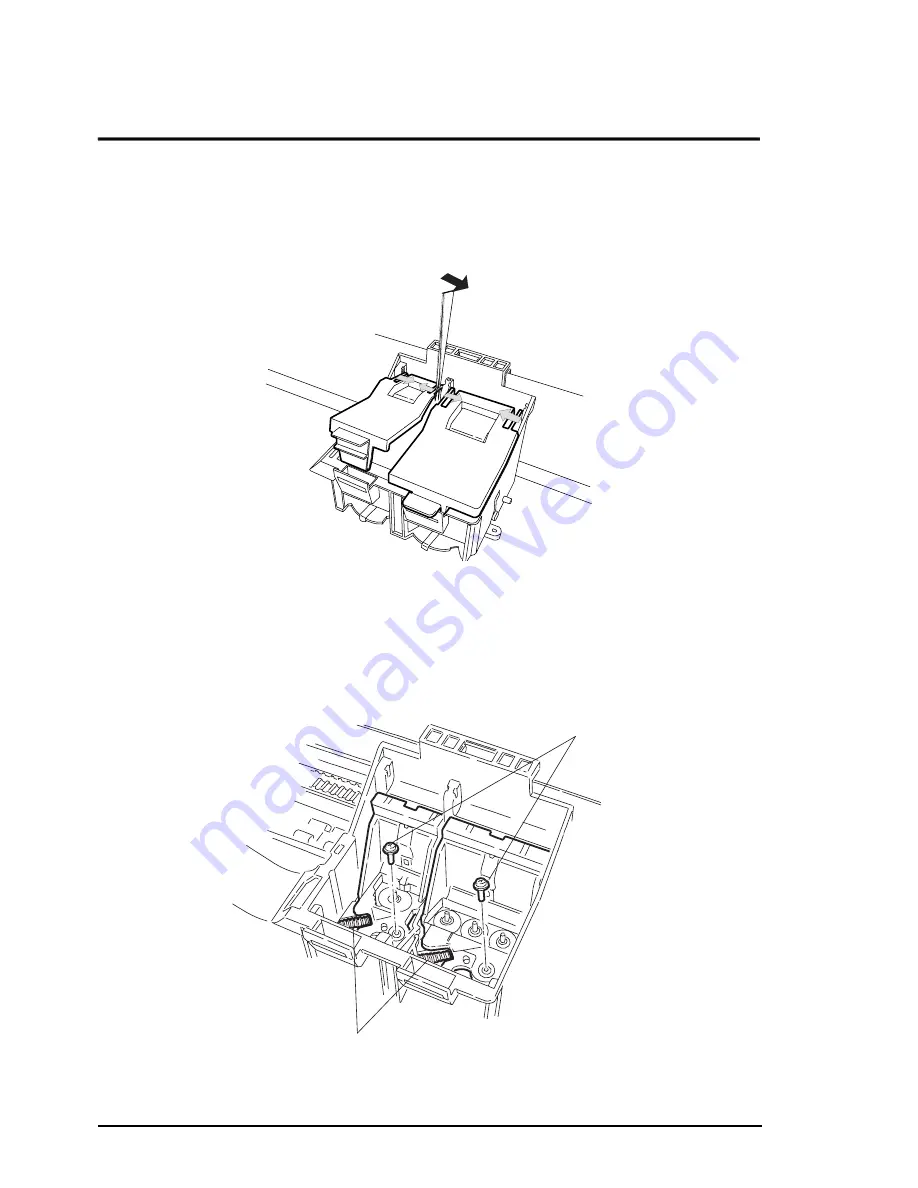
3. Using tweezers, release the ink cartridge covers from the pins fixing them to the CR
assembly. Then remove the ink cartridge covers. (See Figure 3-8.)
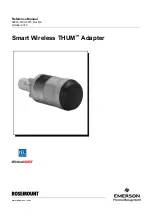
4. Remove 2 head fixing screws securing the printheads to the CR assembly at the bottom.
5. Remove 2 compression springs (9.9 g) holding each printhead to the carriage. (See Figure
3-9.)
Figure 3-8. Cartridge Cover Removal
Head Fixing Screw
Compression Spring (9.9)
Figure 3-9. Screw and Spring Removal
Содержание Stylus Color 800
Страница 1: ...EPSON COLOR INK JET PRINTER EPSON Stylus COLOR 800 SERVICE MANUAL SEIKO EPSON CORPORATION 4007371 ...
Страница 48: ......
Страница 56: ......
Страница 60: ......
Страница 154: ......
Страница 155: ......
Страница 156: ......
Страница 157: ......
Страница 158: ......
Страница 164: ......
Страница 173: ...EPSON Stylus 2 25 800 Rev A 6 6 Lubricate PF Roller Bushing 12 Figure 6 10 Lubrication Point 10 ...
Страница 184: ...Appendix Rev A A 9 A 3 Circuit Board Component Layout A 3 1 C202 MAIN Board Assembly Component Layout ...
Страница 185: ...EPSON Stylus 2 25 800 Rev A A 10 A 3 2 C202 PSB Board Assembly Layout A 3 3 C202 PSE Board Assembly Layout ...
Страница 187: ...EPSON SEIKO EPSON CORPORATION ...


