Disassembly and Assembly
Rev. A
3-43
❏
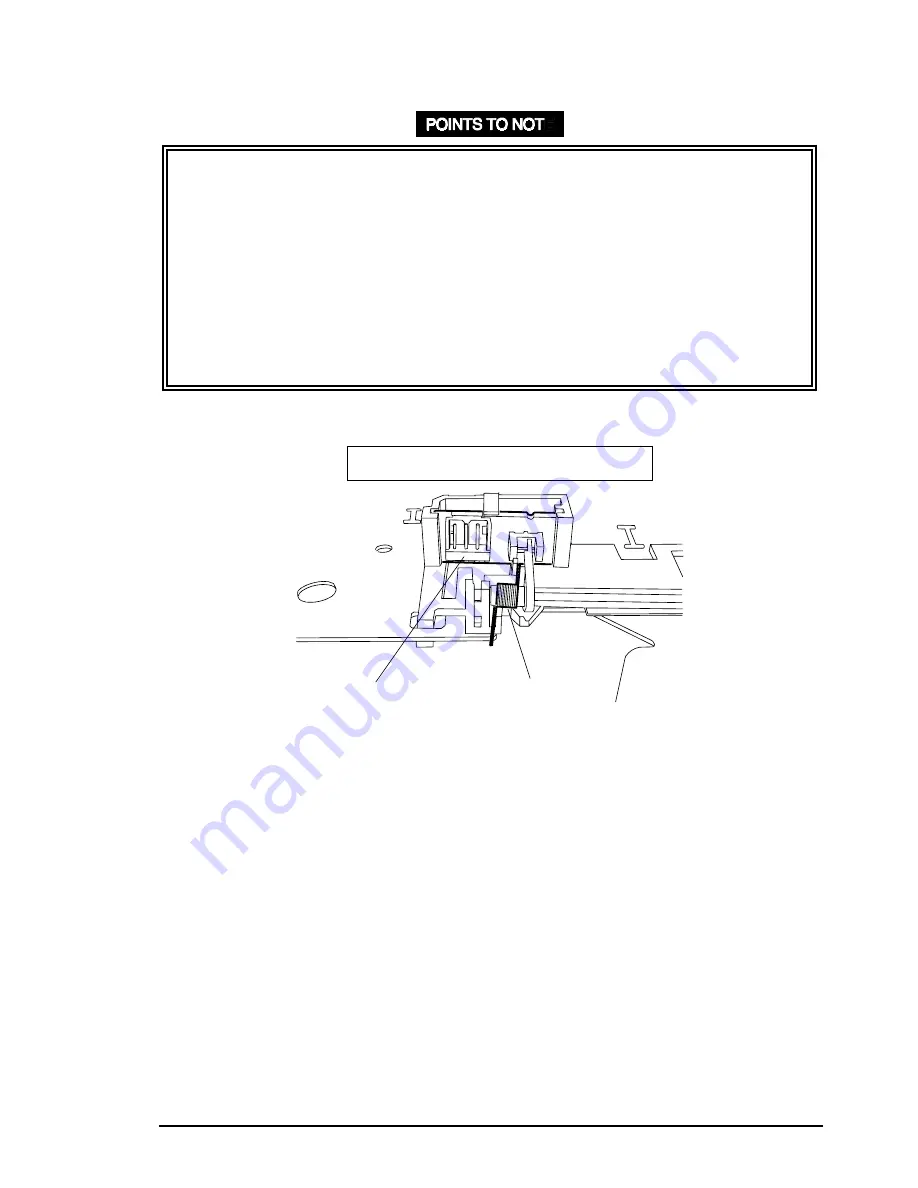
When mounting the paper end sensor assembly on the top frame, be sure to mount the
torsion spring correctly at the point shown in Figure 3-57.
❏
After installing the paper empty sensor lever, ensure it bounces smoothly.
❏
Install the paper empty sensor and right paper guide assembly in the following order:
c
Mount the paper empty sensor onto the top frame.
d
Align the paper empty sensor lever with the cutout in the upper paper guide
assembly.
e
Attach the right paper guide assembly to the top frame, or refer to POINTS TO
NOTE in Section 3.13.5.
❏
Ensure that the hooks for the PE sensor assembly fit securely into the cutouts in the top
frame.
Printer Mechanism Viewed from the Bottom
Paper End Sensor
Cable Connector
Torsion Spring (0.22)
Figure 3-56. Torsion Spring
Содержание Stylus Color 800
Страница 1: ...EPSON COLOR INK JET PRINTER EPSON Stylus COLOR 800 SERVICE MANUAL SEIKO EPSON CORPORATION 4007371 ...
Страница 48: ......
Страница 56: ......
Страница 60: ......
Страница 154: ......
Страница 155: ......
Страница 156: ......
Страница 157: ......
Страница 158: ......
Страница 164: ......
Страница 173: ...EPSON Stylus 2 25 800 Rev A 6 6 Lubricate PF Roller Bushing 12 Figure 6 10 Lubrication Point 10 ...
Страница 184: ...Appendix Rev A A 9 A 3 Circuit Board Component Layout A 3 1 C202 MAIN Board Assembly Component Layout ...
Страница 185: ...EPSON Stylus 2 25 800 Rev A A 10 A 3 2 C202 PSB Board Assembly Layout A 3 3 C202 PSE Board Assembly Layout ...
Страница 187: ...EPSON SEIKO EPSON CORPORATION ...


