EPSON Stylus COLOR 860/1160
Revision C
Disassembly and Assembly
Disassembly Procedures
80
4.2.1 Removing the Upper Housing
Since the printer mechanism itself structures the bottom part, the printer
mechanism appears just by removing the Upper Housing.
1.
Open the printer cover and turn the PG adjustment lever towards (+) side.
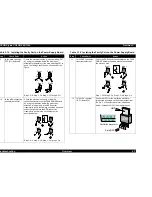
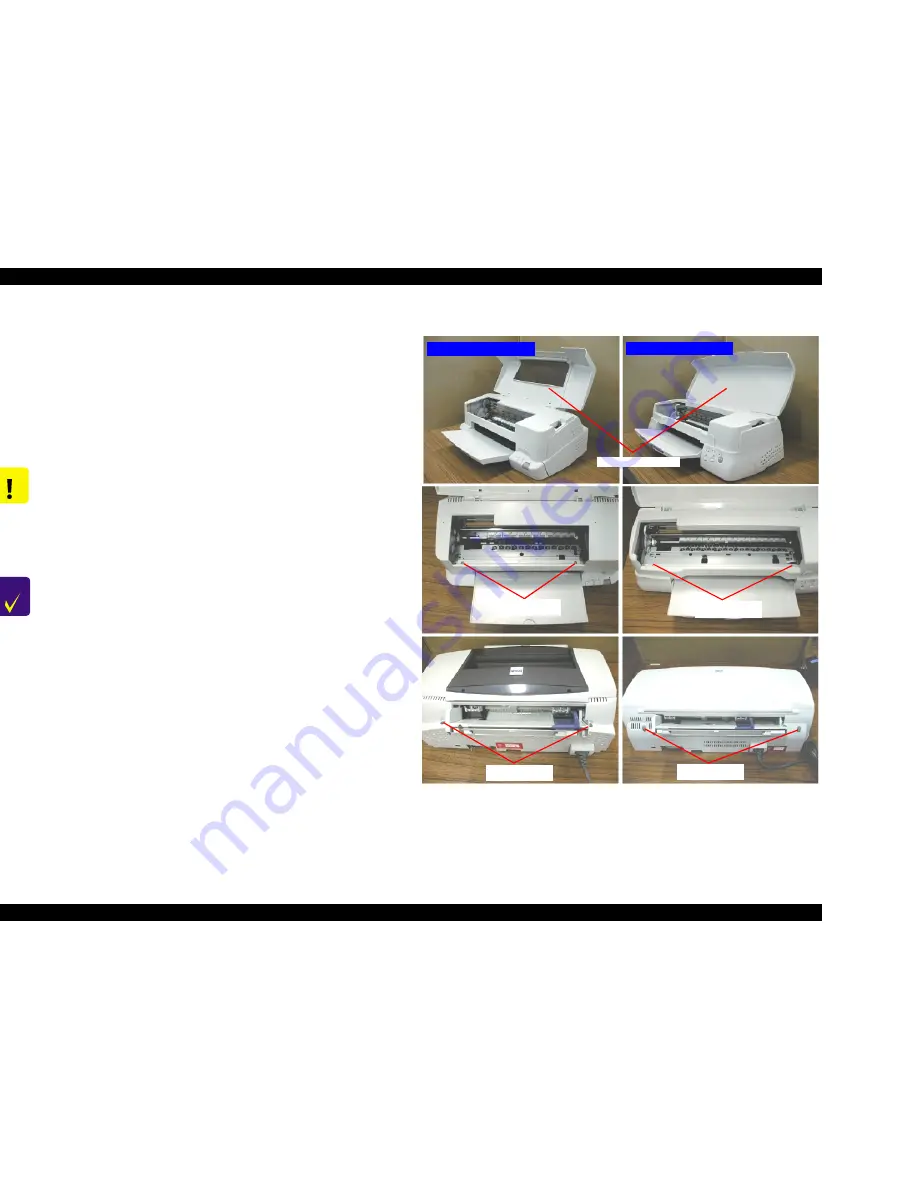
2) Remove 4 screws (No.8) securing the Upper Housing, and remove it
upward. Refer to Figure 4-2. The left column’s photos show you the Stylus
Color 860 and right column’s photos show you the Stylus Color 1160.
Figure 4-2. Removing the Upper Housing
C A U T I O N
Lift up and remove the Upper Housing, pulling it forward.
(Since it collides with the carriage)
C H E C K
P O I N T
After assembling the Upper Housing, confirm the Head FFC is
placed in the gutter which is located at the back side of the of
the Upper Housing.
In case the Head FFC is not placed in the gutter, it may
damage the head FFC.
No.8 Screws
Stylus COLOR 860
Upper Housing
No.8 Screws
No.8 Screws
No.8 Screws
Stylus COLOR 1160
Содержание Stylus COLOR 1160
Страница 8: ...C H A P T E R PRODUCTDESCRIPTION ...
Страница 28: ...C H A P T E R OPERATINGPRINCIPLES ...
Страница 53: ...C H A P T E R TROUBLESHOOTING ...
Страница 74: ...C H A P T E R DISASSEMBLYANDASSEMBLY ...
Страница 116: ...C H A P T E R ADJUSTMENT ...
Страница 150: ...C H A P T E R MAINTENANCE ...
Страница 160: ...APPENDIX C H A P T E R ...
Страница 171: ...PSON Stylus COLOR 860 1160 Revision C ppendix Circuit Board Component Layout 171 Figure 7 5 C298PNL Component Layout ...

