EPSON Stylus COLOR 860/1160
Revision C
Disassembly and Assembly
Disassembly Procedures
114
4.2.4.9 Remove the PF Motor Assembly
1.
Remove the Upper Housing (Refer to Section 4.2.1.)
2) Remove the ASF Assembly from the Printer Mechanism. (Refer to Section
4.2.4.6.)
3) Remove the Carriage Assembly. (Refer to Section 4.2.4.7.)
4) Remove the PF Roller Assembly. (Refer to Section 4.2.4.8.)
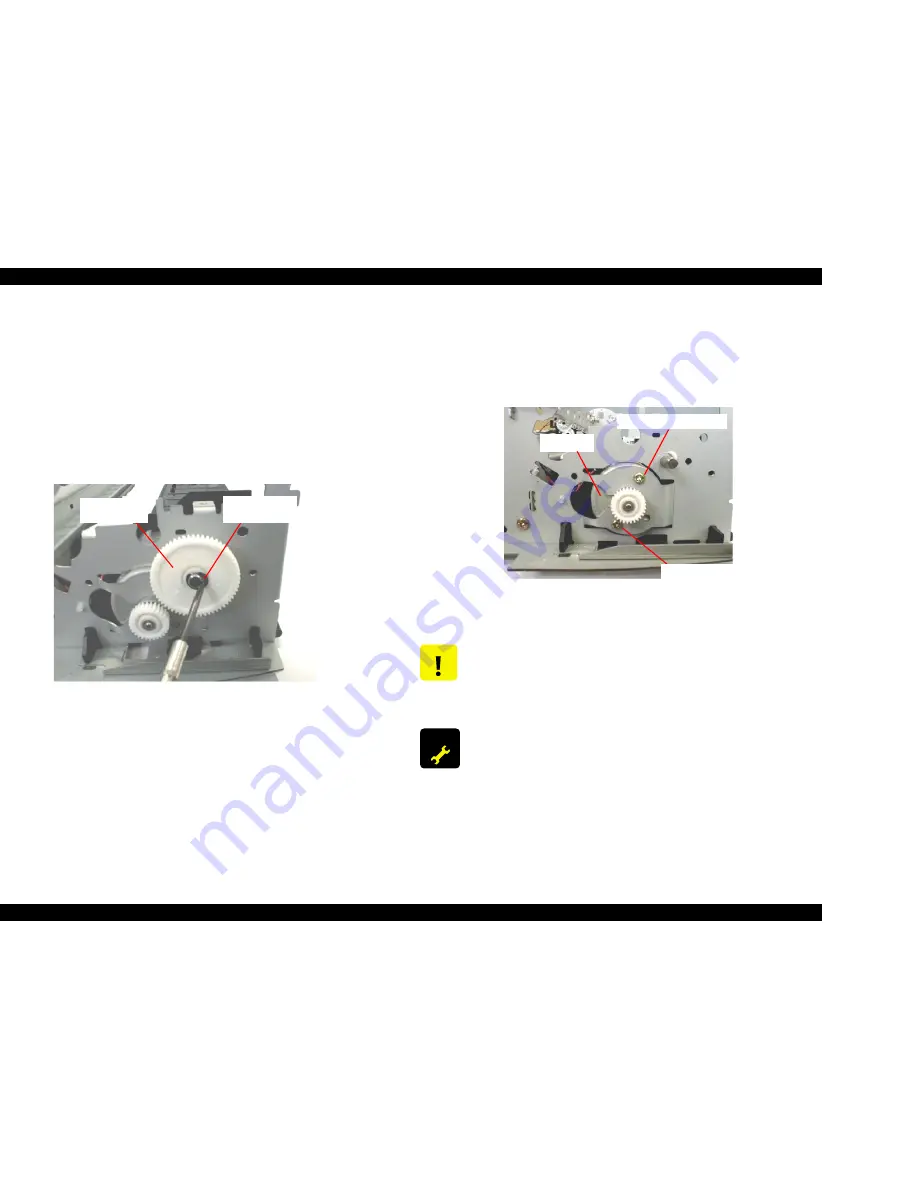
5) Remove the Plain Washer (4.1x0.5x4.5) from the Combination Gear
13.5,30 and then remove the Combination Gear 13.5,30 carefully. Refer to
Figure 4-66.
Figure 4-66. Removing the Flat Washer & Gear 13.5,30
6) Holding the PF Motor, remove one No.5 screw and PF Motor fixing screw
securing the PF Motor, and remove the motor from the Left Side Frame.
Refer to Figure 4-67.
Figure 4-67. Removing the PF Motor
Combination
Gear 13.5, 30
Plain Washer
4.1 x 0.5 x 4.5
C A U T I O N
Do not damage the teeth of the Combination Gear 13.5,30.
A D J U S T M E N T
R E Q U I R E D
In case the PF motor is removed or replaced, the backlash
between the PF pinion gear and the Gear 76 has to be set with
a suitable value. Refer to the Chapter 5 (Section 5.2.2).
PF Motor
PF Motor Fixing Screw
No. 5 Screws securing
the PF Motor
Содержание Stylus COLOR 1160
Страница 8: ...C H A P T E R PRODUCTDESCRIPTION ...
Страница 28: ...C H A P T E R OPERATINGPRINCIPLES ...
Страница 53: ...C H A P T E R TROUBLESHOOTING ...
Страница 74: ...C H A P T E R DISASSEMBLYANDASSEMBLY ...
Страница 116: ...C H A P T E R ADJUSTMENT ...
Страница 150: ...C H A P T E R MAINTENANCE ...
Страница 160: ...APPENDIX C H A P T E R ...
Страница 171: ...PSON Stylus COLOR 860 1160 Revision C ppendix Circuit Board Component Layout 171 Figure 7 5 C298PNL Component Layout ...


