


EPSON Stylus COLOR 860/1160
Revision C
Adjustment
Adjustment
136
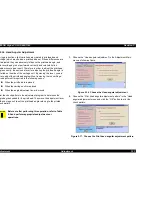
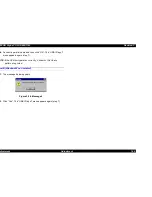
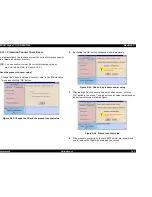
7.
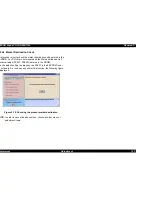
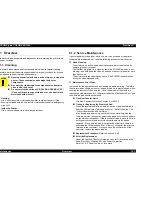
Check the printed pattern again and Input the suitable value in the
above menu and click the “OK” button. The input value is written in
the specific address of the EEPROM. Refer to Figure 5-28.
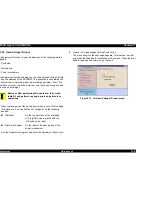
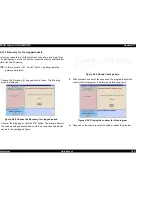
The value
0
(blue) appears in the center of the screen and changes
the value by clicking the up/down icon. Apply the value for the most
properly aligned pattern in the Bi-D adjustment pattern print.
You can change the value by input the suitable value directly from
the key board.
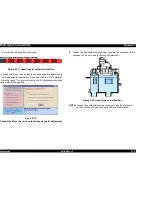
In case the + value is input, the 2nd vertical printed pattern is shift to
the left side. And in case the - value is input, the 2nd vertical printed
pattern is shift to the right side.
Figure 5-28. Input the suitable value
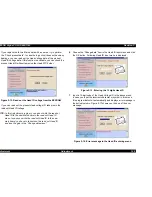
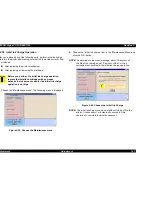
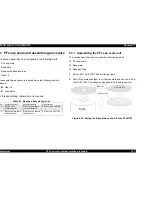
8.
To confirm if the adjustment value is suitable, click the “Previous”
button and go back to the “Bi-Directional Adjustment” menu.
9.
Choose the “Print the Bi-D adjustment patter” and click the “OK”
button.
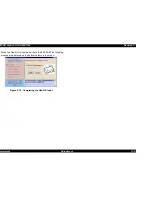
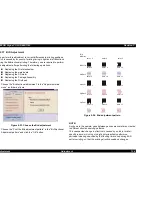
10.
Check if the all 3 vertical line is alined correctly in the adjusted dot
size pattern. If you can watch the misaligned pattern, repeat the
step 3 to Step10 until the Bi-d adjustment pattern is alined.
Содержание Stylus COLOR 1160
Страница 8: ...C H A P T E R PRODUCTDESCRIPTION ...
Страница 28: ...C H A P T E R OPERATINGPRINCIPLES ...
Страница 53: ...C H A P T E R TROUBLESHOOTING ...
Страница 74: ...C H A P T E R DISASSEMBLYANDASSEMBLY ...
Страница 116: ...C H A P T E R ADJUSTMENT ...
Страница 150: ...C H A P T E R MAINTENANCE ...
Страница 160: ...APPENDIX C H A P T E R ...
Страница 171: ...PSON Stylus COLOR 860 1160 Revision C ppendix Circuit Board Component Layout 171 Figure 7 5 C298PNL Component Layout ...