84
Publishing Discs
Changing the print area
Changing the print area setting allows you to print the label at a size other than standard and wide.
EPSON Total Disc Maker:
Use the following procedure to set an optional print area.
1
Start EPSON Total Disc Maker.
See “Starting EPSON Total Disc Maker” on page 42 in this guide for the start procedure.
2
Click [Label].
The label view appears.
3
Click
[Set Inside/Outside Diameter] on the toolbar.
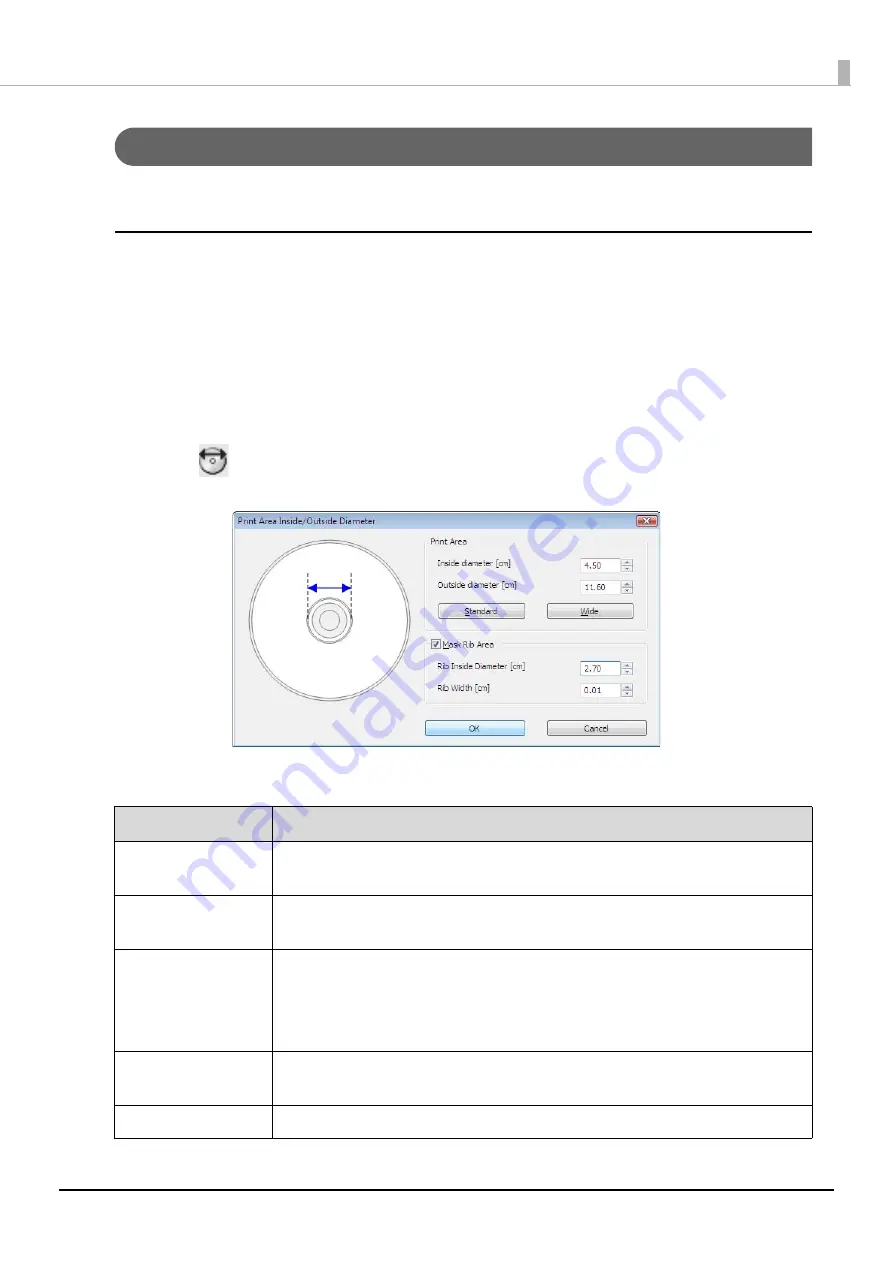
The [Print Area Inside/Outside Diameter] dialog box appears.
4
Set the inside and outside diameters of the print area, and the rib area.
Setting Item
Description
Inside Diameter
Set the inside diameter of the label. You can set a value within the range of 1.80 to
5.00.
Outside Diameter
Set the outside diameter of the label. You can set a value within the range of 7.00 to
11.94.
Mask Rib Area
Select this to mask the rib area.
Rib refers to the protruding section of the disc inside circumference.
Masking the rib area enables you to prevent ink running onto the rib when a printed
disc and rib touch in the output stacker.
Rib Inside Diameter
Set the inside diameter of the rib area. You can set a value within the range of 2.70 to
5.00.
Rib Width
Set the width of the rib area. You can set a value within the range of 0.01 to 1.15.
Содержание PP-100NII
Страница 1: ...User s Guide M00133200EN ...
Страница 6: ...6 Ink and Disc 194 Ink cartridges 194 Discs 194 ...
Страница 72: ...72 How to Use the Printer Driver 8 Click Print in the File menu 9 Click the Preferences button ...
Страница 130: ...130 Publishing Discs 4 Click Republish ...
Страница 148: ...148 Publishing Discs Next follow the normal procedure for publishing discs see page 108 in this guide ...


