ROC364 Instruction Manual
2-17
Master Controller Unit, I/O Module Rack, and Wiring
Rev Jun/05
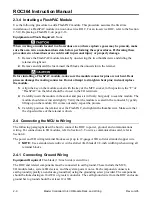
To replace a FlashPAC module:
When repairing units in a hazardous area, change components only in an area known to be non-
hazardous.
There is a possibility of losing the ROC configuration and historical data held in RAM while
performing the following procedure. As a precaution, save the current configuration and
historical data to permanent memory as instructed in Section 2.5.2, RAM Backup Procedure, on
page 2-13.
During this procedure, all power is removed from the ROC and devices powered by the ROC.
Ensure all connected input devices, output devices, and processes remain in a safe state when
power is removed from the ROC and when power is restored to the ROC.
1.
Back up your RAM to avoid losing data. Refer to Section 2.5.2, RAM Backup Procedure, on
page 2-13.
2.
Remove power by unplugging the block on the power terminal block.
3.
Lift up on the FlashPAC to be replaced and remove it from the socket.
Before installing a new FlashPAC module, make sure the FlashPAC connector pins are straight.
Bent pins can damage the mating connector. Do not attempt to straighten bent pins; instead,
replace the FlashPAC.
4.
Align the key on the FlashPAC socket with the key of the MCU socket. Carefully insert the
FlashPAC module in the socket and press it in firmly, but gently to seat the FlashPAC. The
FlashPAC should move inward slightly. Verify that the FlashPAC is seated into the connector by
gently lifting up on the FlashPAC. If it comes out easily, repeat the process.
5.
Slide the retainer over the FlashPAC module and tighten the thumbscrews. Make sure that the
sloped surface of the retainer is down.
6.
Plug in the five-terminal connector to restore power. A Cold Start using EEPROM, Internal
Config Memory, or Flash Memory values automatically occurs and may take a few seconds.
7.
Using ROCLINK configuration software, check the configuration data including ROC Displays
and FSTs, and load or modify them as required. In addition, load and start any user programs as
needed.
8.
Verify that the ROC performs as required.
9.
If you changed the configuration, save the current configuration data to memory by selecting
ROC > Flags > Write to EEPROM or Flash Memory Save Configuration as instructed in the
applicable ROCLINK configuration software user manual.
10.
If you changed the configuration including the history database, ROC Displays, or FSTs, save
them to disk.


