


Installation Instructions for Wi-Q™ Technology 45HQ Mortise Locks
BEST
a Product Group of
dormakaba USA Inc.
Installing the trim
6
11
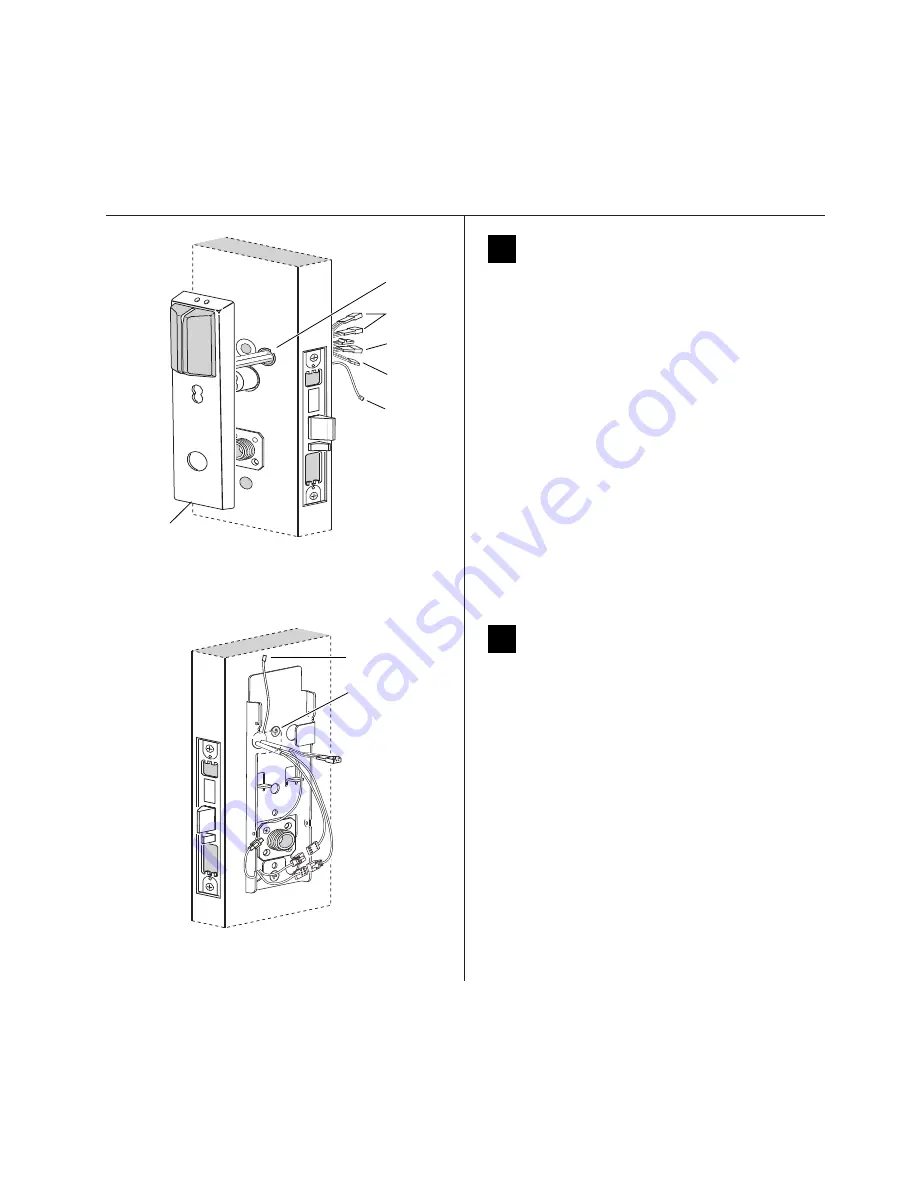
Route wire harnesses and position
outside escutcheon
1 From the outside of the door, feed the motor con-
nector, battery connector, and sensor connectors
through the harness hole.
Caution: When routing the connectors, make
sure the harnesses are not routed across any
sharp edges or over any surface that could dam-
age their sleeving or wire insulation.
2 Perform these steps:
a Firmly press the outside escutcheon in position
on the door. The core should be flush with the
outer surface of the escutcheon.
b If necessary, adjust the cylinder depth plus or
minus one turn so that the core is flush with the
outer surface of the escutcheon.
c Secure the cylinder in the mortise case with the
cylinder clamp screw.
4 Rest the outside escutcheon on the door by insert-
ing the trim studs into the trim holes.
12
Install fire plate
1 From the inside of the door, feed the wiring
through the fire plate harness hole.
2 Position the fire plate on the door so that the inside
mounting plate fits through the square opening in
the fire plate.
3 Insert the two counter sunk mounting screws into
the holes at the top and bottom of the fire plate.
4 Tighten the mounting screws until the fire plate is
securely mounted to the door.m
Outside
escutcheon
Outside of door
Figure 10 Feeding the wire harness connectors through
the harness hole
Motor
connector
Sensor
connectors
Battery
connector
Harness
hole
Antenna
Figure 11 Installing the fire plate
Inside of door
Mounting
screws
Antenna
wire
Содержание BEST Wi-Q ONGUARD
Страница 7: ...A Glossary Glossary 109 B Lock Installation Lock Installation 113 ...
Страница 40: ...40 2 Select Inbound Rules Figure 13 Inbound Rules Select Inbound Rules ...
Страница 44: ...44 6 Select Allow the connection Click Next to continue See Figure 17 Figure 17 Allow the Connection ...
Страница 45: ...45 7 De select the Public option Click Next Figure 18 De select Public ...
Страница 52: ...52 Figure 27 Wi Q Interface Setup Wizard Click Next ...
Страница 57: ...57 Figure 33 Custom Setup Options Click Next ...
Страница 58: ...58 10 The wizard is now ready to begin installation Click Install Figure 34 Begin Installation Click Install ...
Страница 75: ...75 To add a new Sign On Credential 1 Select Add Figure 52 Add Segment Sign On Credential 1 ...
Страница 113: ...B Lock installation ...
Страница 168: ...6161 East 75th Street Indianapolis IN 46250 USA Phone 1 800 392 5209 https dhwsupport dormakaba com hc en us 172713 S3 ...


