5 - 5
DigiGate-700
™
for Windows
®
- User’s Guide
DigiGate-700
for Windows
™
®
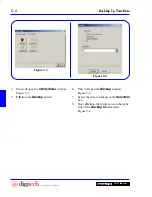
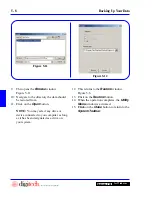
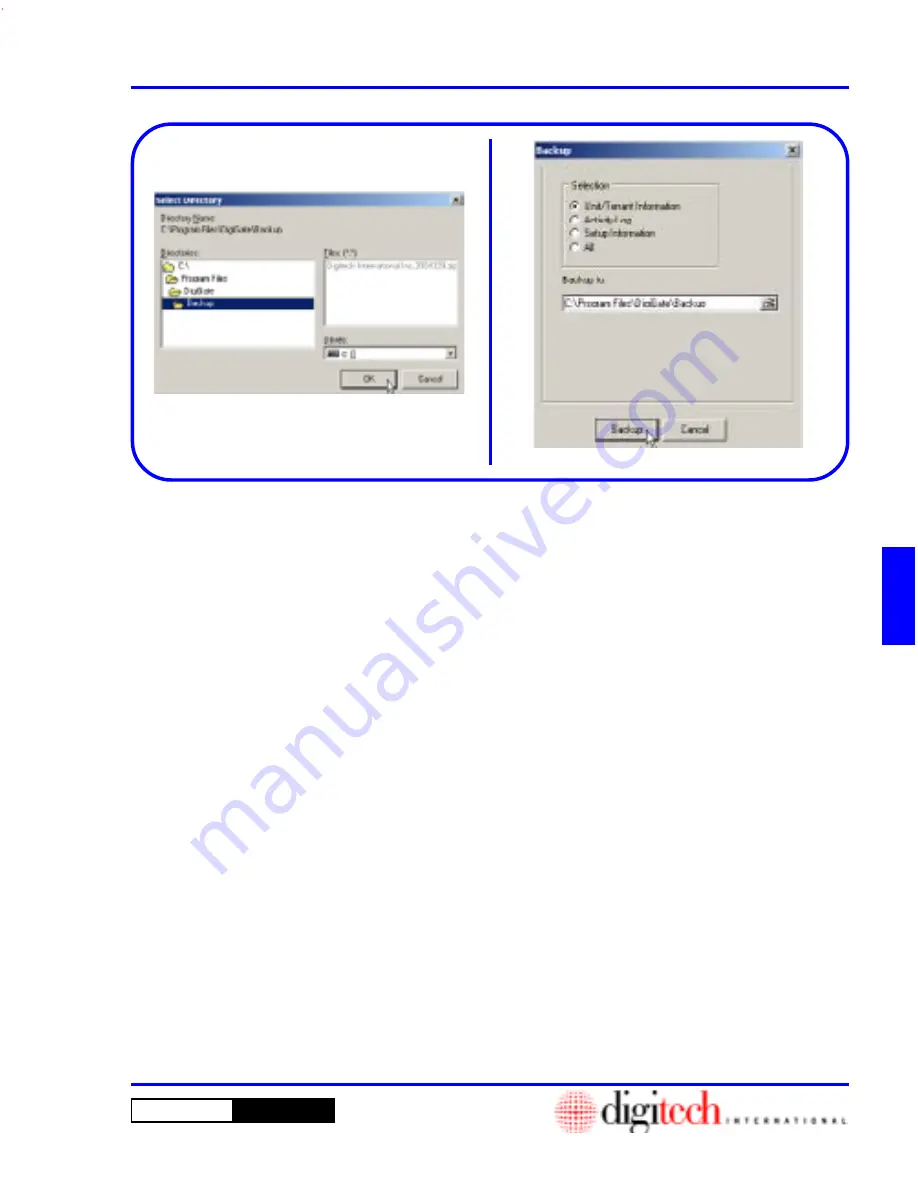
9. This opens the
Select Directory
window. Figure 5-5
10. Navigate to the directory the backup
should be saved to.
11. Click on the
OK
button.
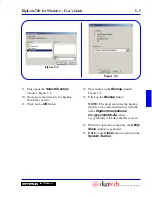
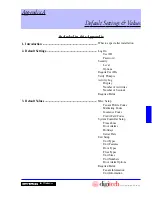
12. This returns to the
Backup
window.
Figure 5-6
13. Click on the
Backup
button.
NOTE:
The program writes the backup
Zip file to the selected directory with the
name
Digitech International
Inc.{yyyymmdd}.zip
where
{yyyymmdd} is the date the file is saved.
14. When the operation completes, the
Utility
Menu
window is activated.
15.
Click
on the
Close
button to return to the
System Toolbar
.
Figure 5-5
Figure 5-6
Содержание DigiGate-700
Страница 1: ...World Class Security Solutions DigiGate User s Guide ...
Страница 2: ......
Страница 3: ...User s Guide DigiGate 700 ...
Страница 166: ...This Page Left Blank Intentionally 3 86 Operating Instructions DigiGate 700 for Windows ...
Страница 202: ...This Page Left Blank Intentionally B 8 Appendix Title DigiGate 700 for Windows ...
Страница 208: ...D 4 Merge Data Fields Descriptions DigiGate 700 for Windows This Page Left Blank Intentionally ...
Страница 214: ...This Page Left Blank Intentionally E 6 Upgrading DOS Software to Windows DigiGate 700 for Windows ...
Страница 224: ...This Page Left Blank Intentionally G 6 DigiGate 700 for Windows Program Error Codes ...
Страница 244: ...This Page Left Blank Intentionally K 8 DigiGate 700 for Windows Program Registration Codes ...
Страница 262: ...X 10 Index DigiGate 700 for Windows This Page Left Blank Intentionally 2 3 ...
Страница 263: ......
Страница 264: ......
Страница 265: ......
Страница 266: ...DigiGate User s Guide Digitech International Inc 800 523 9504 toll free www digitech intl com ...

