


Delphi Display Systems, Inc. RDS-INSFTTCU
Page 14 of 82
Confidential Document:
Do not copy or distribute without written permission from Delphi Display Systems, Inc.
Copyright
2012. [Unpublished Work]. All rights reserved
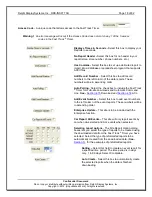
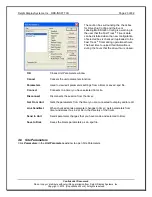
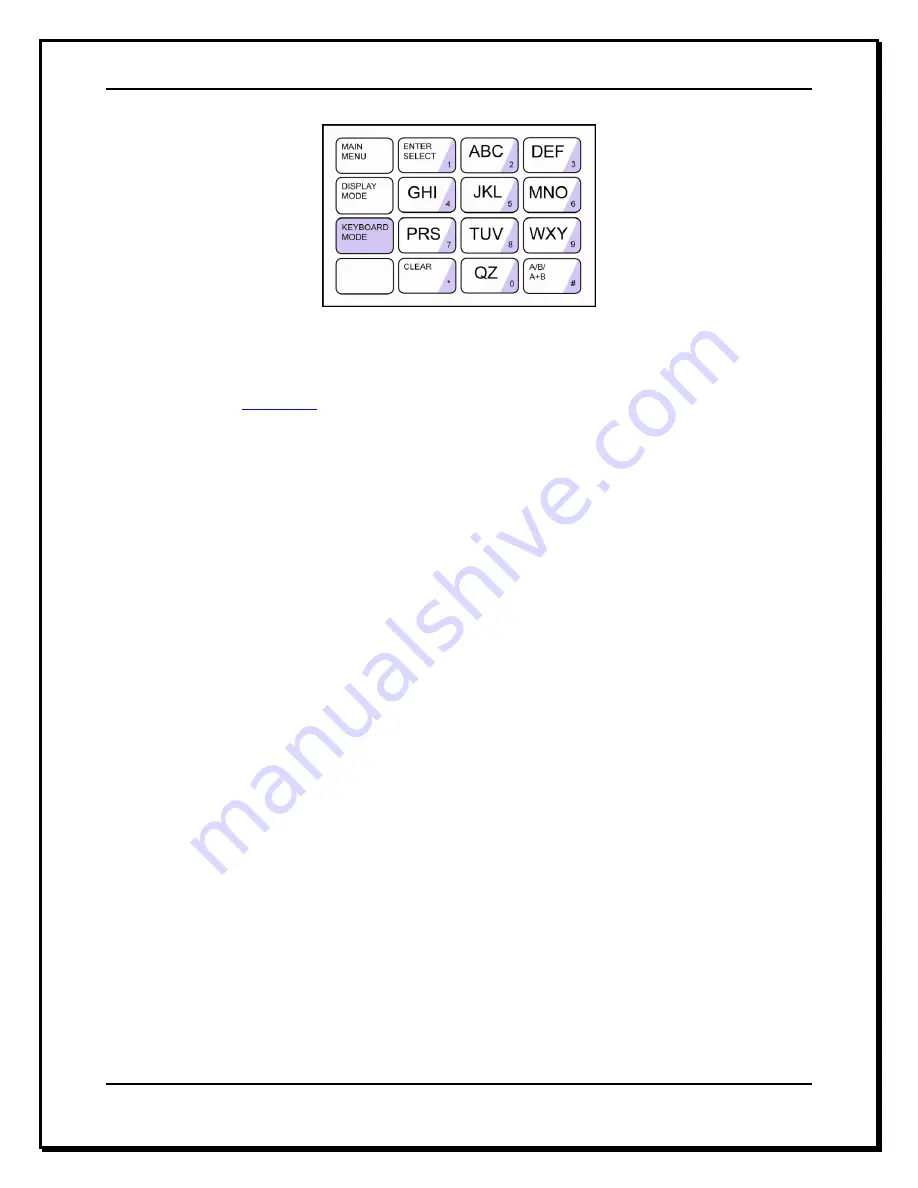
Figure 6
– Keyboard Mode
NOTE: letter designations are for reference only. letters do not appear on keys.
NOTE: Most of the operations performed in Remote Control can be accomplished through “Site
Parameters.” See –
Section 4.6
3
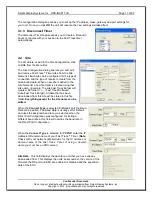
Software Installation (using supplied thumb drive)
*** IMPORTANT: PLEASE READ BEFORE INSTALLING! ***
1. It is strongly recommended to exit all programs before installing your software.
2. Insert the USB drive into your USB slot.
3. If the computer senses the drive and asks what you want to do, select OPEN TO VIEW FILES,
otherwise, browse My Computer for the new REMOVABLE DISK and open it.
4.
Locate and double click the file called “
Fast Track PC Software Setup 225H DOT NET.exe
” to begin
the software installation.
5. This starts the Install Shield
®
Wizard welcoming you to the Fast Track Software installation. Click
Next
to continue with the installation or
Cancel
to quit.
6. Software license agreement. Click
I accept the terms of the license agreement
,
if you agree with the
terms and continue with the installation, Click
I do not accept the terms of the license agreement
,
to
cancel installation and exit, or
Back
to return to the previous screen. Click on the print button to print
the license to your printer.
7. Enter the user name and company name.
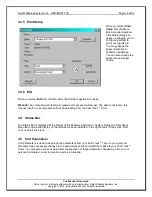
8. Select the type install, typical or custom.
a.
Typical ~
Installation is automatic, files installed to C:\Program Files\Fast Track Software
Suite
b.
Custom ~
Choose a destination location. Click
Next
to create the default location
(C:\Program Files\Fast Track Software Suite) and continue, click
Browse
to select
another location then
Yes
to confirm and then
Next
to continue or click
Back
to return to
the previous screen or
Cancel
to quit.
c.
Custom ~
Select the components that you would like to install. Program File, Manuals
9. Click install, Install Shield
®
Wizard begins transferring files to your hard drive. Setup is complete
when the files have been transferred, click on
Finish
to end
.
10. Close the Removable
Disk directory, use the Windows method to “SAFELY REMOVE HARDWARE”
in the SysTray, select the MASS STORAGE DEVICE that matches, then remove the USB drive when
prompted.
Installation of Software is now complete and ready for configuration.
NOTE
: The USB drive contains other support utilities that are not installed at time of installation.
These files may be copied into your Fast Track directory at any time.


