Memory Module(s)
105
1
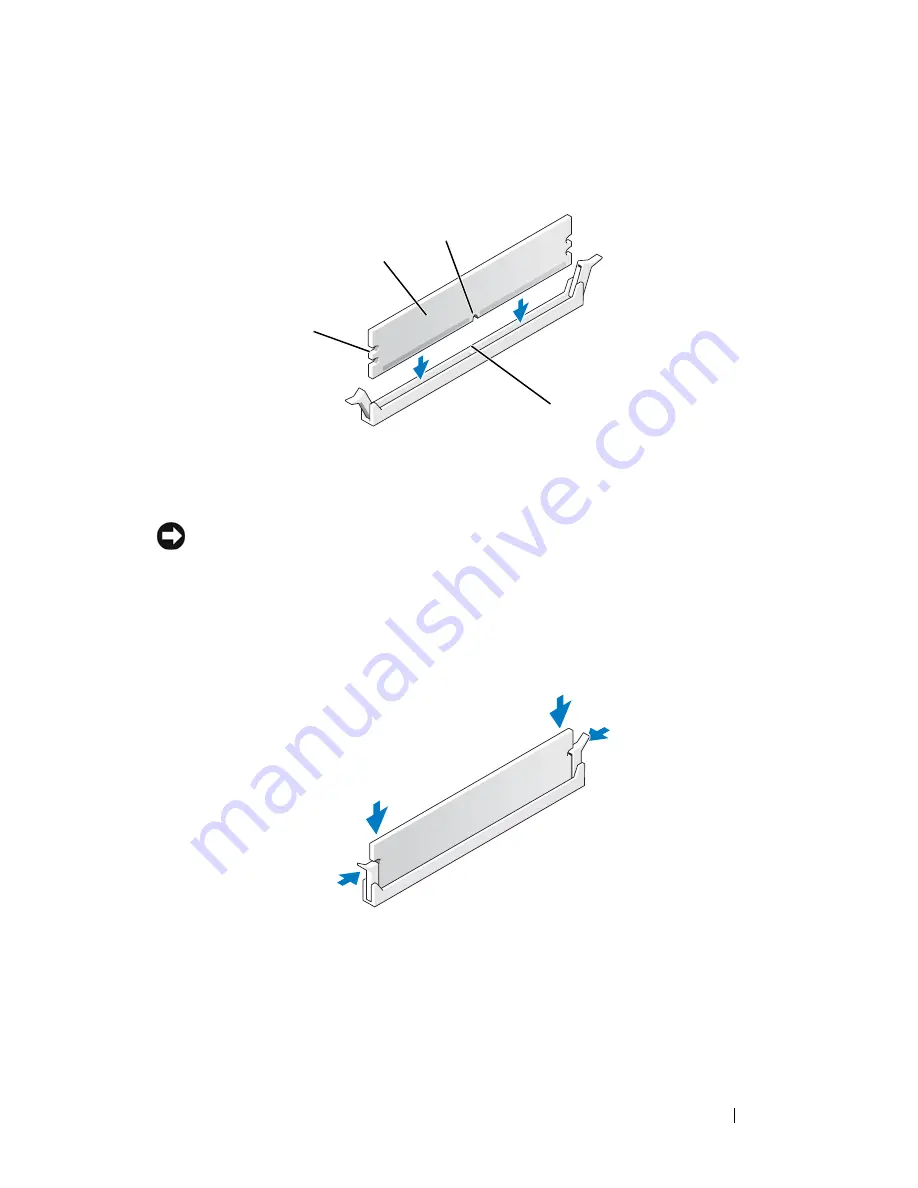
Align the notch on the bottom of the module with the crossbar in the
connector.
.
NOTICE:
To avoid damage to the memory module, press the module straight down
into the connector while you apply equal force to each end of the module.
2
Insert the module into the connector until the module snaps into position.
If you insert the module correctly, the securing clips snap into the cutouts
at each end of the module.
3
Follow the procedure in "After Working on Your Computer" on page 45.
4
When the message appears stating that memory size has changed, press
<F1> to continue.
5
Log on to your computer.
1
cutouts (2)
2
memory module
3
notch
4
crossbar
3
2
1
4
Содержание Vostro 220 - Vostro 220 Slim Desktop Computer
Страница 42: ...42 Working on Your Computer Vostro 220 2 4 3 13 16 18 5 14 17 19 21 22 1 23 20 15 8 9 11 10 12 6 7 24 25 ...
Страница 50: ...50 Computer Cover ...
Страница 52: ...52 Bezel 1 clips 4 2 bezel 1 2 ...
Страница 54: ...54 Bezel ...
Страница 64: ...64 PCI and PCI Express Cards ...
Страница 87: ...Drives 87 Vostro 220s 1 3 5 inch bay break away metal plate 1 ...
Страница 88: ...88 Drives ...
Страница 94: ...94 Fan Vostro 420 1 chassis fan 2 system board power connector 3 screws 4 2 1 3 ...
Страница 95: ...Fan 95 Vostro 220 1 chassis fan 2 system board power connector 3 screws 4 2 1 3 ...
Страница 96: ...96 Fan Vostro 220s 1 system board power connector 2 chassis fan 3 screw 1 2 3 ...
Страница 98: ...98 Fan ...
Страница 111: ...Power Supply 111 Vostro 220 ...
Страница 116: ...116 Power Supply ...
Страница 124: ...124 System Board ...
Страница 138: ...138 Contacting Dell ...


