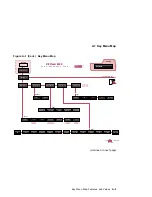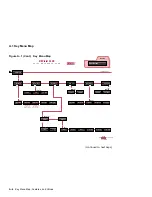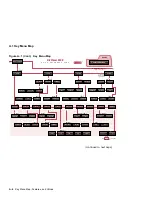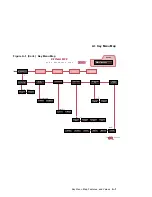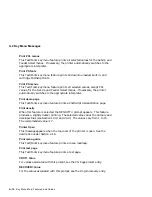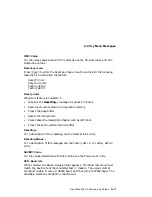
A.1 Key Menu Map
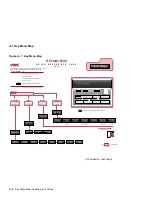
Figure A–1 Key Menu Map
Q U I C K R E F E R E N C E C A R D
DEClaser 5100
© Digital Equipment Corporation 1994. All rights reserved.
Test/Fonts
Reset
Test/Fonts
Reset
Set-Up
Feeder Select
On Line
Form Feed
Ready
Alarm
Data
Enter
*
Reset printer
Factory defs
Ltr
Factory defs
A4
Show
page count
menu guide
PS menus
PCL menus
test page
PS fonts
PCL fonts
demo page
On Line
Test/Fonts menu
Reset menu
Feeder Select
Internal
LCIT
Front
Envelope
Front & Int
Int & LCIT
All
Feeder select
Set-Up
Set-Up menus inside
(please turn page)
Use this card as a guide to locate the printer features and values you want.
Note: Printer must be Paused in order to display menu choices.
FEED =
Set-Up menu
Press to select feature
Enter
( available when
Envelope feeder
option is installed )
( available when
LCIT option
is installed )
( available when
LCIT option
is installed )
( available when
LCIT option
is installed )
Printer Menus
Press this KEY To...
Enter
scroll through the values available.
move down a level.
scroll back through the menu values.
move up a level.
select the feature or value displayed.
TM
EK-D5100-RC
indicates that the value displayed is selected.
DSG-000820
(continued on next page)
A–2 Key Menu Map, Features, and Values
Содержание DEClaser 5100
Страница 10: ......
Страница 13: ...DSG 000172 Notes 1 ...
Страница 14: ......
Страница 36: ...1 8 Resolution Graphics Enhancements Option Board DSG 000172 Notes 1 22 Physical and Functional Description ...
Страница 61: ...2 5 HVPSA Figure 2 12 EP ED Cartridge DSG 000612 2 1 3 4 5 6 7 Technical Description 2 25 ...
Страница 62: ...2 5 HVPSA DSG 000172 Notes 2 26 Technical Description ...
Страница 70: ...3 2 Control Panel Operation DSG 000172 Notes 3 8 Operating the Control Panel ...
Страница 90: ......
Страница 124: ...7 5 Phantom Jams DSG 000172 Notes 7 8 FIPs for Fixing Paper Jams ...
Страница 142: ...9 3 Assembly Gear 3 Remove the gear assembly through the rear of the printer DSG 000639 9 6 Removing and Replacing FRUs ...
Страница 152: ...9 7 Assembly Paper Delivery 3 Press and release the two clips DS G 0 006 46 1 9 16 Removing and Replacing FRUs ...
Страница 167: ...9 12 Board DC Control 1 2 4 5 7 8 9 6 3 10 DSG 000657 Removing and Replacing FRUs 9 31 ...
Страница 205: ...9 26 Guide HVPSA Contact Plate b Remove the HVPSA contact plate DS G 0 00 68 5 Removing and Replacing FRUs 9 69 ...
Страница 224: ...10 1 Field Replaceable Units DSG 000172 Notes 10 4 FRU Part Numbers ...
Страница 254: ...B 4 Connecting to OpenVMS VAX or ULTRIX Systems DSG 000172 Notes B 10 General Information ...
Страница 264: ...D 3 Tools DSG 000172 Notes D 4 Training Documentation and Tools ...
Страница 274: ......

