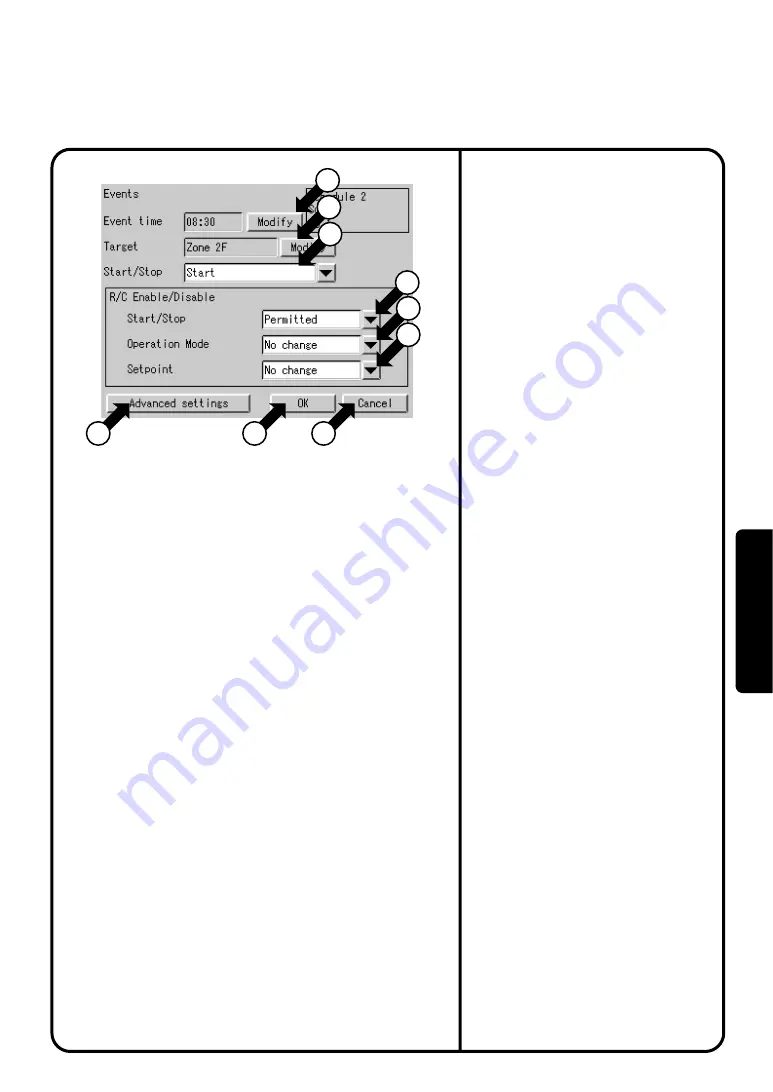
6.
Push the Add button or Modify button
on the previous page, and the Event
setup screen
Screen 3 will be displayed. The current
settings of events are shown at the left
side of the buttons
!2
to
!7
.
The following describes in order the
settings of events that can be made.
¡
Event time :
Refers to the event setting time.
Display a keyboard for registering the
time by pushing the [Modify] button
!2
and enter the time.
¡
Target :
Refers to the zone or group of the air
conditioner to be controlled. Push
the [Modify] button
!3
to select a
zone or group for which schedule
operations should be performed.
¡
Start / Stop :
Sets Start, Stop or No change. Use the
pull-down menu
!4
for this selection.
¡
Advanced settings :
Push the button
!8
to display an
advanced settings screen Screen 4.
The descriptions of the advanced
settings are shown on the next page.
After setting the operation and making
the advanced settings on the next page,
push the [OK] button
!9
. To cancel the
settings made, push the [Cancel] button
@0
to return to Screen 2 on the previous
page. When making additional settings,
repeat the operations shown in steps 5
and 6. After making the necessary
settings, push the [OK] button on
Screen 2 of the previous page.
Start / Stop :
Select
Permitted
,
Stop Only
,
Prohibited
or
No change
from the
pull-down menu
!5
Operation Mode :
Select
Permitted
,
Prohibited
or
No
change
from the pull-down menu
!6
.
Setpoint :
Select
Permitted
,
Prohibited
or
No
change
from the pull-down menu
!7
.
A full description of each button has been
given above.
The following discusses how to make the
actual settings.
To define the new operation, push the [Add]
button
r
. To change the previously set
operation, push the [Modify] button
y
.
Screen 3 Events
18
19
20
12
13
14
15
16
17
How to make the setting for the remote
control at hand
[
]
System Settings Menu Operation
76
Oper
ation


