background image


XCP-Gateway 

Appendix 


User Guide 


32 


Version 01.00 

User Guide 


Appendix 

7.1 

List of figures 

Fig. 3-1: XCP-Gateway, front view .......................................................................................................... 6


Fig. 3-2: XCP-Gateway, rear side ........................................................................................................... 6


Fig. 4-1: XCP-Gateway, rear side with ventilation inlet ........................................................................... 9


Fig. 4-2: XCP-Gateway, rear side ......................................................................................................... 10


Fig. 5-1: Measurement arrangement: XCP-Gateway, EtherCAT STGMM 6 measurement modules  

and data acquisition system .................................................................................................... 15


Fig. 5-2: 

Internet Protocol Version 4 (TCP/IPv4) Properties

 ............................................................ 17


Fig. 5-3: 

Select document type 

dialog ................................................................................................ 17


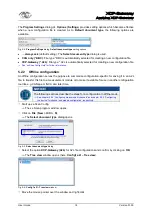
Fig. 5-4: 

Program Settings 

dialog, 

Default document type

 setting options ...................................... 18


Fig. 5-5: 

Select document type

 dialog ................................................................................................ 18


Fig. 5-6: 

Config1.a2l – Tree view 

window ........................................................................................... 18


Fig. 5-7: 

Config1.a2l – Tree view

 window, context menu .................................................................... 19


Fig. 5-8: 

Select device type 

dialog ...................................................................................................... 19


Fig. 5-9: 

Select device type

 dialog, pull-down menu opened .............................................................. 19


Fig. 5-10: Device configuration dialog, 

Config1.a2l – Tree view 

window in the background .............. 20


Fig. 5-11: xx-Scan Config program window .......................................................................................... 21


Fig. 5-12: 

Options | Interface

 menu ..................................................................................................... 21


Fig. 5-13: 

Interface

 dialog ..................................................................................................................... 22


Fig. 5-14: 

Config1.a2l – Tree view

 ...................................................................................................... 22


Fig. 5-15: 

XCP-Gateway

 dialog, 

Configuration

 tab ............................................................................ 23


Fig. 5-16: 

XCP-Gateway

 dialog, 

Licensing

 tab ................................................................................... 23


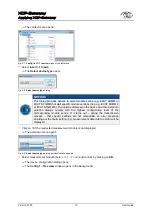
Fig. 5-17: 

Select document type

 dialog .............................................................................................. 24


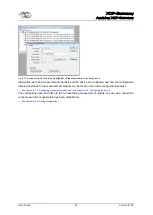
Fig. 5-18: 

Config1.a2l – Tree view

 window ......................................................................................... 24


Fig. 5-19: 

File | Scan Bus

 menu ........................................................................................................... 25


Fig. 5-20: 

Config1.a2l – Tree view

 window: detected measurement modules .................................... 25


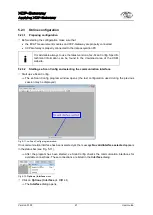
Fig. 5-21: 

File | Auto-Configuration

 menu .......................................................................................... 25


Fig. 5-22: Auto-Configuration: “Scanning for devices…” ....................................................................... 26


Fig. 5-23: Auto-Configuration: Display of results ................................................................................... 26


Fig. 5-24: Message: Auto-Configuration completed .............................................................................. 26


Fig. 5-25: 

AutoConfig.a2l –


Tree view

 window, device channels ....................................................... 27


Fig. 5-26: Dialog for measurement channel configuration .................................................................... 27


Fig. 5-27: 

AutoConfig.a2l –


Tree view

 window, device entry .............................................................. 28


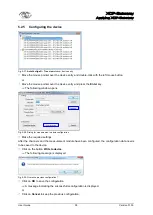
Fig. 5-28: Dialog for measurement module configuration ..................................................................... 28


Fig. 5-29: Overwrite previous configuration?......................................................................................... 28


Fig. 5-30: 

Measurement Values

 window ............................................................................................. 29


Fig. 5-31: 

Options | Settings 

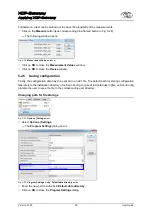
menu ..................................................................................................... 29


Fig. 5-32: 

Program Settings 

dialog, 

Default data directory 

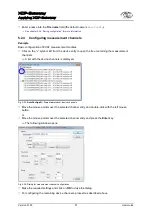
option.................................................... 29


Fig. 5-33: 

Save As

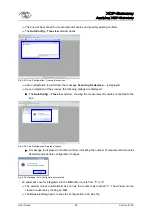
 dialog ...................................................................................................................... 30


Fig. 5-34: 

Tree view

 window: new file name displayed in the header .................................................. 30


Fig. 6-1: XCP-Gateway, top side of housing with certification sticker (1) ............................................. 31


Содержание XCP-Gateway

Страница 1: ...CSM csm products com Innovative Measurement and Data Technology XCP Gateway User Guide Version 01 00 ...

Страница 2: ......

Страница 3: ... month to stay up to date Germany Headquarter United States Address CSM Computer Systeme Messtechnik GmbH Raiffeisenstrasse 36 70794 Filderstadt Germany CSM Products Inc 545 Dakota Street Unit A Crystal Lake IL 60012 Phone 49 0 711 77964 20 1 815 444 1671 Fax 49 0 711 77964 40 1 815 444 1674 Email info csm de sales csmproductsinc com Web German http www csm de English http www csm products com htt...

Страница 4: ...XCP Gateway User Guide ii Version 01 00 User Guide ...

Страница 5: ...mponents 6 3 1 2 Functional description LED indicators 7 3 1 2 1 Indicator LEDs PC and ECAT 7 3 1 2 2 Status LEDs Gateway and Bus 7 4 MOUNTING AND INSTALLATION 9 4 1 Before mounting the device 9 4 2 Mounting XCP Gateway 10 4 3 Installing XCP Gateway 11 4 3 1 Before installing the device 11 4 3 2 Connectors 11 4 3 2 1 PC socket 12 4 3 2 2 ECAT socket 12 4 3 2 3 Sync service connector 13 4 3 2 4 Con...

Страница 6: ...1 5 2 4 3 Setting configuration parameters 22 5 2 4 4 Creating configuration file 24 5 2 4 5 Scan Bus and Auto Configuration 25 5 2 5 Configuring measurement channels 27 5 2 6 Configuring the device 28 5 2 7 Saving configuration 29 6 MAINTENANCE SERVICES AND CLEANING INSTRUCTIONS 31 6 1 Maintenance and repair 31 6 2 Cleaning instructions 31 7 APPENDIX 32 7 1 List of figures 32 7 2 List of tables 3...

Страница 7: ... 6 Warranty and warranty exclusion This pictogram indicates important hints or additional information on a specific topic Options Interface Menu option Menu options are highlighted in bold The vertical bar separates the menu from the menu command The example to the right means Click on the Options menu and then select the option Interface Click on Options Interface Options Settings A menu option i...

Страница 8: ...roller and Automation Technology is an Ethernet based field bus system developed by Beckhoff XCP eXtended Calibration Protocol Further information on that network protocol can be found on the ASAM e V website www asam de Tab 1 2 List of abbreviations 1 5 Legal disclaimer This user guide and further technical documents are part of the product and contain important information for its safe and effic...

Страница 9: ...s modified in any way the information that is part of the product in particular the safety instructions is not observed the product is operated with additional equipment or parts which have not been explicitly endorsed by the manufacturer of the product See also chapter 2 2 Operator s obligation See also chapter 2 3 Intended use 1 7 ESD information The manufacturer of the product declares that the...

Страница 10: ... to the technical documentation of the product the operator may have to provide further operating instructions in compliance with the Act on Occupational Safety and Health 2 3 Intended use XCP Gateway has been designed for fast and time equidistant acquisition of measurement data from CSM MiniModules using software based on the protocol XCP on Ethernet The device may only be used for the above men...

Страница 11: ... Gateway is not only suited for various stationary fields of application but most of all for the connection to common measurement data acquisition systems that are used in mobile applications Key features EtherCAT to XCP on Ethernet converter EtherCAT master with time synchronization over distributed clock or Sync Manager 3 XCP on Ethernet Slave with accuracy of measurement signal time stamps of 1...

Страница 12: ...s 6 Bus status LED chapter chapter 3 1 2 2 Status LEDs Gateway and Bus 7 Hardware serial number 8 Sync service connector chapter 4 3 2 3 Sync service connector Fig 3 2 XCP Gateway rear side 1 Threaded mounting holes for screws M4 x 8 mm 1 2 Cable tie eyelets 3 GORE membrane ventilation inlet See chapter 4 1 Before mounting the device for detailed information 1 The specification M4 x 8 mm only appl...

Страница 13: ...itialization of the EtherCAT measurement modules connected has failed check for firmware update if required 90 green 10 off off Measurement module initialized and connected to XCP master measurement software or xx Scan Config status OK 50 green 50 off off XCP Gateway has been selected by configu ration software status OK 10 green 90 off 100 green Measurement successfully started fault free functio...

Страница 14: ... off Internal device error or initialization error try to make a new start 100 red 100 red Initialization of further internal structures failed Try to reconnect 100 green 50 orange 50 red LED flashes SOS code off If the Gateway LED displays the SOS code LED is flashing red 3x long 3x short 3x long the device start has failed and the XCP Gateway is most likely defect Tab 3 2 Status LEDs Gateway and...

Страница 15: ...tasheet XCP Gateway for further technical information The XCP Gateway is equipped with a GORE membrane which is essential for pressure and humidity control To ensure reliability and performance of the device it is essential that the small ventilation inlet in the rear side of the housing is not blocked or restricted in any way If the ventilation inlet is blocked condensation may dam up inside the ...

Страница 16: ...s Mounting XCP Gateway Mount the device to the selected site by screwing the four screws into the threaded mounting holes in the rear side of the housing or Fix the device using the cable ties CSM provides a mounting kit for standard housing devices Please contact the CSM sales department for further details Mounting modules in slide case housings Modules in slide case housings can be stacked on e...

Страница 17: ...y See chapter 6 1 Maintenance and repair for details 4 3 2 Connectors The two sockets embedded on the left side of the device housing s front panel are used for connecting the XCP Gateway to the data acquisition system PC on the one hand and to the EtherCAT measurement modules ECAT on the other hand Via the so called interface cable connecting the XCP Gateway with the data acquisition system the d...

Страница 18: ... Thus a signal at a specific pin of the PC socket is always available at the ECAT socket too Make sure that this work only is carried out by qualified and trained personnel 4 3 2 2 ECAT socket By default a LEMO 1B connector is used for the ECAT socket To have the device equipped with a different socket please contact CSM For connecting a cable to this socket a plug of the type FGA 1B 308 CLA xxxxx...

Страница 19: ...es connected to it is effected via the interface cable linking the measurement module also to the computer data acquisition system Measurement modules of the MiniModule series are designed for low power consumption In combi nation with the original CSM cables and due to the miniaturized geometry of the device MiniModules can be simply and straightforward installed in most cases To ensure error fre...

Страница 20: ...ption of typ 3 W per module Power Supply 8 V 12 V 24 V max cable lengt h 5 m 5 12 25 10 m 4 10 20 max number of measurement modules Tab 4 4 Maximum number of measurement modules depending on cable length supply voltage If more measurement modules are wired in series given the same cable length and supply voltage than stated in Tab 4 4 an additional power supply is needed An intermediate power supp...

Страница 21: ...ement modules 1 XCP Gateway 1 power supply 1 data acquisition system PC including DAQ software e g CANape INCA etc 1 interface cable with power supply K420 xxxx 5 connection cables K400 xxxx PC ECAT XCP Gateway PC ECAT Gateway Bus XCP Gateway IN OUT 1 2 3 4 5 6 STG Scan MiniModul IN OUT 1 2 3 4 5 6 STG Scan MiniModul IN OUT 1 2 3 4 5 6 STG Scan MiniModul IN OUT 1 2 3 4 5 6 STG Scan MiniModul IN OU...

Страница 22: ...adjusted Make sure that the ports 5555 and 5556 are unlocked for xx Scan Config NOTICE XCP Gateway uses a fixed IP address factory setting 192 168 100 3 To be able to communicate with the gateway from the data acquisition software the IP addresses of the network adapter connecting the XCP Gateway with the data acquisition system PC and the XCP Gateway need to be within the same address range A typ...

Страница 23: ...ne or offline For the actual configuration work in xx Scan Config the user can choose between the dialogs Tree View Device List and Channel List The following paragraphs contain the basic steps for online and offline configuration using the Tree View dialog 5 2 1 Dialogs and windows NOTICE Depending on the settings made in the Program Settings dialog the windows and dialogs displayed during a conf...

Страница 24: ...ffline configuration serves the purpose to summarize configuration specific for saving it in an A2L file to transfer this file to a measurement module or to make it available for use in another configuration tool like e g CANape or INCA at a later time NOTICE The following sections describe the steps for a configuration in offline mode See chapter 5 2 4 Configuring measurement channels and chapter...

Страница 25: ...e and channel confi guration dialogs comply with the highest configuration level of the corresponding module series If it turns out during the transmission process that specific settings are not compatible an error message pointing out the faulty setting e g measurement data rate too high will be displayed Click on if the requested measurement module is not displayed The pull down menu opens Fig 5...

Страница 26: ...are configured and how the configuration data is transferred to the measurement module can be found in the online configuration chapter See chapter 5 2 4 Configuring measurement channels and chapter 5 2 5 Configuring the device The configuration can be written to the corresponding measurement module as soon as a connection to the measurement application has been established See chapter 5 2 6 Savin...

Страница 27: ...ebsite 5 2 3 2 Starting xx Scan Config and selecting the communication interface Start up xx Scan Config The xx Scan Config program window opens the last configuration used during the previous session may be displayed Fig 5 11 xx Scan Config program window If no communication interface has been selected yet the message No valid Interface selected appears in the status bar see Fig 5 11 After the pr...

Страница 28: ...available at the XCP Gateway Check cable connections if necessary 5 2 3 3 Setting configuration parameters The XCP Gateway Configuration dialog provides options for setting the configuration parameters used by the data acquisition software to establish a connection to one or several ECAT measurement modules via the XCP Gateway Modifications are only necessary if the default settings do not match t...

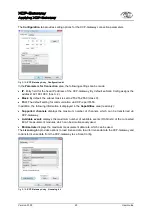
Страница 29: ...default setting for communication via XCP is port 5555 In addition the following information is displayed in the Capabilities area read only Supported channels displays the maximum number of channels which can be transferred via XCP Gateway Available events displays the maximum number of available events DAQ lists of the connected ECAT measurement modules which can be simultaneously used Minimal r...

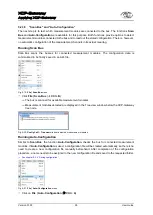
Страница 30: ...ved in an A2L file used by the data acquisition software and written to the XCP Gateway See also notice regarding the IP address range on page 16 In case of specific questions concerning communication parameter settings please contact the CSM sales department 5 2 3 4 Creating configuration file The procedure described in this chapter is not absolutely necessary if Auto Configuration is used for co...

Страница 31: ...file Fig 5 19 File Scan Bus menu Click File Scan Bus Ctrl B The bus is scanned for available measurement modules Measurement modules detected are displayed in the Tree view window below the XCP Gateway tree node Fig 5 20 Config1 a2l Tree view window detected measurement modules Running Auto Configuration Similar to Scan Bus the function Auto Configuration checks the bus for connected measurement m...

Страница 32: ...displayed The AutoConfig Tree view window showing the measurement modules connected to the bus Fig 5 23 Auto Configuration Display of results A message is displayed in another window indicating the number of measurement modules detected and possible configuration changes Fig 5 24 Message Auto Configuration completed An automatic counter integrated into the OK button counts from 5 to 0 The window c...

Страница 33: ...the tree containing the measurement channels A list with the device channels is displayed Fig 5 25 AutoConfig a2l Tree view window device channels Move the mouse pointer over the selected channel entry and double click with the left mouse button or Move the mouse pointer over the selected channel entry and press the Enter key The following window opens Fig 5 26 Dialog for measurement channel confi...

Страница 34: ...Enter key The following window opens Fig 5 28 Dialog for measurement module configuration Make the required settings After the channels and the measurement module have been configured the configuration data needs to be saved to the device Click on the button Write to device The following message is displayed Fig 5 29 Overwrite previous configuration Click on OK to save the configuration A message ...

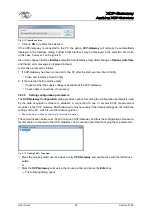
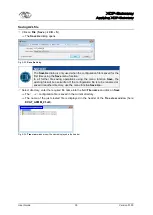
Страница 35: ...g configuration Finally the configuration data has to be saved in an A2L file The default path for storing configuration files refers to the installation directory of xx Scan Config In case of restricted user rights xx Scan Config prompts the user to save the file to the corresponding user directory Changing path for file storage Fig 5 31 Options Settings menu Select Options Settings The Program S...

Страница 36: ...saving operations using the menu function Save the existing file will be overwritten If the configuration file is to be renamed or saved in another directory use the menu function Save As Select directory enter the required file name into the field File name and click on Save The a2l configuration file is saved in the current directory The name of the just created file is displayed in the header o...

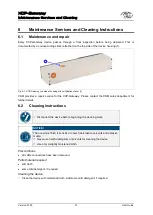
Страница 37: ...icker 1 CSM provides a repair service for the XCP Gateway Please contact the CSM sales department for further details 6 2 Cleaning instructions Disconnect the device before beginning the cleaning work NOTICE The housing s finish is sensitive to harsh detergents solvents and abrasive media Never use harsh detergents or solvents for cleaning the device Use only a slightly moistened cloth Preconditio...

Страница 38: ...nu 21 Fig 5 13 Interface dialog 22 Fig 5 14 Config1 a2l Tree view 22 Fig 5 15 XCP Gateway dialog Configuration tab 23 Fig 5 16 XCP Gateway dialog Licensing tab 23 Fig 5 17 Select document type dialog 24 Fig 5 18 Config1 a2l Tree view window 24 Fig 5 19 File Scan Bus menu 25 Fig 5 20 Config1 a2l Tree view window detected measurement modules 25 Fig 5 21 File Auto Configuration menu 25 Fig 5 22 Auto ...

Страница 39: ...2 Tab 3 1 Indicator LEDs PC and ECAT 7 Tab 3 2 Status LEDs Gateway and Bus 8 Tab 4 1 Front view of PC socket pin assignment 12 Tab 4 2 Front view ECAT socket pin assignment 12 Tab 4 3 Front view sync service connector pin assignment 13 Tab 4 4 Maximum number of measurement modules depending on cable length supply voltage 14 ...

Страница 40: ...All trademarks mentioned are property of their respective owners This document is subject to change without notice XCP Gateway_UG_0100_ENG Copyright 2014 CSM GmbH 2014 11 05 ...

Отзывы: