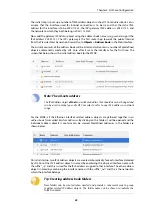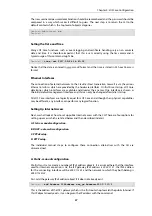
from the protected network
G1_net
which is connected to the interface
G1
.
The following command will add an IP policy called
lan_to_wan
to allow HTTP and HTTPS traffic
through to the public Internet:
Device:/> add IPPolicy Name=lan_to_wan
SourceInterface=G1
SourceNetwork=InterfaceAddresses/G1_net
DestinationInterface=G2
DestinationNetwork=all-nets
Service=http-all
Action=Allow
IP policies have a default value of
Auto
for the type of source translation. This means that if the
source is a private IPv4 address and the destination is a public address, NAT will be performed
automatically using the IP address of the outgoing interface as the new source address.
Therefore the above IP policy will work both for connection to another private IP address or to
public addresses on the Internet.
Instead of relying on the
Auto
option, this section will specify NAT translation explicitly for clarity.
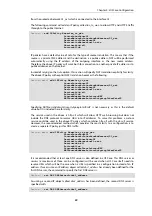
The above IP policy with explicit NAT translation becomes the following:
Device:/main> add IPPolicy Name=lan_to_wan
SourceInterface=G1
SourceNetwork=InterfaceAddresses/G1_net
DestinationInterface=G2
DestinationNetwork=all-nets
Service=http-all
Action=Allow
SourceAddressTranslation=NAT
NATSourceAddressAction=OutgoingInterfaceIP
Specifying
NATSourceAddressAction=OutgoingInterfaceIP
is not necessary as this is the default
value but it is included here for clarity.
The service used in the above is
http-all
which will allow HTTP web browsing but does not
include the DNS protocol to resolve URLs into IP addresses. To solve this problem, a custom
service could be used in the above IP policy which combines
http-all
with the
dns-all
service.
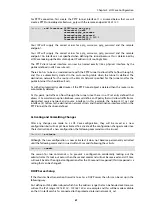
However, the recommended method, which provides the most clarity to a configuration, is to
create a separate IP policy just for DNS traffic:
Device:/main> add IPPolicy Name=lan_to_wan_dns
SourceInterface=G1
SourceNetwork=InterfaceAddresses/G1_net
DestinationInterface=G2
DestinationNetwork=all-nets
Service=dns-all
Action=Allow
SourceAddressTranslation=NAT
NATSourceAddressAction=OutgoingInterfaceIP
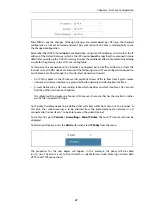
It is recommended that at least one DNS server is also defined in cOS Core. This DNS server or
servers (a maximum of three can be configured) will be used when cOS Core itself needs to
resolve URLs which will be the case when a URL is specified in a configuration instead of an IP
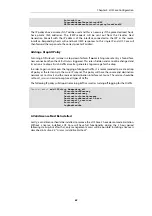
address. If we assume an IP address object called
dns1_address
has already been defined for the
first DNS server, the command to specify the first DNS server is:
Device:/> set DNS DNSServer1=dns1_address
Assuming a second IP object called
dns2_address
has been defined, the second DNS server is
specified with:
Device:/> set DNS DNSServer2=dns2_address
Chapter 4: cOS Core Configuration
59
Содержание NetWall W20A
Страница 12: ... i Orange when cOS Core is running normally Chapter 1 W20B Product Overview 12 ...
Страница 14: ...Chapter 1 W20B Product Overview 14 ...
Страница 31: ...Chapter 3 W20B Installation 31 ...
Страница 70: ...Chapter 4 cOS Core Configuration 70 ...
Страница 80: ...Appendix B Declarations of Conformity 80 ...
Страница 81: ...Appendix B Declarations of Conformity 81 ...

