


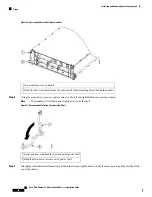


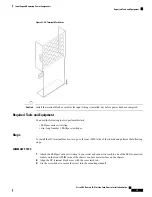


4.
Grasping both handles simultaneously, pull both the left and right handles down at the same time to pull
the shelf partially out of the chassis.
5.
When the shelf is partially out of the chassis and the ejector handles are away from the pins, hand-tighten
the handle screws back into the shelf.
6.
Slide out the shelf out so that two people can safely remove it and carefully set it down on a flat surface.
DETAILED STEPS
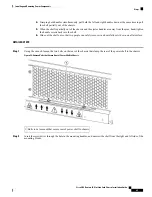
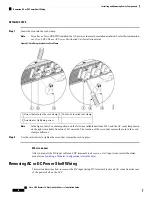
Step 1
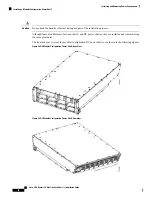
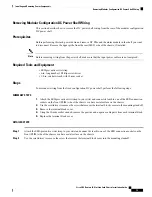
Using the wrench, loosen the two bolts on the rear of the chassis that clamp the rear of the power shelf to the chassis.
Figure 35: Remove Bolts that Secure Rear of Power Shelf to Chassis
Bolts to be loosened that secure rear of power shelf to chassis
1
Step 2
Insert the screwdriver through the hole in the mounting handles, and unscrew the shelf from the right and left side of the
mounting blocks.
Cisco CRS Routers 16-Slot Line Card Chassis Installation Guide
65
Installing and Removing Power Components
Steps
Содержание CRS-16-LCC/M
Страница 20: ...Cisco CRS Routers 16 Slot Line Card Chassis Installation Guide xx Preface Preface ...
Страница 118: ...Cisco CRS Routers 16 Slot Line Card Chassis Installation Guide 98 Installing and Removing Power Components Steps ...
Страница 252: ...Cisco CRS Routers 16 Slot Line Card Chassis Installation Guide 232 Upgrading Chassis Components Steps ...


