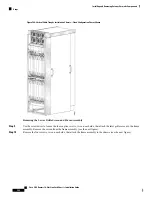


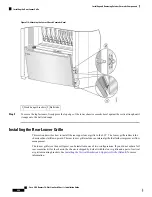


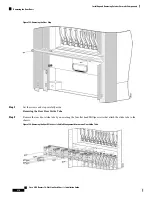


Figure 115: Attaching the Rear (MSC) Side Exterior Doors
Step 15
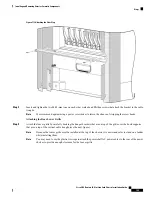
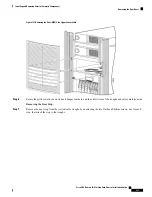
Insert four M4x8-mm wafer-head screws (two on each side) into the appropriate screw holes in the doors, and use the
screwdriver to fully tighten.
Verify that Step 13 was completed correctly to ensure proper orientation of doors. The screw locations vary
depending on the door. If all screw holes for a door do not align with the screw holes on the rear (MSC) side
of the chassis, you need to use the other door.
Note
Step 16
Insert and fully tighten all screws.
Step 17
Ensure that the doors are properly aligned.
a) Check to see if the doors close without interfering with each other.
Typically, the doors will close without interfering with each other. However, you may need to adjust
either the left or right door, or both, to align the doors properly. Adjust doors only if necessary.
Note
Cisco CRS Routers 16-Slot Line Card Chassis Installation Guide
202
Installing and Removing Exterior Cosmetic Components
Steps
Содержание CRS-16-LCC/M
Страница 20: ...Cisco CRS Routers 16 Slot Line Card Chassis Installation Guide xx Preface Preface ...
Страница 118: ...Cisco CRS Routers 16 Slot Line Card Chassis Installation Guide 98 Installing and Removing Power Components Steps ...
Страница 252: ...Cisco CRS Routers 16 Slot Line Card Chassis Installation Guide 232 Upgrading Chassis Components Steps ...


