

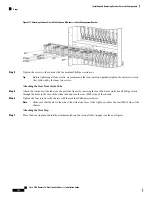


6.
Rotate the grille toward you on its hook hanger brackets, and then lift it clear of the troughs and set it
carefully aside.
7.
Remove the door stop from the vertical cable troughs by unscrewing the two flat head Phillips screws,
one for each side, that attach the stop to the troughs.
8.
Set the screws and stop carefully aside
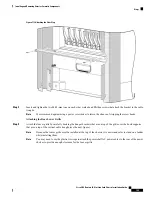
9.
Remove the rear door strike tube by unscrewing the four flat head Phillips screws that attach the strike
tube to the chassis.
10.
Set the screws and strike tube carefully aside
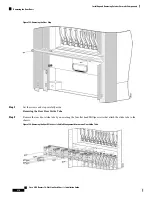
11.
Remove the mid-chassis horizontal cable management bracket (as in the previous figure) by unscrewing
the four flat head Phillips screws (two for each side) that attach the bracket to the chassis.
12.
Set the screws and bracket carefully aside
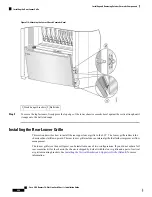
13.
Remove the rear vertical cable troughs—one left and one right—from the rear of the chassis (see the
next figure).
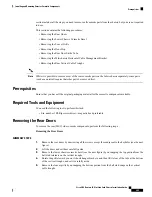
DETAILED STEPS
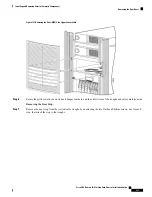
Step 1
Remove the rear doors by unscrewing all the screws except those adjacent to the keyholes (see the next figure).
Step 2
Lift the doors and set them carefully aside.
The doors scratch easily, so they should be handled with care.
Caution
Cisco CRS Routers 16-Slot Line Card Chassis Installation Guide
210
Installing and Removing Exterior Cosmetic Components
Removing the Rear Doors
Содержание CRS-16-LCC/M
Страница 20: ...Cisco CRS Routers 16 Slot Line Card Chassis Installation Guide xx Preface Preface ...
Страница 118: ...Cisco CRS Routers 16 Slot Line Card Chassis Installation Guide 98 Installing and Removing Power Components Steps ...
Страница 252: ...Cisco CRS Routers 16 Slot Line Card Chassis Installation Guide 232 Upgrading Chassis Components Steps ...


