17
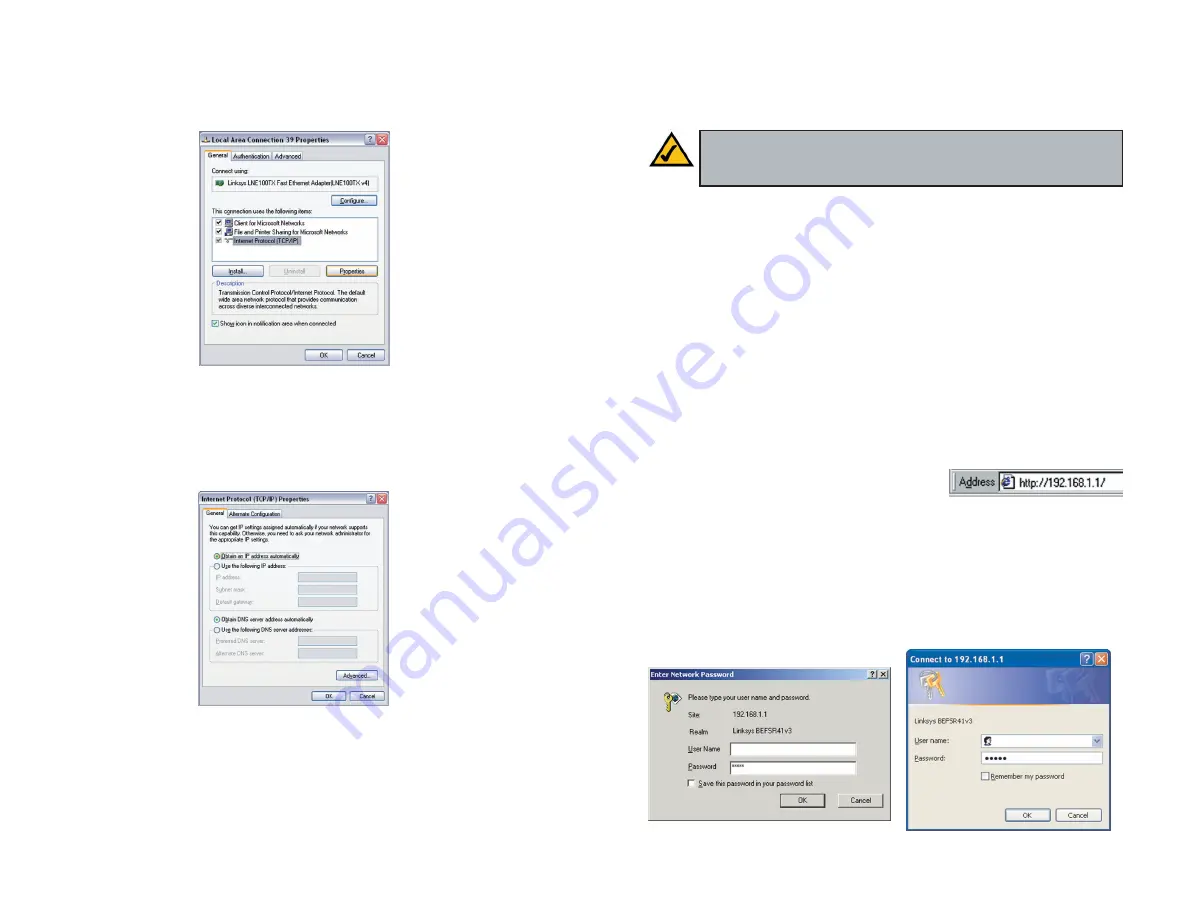
4. Select
Internet Protocol (TCP/IP)
, as shown in Figure 4-7, and click the
Properties
button.
5. Select
Obtain an IP address automatically
, as shown in Figure 4-8. Once
the new window appears, click the
OK
button. Click the
OK
button again
(or the
Close
button if any settings were changed) to complete the PC con-
figuration.
6. Restart your computer.
Go to “Chapter 5: Configure the Router.”
16
Chapter 5: Configure the Router
This chapter will show you how to configure the Router to function in your net-
work and gain access to the Internet through your Internet Service Provider
(ISP). Detailed description of the Router’s Web-based Utility can be found in
“Chapter 6: The Router’s Web-based Utility.” You will set the Internet
Connection Type on the Router’s Basic Setup tab based on the information pro-
vided by your ISP, who may also require the use of a Host Name and Domain
Name.
You will need the setup information from your ISP.
If you do not have
this information, please contact your ISP before proceeding.
The instructions from your ISP tell you how to set up your PC for Internet
access. Because you are now using the Router to share Internet access among
several computers, you will use the setup information to configure the Router
instead of your PC. You only need to configure the Router once using the first
computer you set up.
1. Open your web browser. Enter
http://192.168.1.1
in the web browser’s
Address
field, as shown in Figure 5-1, and
press the
Enter
key.
2. An
Enter Network Password
window, shown in Figure 5-2, will appear
(Windows XP users will see a
Connect to 192.168.1.1
window, shown in
Figure 5-3). Leave the
User Name
field empty, and enter
admin
in lower-
case letters in the
Password
field (
admin
is the default password). Then,
click the
OK
button.
Figure 5-1
Figure 5-3
Note:
Linksys recommends using the Setup CD for first time instal-
lation of the Router and for setting up additional computers. For addi-
tional assistance, follow the steps in this chapter.
Figure 4-7
Figure 4-8
Figure 5-2


