52
53
(
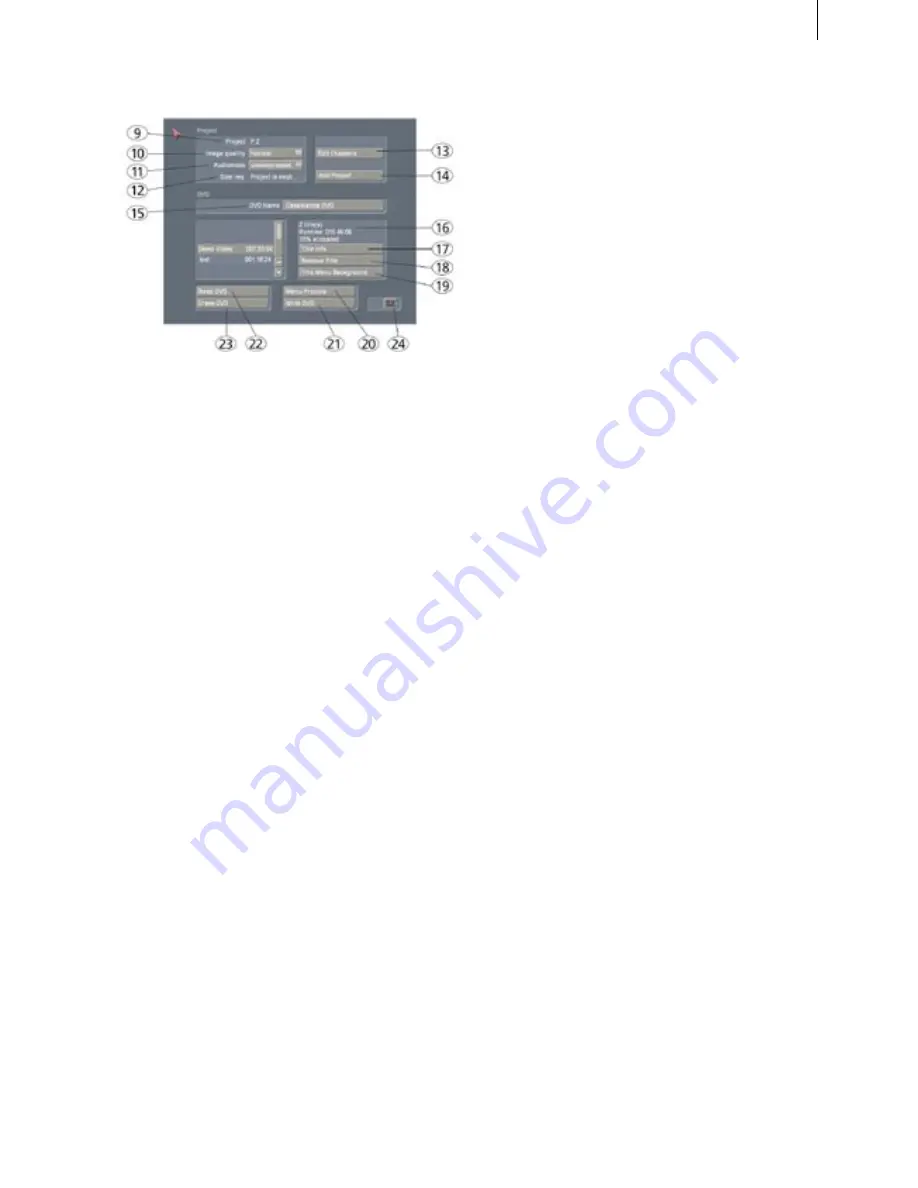
9
) In the upper line you see the project name
that is later also used in the DVD menu. If you are
not satisfied with the name, exit the DVD Arabesk
menu, change the project name in Project Set-
tings, and come back to the DVD menu.
(
10
) In the second line you can specify the
project's
Image quality
after transformation to
the DVD standard.
Three levels are available:
Normal
,
High
, and
Ma-
ximum
. Picture quality is determined by the data
transfer rate (compression factor). The higher the
picture quality, the more storage space is required.
High or maximum quality cause the DVD to fill
up faster than at normal quality.
The
Normal
quality corresponds to the quality
generally available on commercial DVDs.
The
High
picture quality corresponds to the mi-
nimal requirements for a playback device accor-
ding to the DVD standard – this video should be
just as playable as with normal quality.
The
Maximum
quality level takes advantage of
everything the DVD standard has to offer. Not all
DVD players conform to this level. If your video
is jittery or even causes error messages, then this
could be the reason.
(
11
) The next thing to do is to set the audio quali-
ty with the "
Audiomode
" button.
Two levels are available, "
uncompressed
" and
"
compressed
". Compressed audio requires only a
fraction of the storage capacity, but sacrifices a bit
of quality.
It is recommended to use uncompressed audio
when creating a music video.
Note for the technically interested:
Uncompressed
audio is 16 bit PCM audio at 48 kHz. Compressed
audio is in MPEG format.
(
12
) This field displays the
Size requirements
for
this project. The value is dependent on the quality
levels explained above and on the length of the
project.
If there is enough space on the DVD for the pro-
ject with its given settings, the display will be less
than %100.
If the project will not fit, the display will read
more than %100. In this case you must reduce
the storage requirements for the project by redu-
cing video and/or audio quality, and/or you must
remove one or more projects.
(
13
) Here you can divide your project into chap-
ters. The chapters can be directly accessed when
playing the DVD (usually via remote), which is a
great help, especially for long projects. Selecting
the "
Edit Chapters
" button opens a window in
which the individual scenes of storyboard are
displayed.
You see that the scenes are displayed, for example,
as:
Chapter 1
000.05:00
S1
A chapter must always be at the beginning of a
scene. Scroll through scenes listed in this window
and decide for which scenes a new chapter should
begin. Select the line with the desired scene and
click on the button "
Start Chapter
".
Numbering is done automatically by the system,
so in the example "
Chapter 1
" would be renamed
to "
Chapter 2
".
(Clicking on the button "
Undo Chapter
" causes
the selected chapter to be canceled).
A further menu function is the specification of
the reference scene. The first frame of this scene
will later represent the project in the DVD menu.
You should pick it carefully!
Click on the button "
Ref. picture
" and the selected
scene is taken as reference scene. It is labeled with
an asterisk in the line.
(
14
) After these settings are made you can now
Содержание Prestige
Страница 1: ...Casablanca Prestige User manual ...
Страница 20: ...20 ...
Страница 40: ...40 ...
Страница 88: ......


