42
43
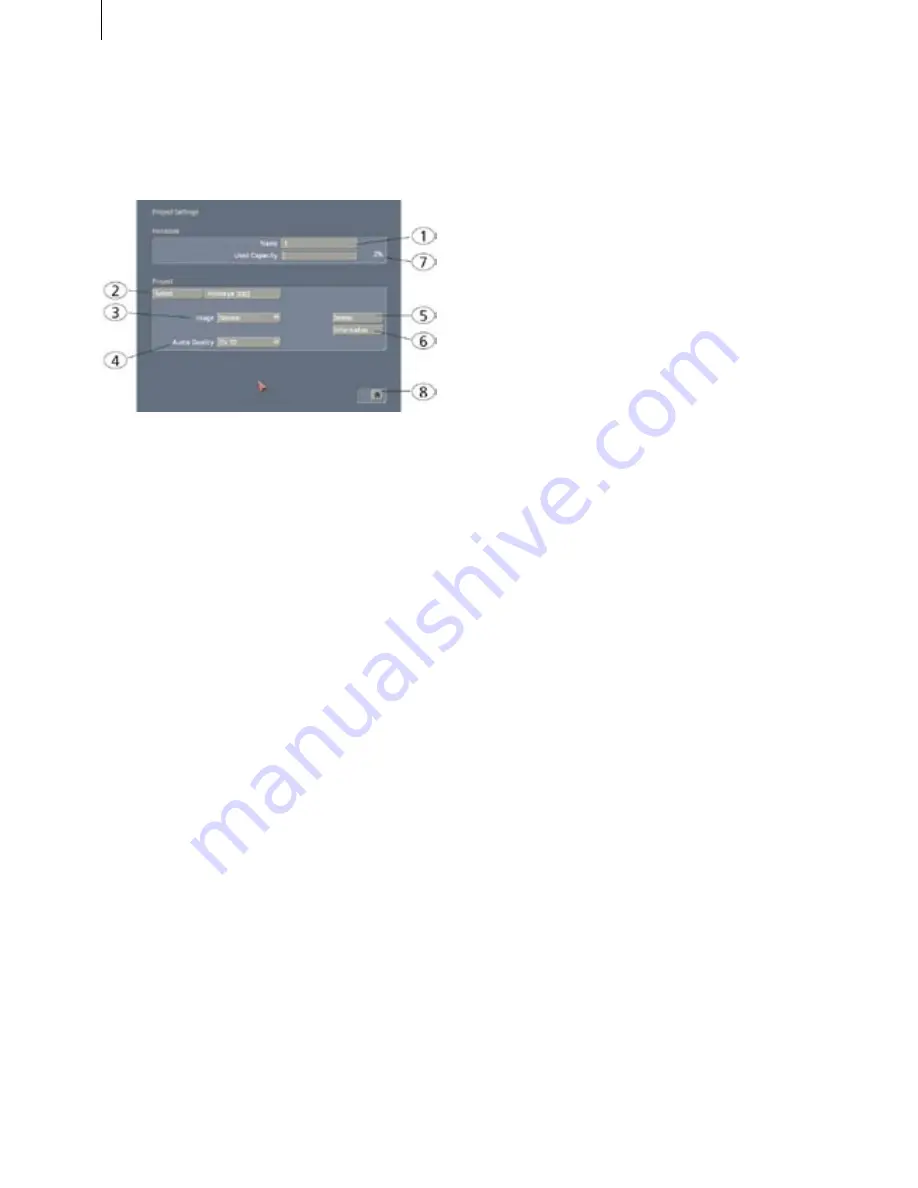
5.2 Project settings
In this menu you make the settings for your
current or next project. This affects, for example,
the project name, image size, and audio quality.
(
1
)
On the upper edge (the "Hard-drive" section)
you see the "
Name
" button. Clicking on the gray
name-field brings up the keyboard with which
you can enter the desired name. You can also see
which hard drive is currently in the
Casablanca
Prestige
. This is otherwise not possible because
the label on the hard drive is not visible when the
hard drive has been inserted into the machine.
Below this the display, "
Used Capacity
" gives
information on the space used on the hard drive
(light gray), and on the total remaining time
(dark gray). A display for individual projects is
not possible because this display refers to the
entire hard drive.
(
2
) Clicking on the "
Select
" button brings up the
Select Project
menu, in which you can select one
of ten different projects. After you press "
OK
",
the project you have selected is displayed next to
the selection button (e.g. "
P 1
"). If you want to
rename the project, click on "
P 1
" (or
"
P 2
", etc.). The on-screen keyboard appears so
that you can enter another project name.
Only the currently active project can be edited!
Exchanging video data between different projects
is possible using the Clipboard feature in the Edit
screen. You always have access to archived titles
and colors.
(
3
) Under "
Image size
" you have the choice
among
Small
,
Normal
, and
Large
. This setting
applies only when effects are applied.
We recommend using the default setting
Normal
.
This will usually prevent black margins from ap-
pearing when using effects.
The image size can be changed at anytime in the
current project. It takes effect only when applying
effects and titles.
For technically interested users:
A video signal
conforming to the studio standard CCIR 601 en-
ables the use of 720 samples and 576 picture lines.
The real resolution is even higher, but a video pic-
ture requires certain portions for synchronization
signals, videotext, timecodes, etc. The resolution
of 720 x 576 pixels is the maximum allowed area
for real video information.
But many video sources do not make use of this
resolution. This is true for camcorders, laserdiscs,
and even for studio devices. A much smaller
portion is often used in the assumption that most
televisions will not be able to render the entire
signal.
(
4
) The "
Format
" button provides two different
settings. In addition to the normal 4:3 format,
Casablanca Prestige
offers a 16:9 mode:
The option means the 16:9 mode
anamorphic
and contains 576 picture lines.
16:9 is set when starting the project.
This special mode works only if both camcorder
and TV conform to the 16:9 standard.
It might be necessary to manually switch the TV
monitor to 16:9. If the TV is not switched, then
Casablanca uses the standard display 4:3.
16:9 display is possible regardless of the format in
which the video source has been recorded.
Note:
The 16:9 format is not available for NTSC
Casablanca machines.
(
5
) The
Audio quality
field lets you choose
between the two levels
DV 32
and
DV 48
, but you
cannot change between these two values within
a running project. You must make this selection
before you begin a project.
You should set the audio quality that you have
chosen for your camera, where
48 kHz (16 bits) = DV 48 and
32 kHz (12 bits) = DV 32.
Casablanca Prestige
also records in digital audio.
For technically interested users:
Audio will
require approximately 200 KB/second, but much
Содержание Prestige
Страница 1: ...Casablanca Prestige User manual ...
Страница 20: ...20 ...
Страница 40: ...40 ...
Страница 88: ......


