26
27
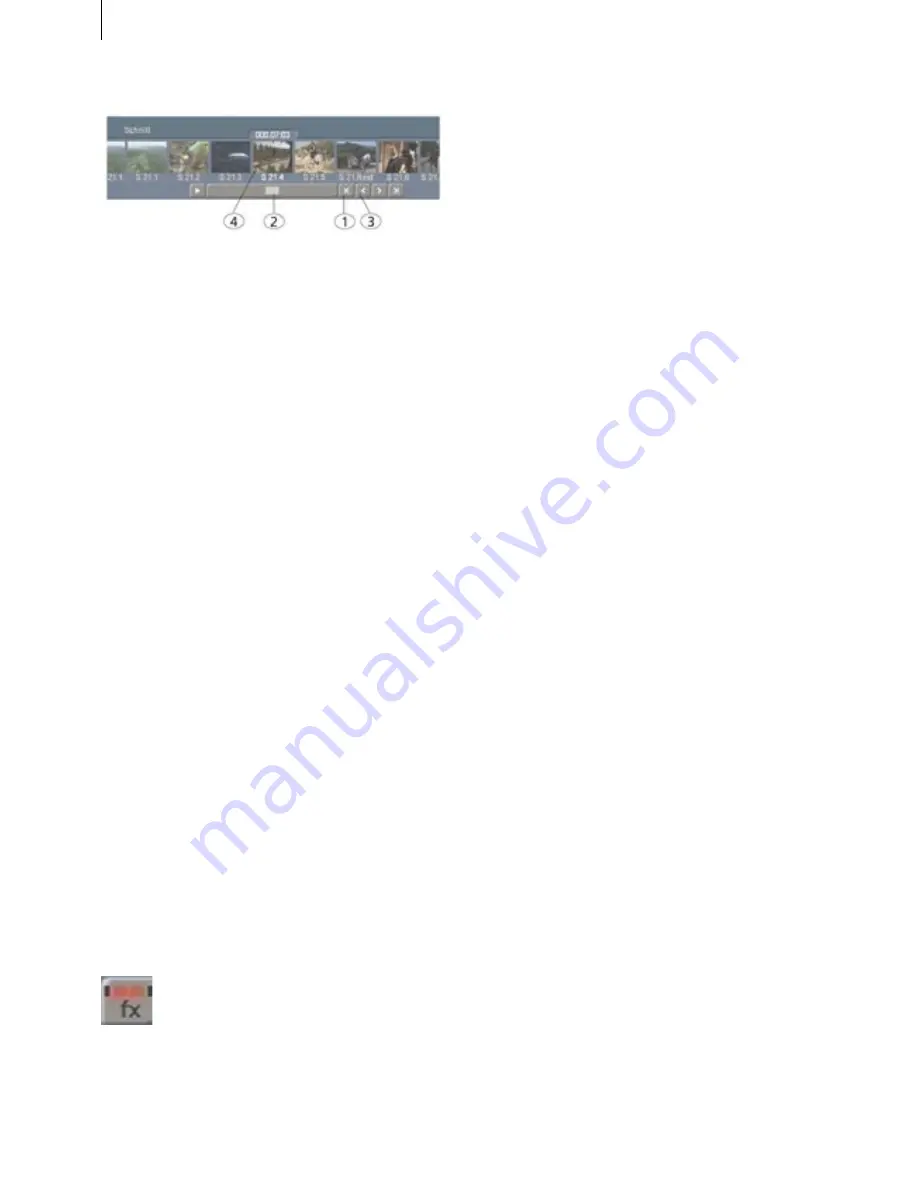
(
1
) Click with the left button on the arrow button
"|<" beneath the storyboard. The first scene of the
project is now the active scene in the center of the
storyboard.
(
2
) The slider under the storyboard is used to
scroll through the Storyboard scenes (using the
trackball). Move the slider all the way to the left.
(
3
) Using the "<" button you can move one scene
at a time toward the first scene.
(
4
) You can also click directly on the desired
scene, causing it to be put in the center.
Clicking on the
Play
symbol below the storyboard
to the left causes the video to play from the
beginning of the active scene (in this case, the first
scene). All scenes are played in the order you have
defined, from left to right through the storyboard.
If you want to change the sequence, (for example
move a scene from the end of the storyboard to
the beginning), select the scene in the
Scene bin
.
Now click in the storyboard on the scene after
which the selected scene is to appear. Click on
"
Add
". Finally, select the old scene in the story-
board and remove it by clicking on "
Remove
".
Step 5: Effects
Transition effects
The basic footage of your video is finished. Now
some effects can be added. Return to the
Main
menu
. Select
Transitions
. Alternatively, you can
simply click the menu symbol at the bottom right
of the Edit menu:
In the
Transitions
screen you see the storyboard
above in its usual place, but in the center you now
find the active scene area now has room for two
scenes. Bring the two scenes that you would like to
connect with a transition into the center. Click on
the
Play
button below the storyboard to play the
last second of the first scene and the first second
of the second scene so that you can observe the
hard cut between the two scenes. Now select a
transition to be placed between the scenes.
Casab-
lanca Prestige
offers you many possibilities from
a simple crossfade to complex 3D effects.
Below left in the menu you find a list of the
individual effects, where a maximum of 7 effects
are displayed at one time in the list; use the slider
to access the rest. Every effect is represented by a
name and a symbol. Simply click on the desired
effect to highlight it in gray.
For example, select the effect "
Crossfade
",
which causes the first scene in the center of the
storyboard to change gently into the second.
In this case the effect is a real-time effect, so its
symbol, outlined in blue, is displayed immediately
between the two scenes in the storyboard after
you have clicked on "
Add
".
Now you can check the effect by clicking the
Play
symbol. This plays one second of the video before
the effect, the effect itself, and one second after the
effect.
Note:
Real-time effects may sometimes be
outlined in red and must then be created before
they can be viewed. The reason for this is the
Dual Stream Technology of the MPEG 2 decoder
in
Casablanca Prestige
. This means that effects
might have to be created that overlap, that are
very near to each other in time, or that are used
with video inserts.
Now select the next transition point in the
storyboard. To do this click on the ">" arrow
button or click directly on the next scene in the
storyboard. Now you can select another transition
effect, (for example the effect
Bars
). In the field to
the right you have three options to change how
this transition performs:
Type
(Move or Over),
Direction
(6 different directions, represented by
arrows), and
Bars
(2-200).
This time the effect symbol placed in the
Содержание Prestige
Страница 1: ...Casablanca Prestige User manual ...
Страница 20: ...20 ...
Страница 40: ...40 ...
Страница 88: ......


