


Advanced Guide
>
Scanning
>
Saving Scanned Data on the USB flash drive/Memory Card Using the Operation Panel of
the Machine
> Saving Scanned Data on the USB flash drive/Memory Card Using the Operation Panel of the Machine
Saving Scanned Data on the USB flash drive/Memory Card
Using the Operation Panel of the Machine
You can save scanned data on the USB flash drive or memory card using the Operation Panel.
Important
Before inserting the USB flash drive.
You may need an extension cable if the USB flash drive cannot be inserted into the Direct Print
Port of the machine. For details, ask an electronics store.
Depending on the type of USB flash drive, the operation may not be guaranteed.
Some USB flash drives with security settings may not be used.
Do not remove the USB flash drive or memory card from the machine under the following
conditions:
while scanning is in progress
before saving scanned data
You cannot use the USB flash drive and memory card at the same time. Be sure to use either of
them as a media for saving scanned data.
Scanned data saved on the USB flash drive or memory card cannot be printed.
For safety reasons, we recommend storing the scanned data saved on a memory card or USB
flash drive to another media periodically to avoid unexpected accidents.
We assume no responsibility for damage or loss of data for whatever reasons even within the
warranty period
1.
Make sure that the machine is turned on.
2.
Press the
Menu
button.
3.
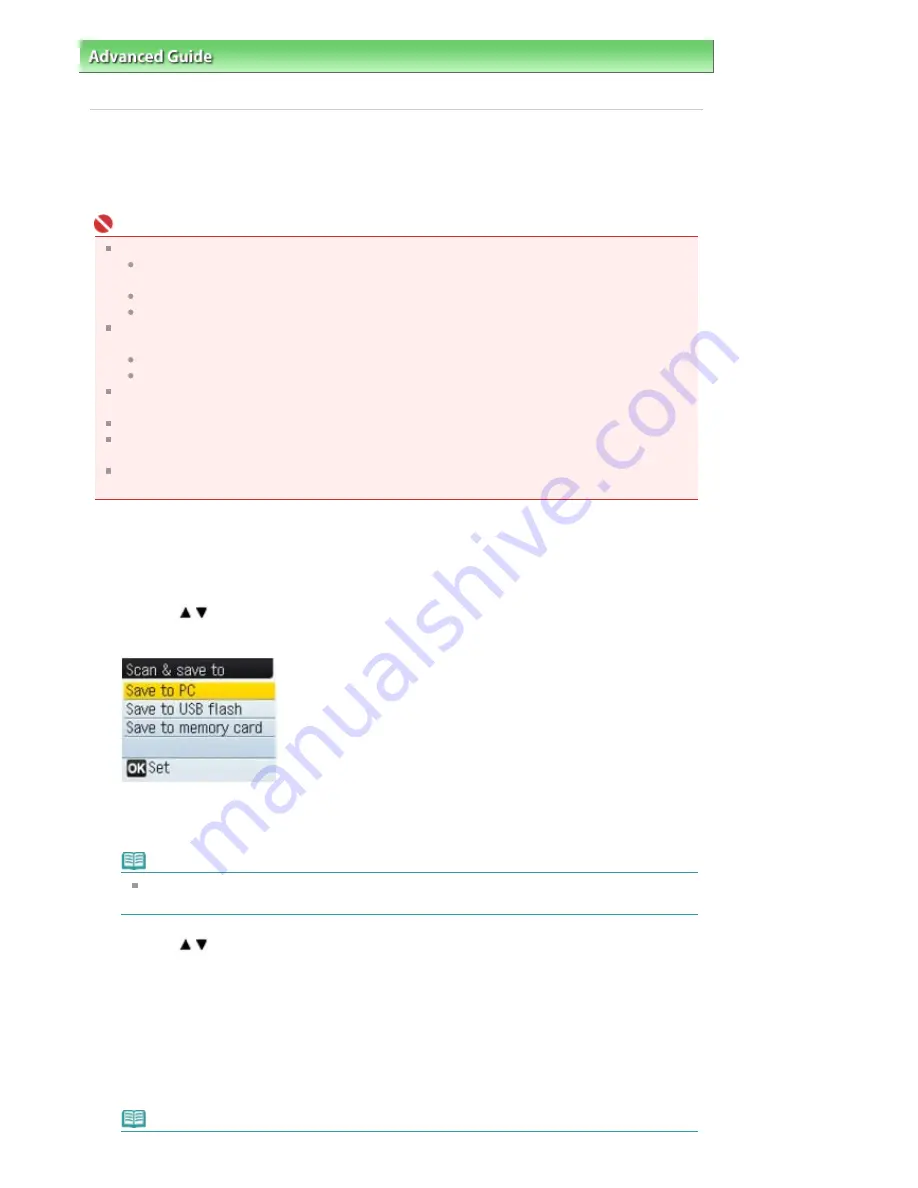
Use the
button to select Scan, then press the
OK
button.
The Scan & save to screen is displayed.
4.
Insert the USB flash drive in the Direct Print Port or the memory card in the Card
Slot.
Note
For information on the types of the memory card compatible with the machine, refer to
Printing
from a Memory Card
.
5.
Use the
button to select Save to USB flash or Save to memory card, then
press the
OK
button.
Select either one you will use as a media for saving scanned data.
6.
Select the Data format, then press the
OK
button.
Select JPEG or PDF.
7.
Load the original on the Platen Glass following the instruction on the LCD.
Note
Page 301 of 681 pages
Saving Scanned Data on the USB flash drive/Memory Card Using the Oper...
Содержание MP480 series
Страница 29: ...Checklist Staff paper Page top Page 29 of 681 pages Printing a Notebook Paper ...
Страница 41: ...position See Aligning the Print Head Page top Page 41 of 681 pages Printing Documents Windows ...
Страница 59: ...Page top Page 59 of 681 pages Loading Paper ...
Страница 62: ...Page top Page 62 of 681 pages Loading Envelopes ...
Страница 65: ...Page top Page 65 of 681 pages Loading Originals ...
Страница 71: ...Page top Page 71 of 681 pages Examining the Nozzle Check Pattern ...
Страница 84: ...Page top Page 84 of 681 pages Cleaning the Paper Feed Roller ...
Страница 128: ...Page top Page 128 of 681 pages Selecting a Photo ...
Страница 130: ...Page top Page 130 of 681 pages Editing ...
Страница 132: ...Page top Page 132 of 681 pages Printing ...
Страница 204: ...Page top Page 204 of 681 pages Attaching Comments to Photos ...
Страница 208: ...See Help for details on each dialog box Page top Page 208 of 681 pages Setting Holidays ...
Страница 244: ...Page top Page 244 of 681 pages Setting Paper Dimensions Custom Size ...
Страница 257: ...Page top Page 257 of 681 pages Printing with ICC Profiles ...
Страница 343: ...Printing Photos Sending via E mail Editing Files Page top Page 343 of 681 pages Saving ...
Страница 425: ...installed Page top Page 425 of 681 pages Custom Dialog Box ...
Страница 553: ...Page top Page 553 of 681 pages Printing with Computers ...
Страница 612: ...Page top Page 612 of 681 pages Paper Jams ...
Страница 619: ...Page top Page 619 of 681 pages Error Message Appears on a PictBridge Compliant Device ...


