


E. Fill this circle to print the same Photo Index Sheet again.
* If you filled this circle, all other filled settings will be disregarded.
F.
Be careful not to make the bar code dirty.
If the bar code is dirty or has wrinkles, the machine may not scan the Photo Index Sheet
properly.
Important
If there is more than one Photo Index Sheet, fill in all the sheets.
If the filled circles on the Photo Index Sheet are not dark or vast enough, the machine may
not scan the Photo Index Sheet properly.
9.
Load paper on the Rear Tray.
Make sure that the page size and media type of the loaded paper match those specified on the
Photo Index Sheet.
Note
When printing images using the Photo Index Sheet, you can select 4" x 6" (101.6 x 152.4 mm),
5" x 7" (127 x 177.8 mm), 8.5" x 11" (Letter), or A4 for the page size.
10.
Make sure that Photo Index Sheet scan & print is selected, then press the
OK
button.
11.
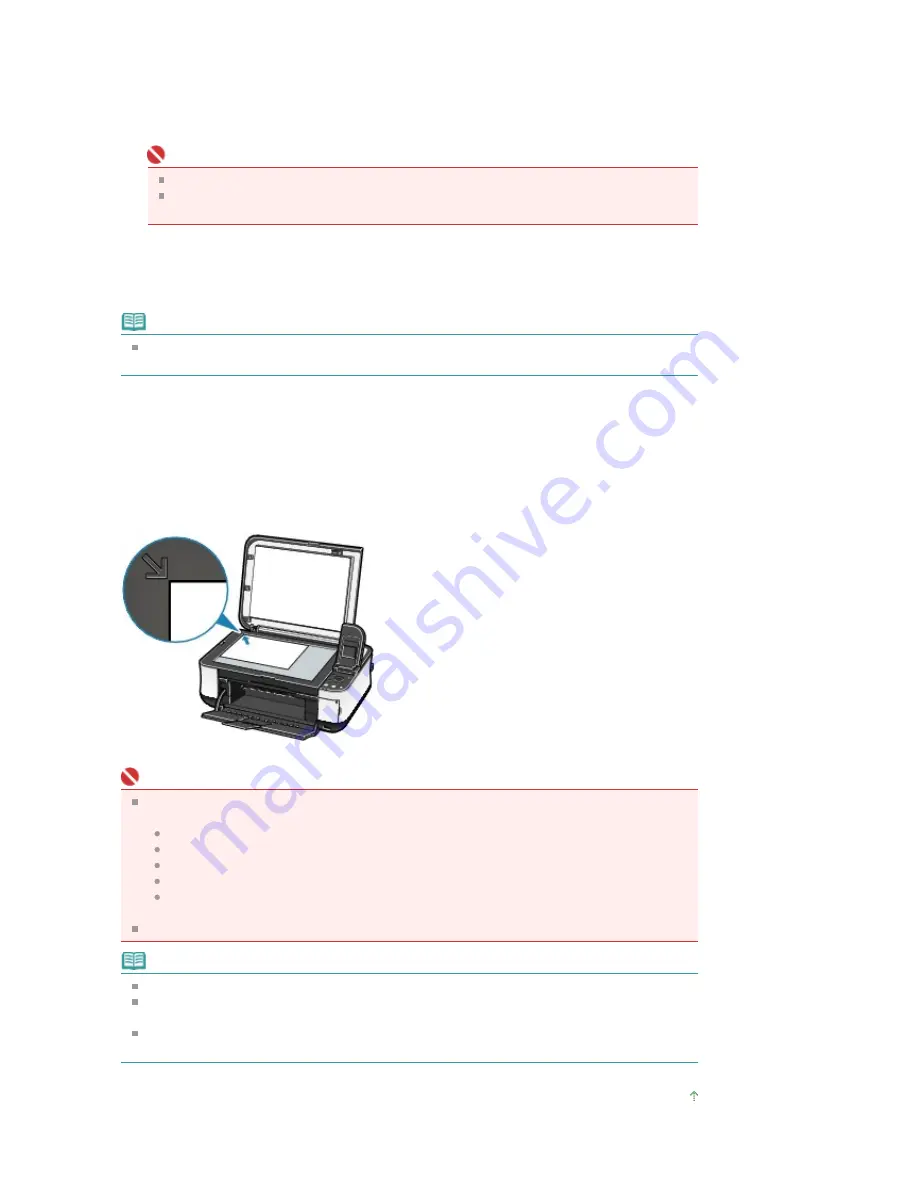
Place the Photo Index Sheet face-down on the Platen Glass, then press the
OK
button.
When placing the Photo Index Sheet, place the front side down and align the upper left corner of it
with the alignment mark as shown in the figure below.
The Photo Index Sheet is scanned and the specified photos will be printed.
Important
If Failed to scan Photo Index Sheet. is displayed on the LCD, press the
OK
button and confirm
the following:
The Platen Glass and the Photo Index Sheet are not dirty
The Photo Index Sheet is placed in the correct position with its front side facing down
You have filled in all the necessary circles on the sheet
Only one option is selected for items that do not accept two or more selections
Is the circle for the number of copies to print for each photograph filled when you print with
DPOF print?
Do not remove the memory card while printing is in progress.
Note
To cancel printing, press the
Stop
button.
To continue to print photographs using subsequent Photo Index Sheets, repeat the procedure
from step 10.
If the memory card has been removed and then reinserted before printing with the Photo Index
Sheet, it may take some time before printing starts.
Page top
Page 292 of 681 pages
Printing by Using the Photo Index Sheet
Содержание MP480 series
Страница 29: ...Checklist Staff paper Page top Page 29 of 681 pages Printing a Notebook Paper ...
Страница 41: ...position See Aligning the Print Head Page top Page 41 of 681 pages Printing Documents Windows ...
Страница 59: ...Page top Page 59 of 681 pages Loading Paper ...
Страница 62: ...Page top Page 62 of 681 pages Loading Envelopes ...
Страница 65: ...Page top Page 65 of 681 pages Loading Originals ...
Страница 71: ...Page top Page 71 of 681 pages Examining the Nozzle Check Pattern ...
Страница 84: ...Page top Page 84 of 681 pages Cleaning the Paper Feed Roller ...
Страница 128: ...Page top Page 128 of 681 pages Selecting a Photo ...
Страница 130: ...Page top Page 130 of 681 pages Editing ...
Страница 132: ...Page top Page 132 of 681 pages Printing ...
Страница 204: ...Page top Page 204 of 681 pages Attaching Comments to Photos ...
Страница 208: ...See Help for details on each dialog box Page top Page 208 of 681 pages Setting Holidays ...
Страница 244: ...Page top Page 244 of 681 pages Setting Paper Dimensions Custom Size ...
Страница 257: ...Page top Page 257 of 681 pages Printing with ICC Profiles ...
Страница 343: ...Printing Photos Sending via E mail Editing Files Page top Page 343 of 681 pages Saving ...
Страница 425: ...installed Page top Page 425 of 681 pages Custom Dialog Box ...
Страница 553: ...Page top Page 553 of 681 pages Printing with Computers ...
Страница 612: ...Page top Page 612 of 681 pages Paper Jams ...
Страница 619: ...Page top Page 619 of 681 pages Error Message Appears on a PictBridge Compliant Device ...


