Advanced Sending Methods
2-40
Se
ndin
g
Docume
nt
s
2
IMPORTANT
•
To specify your folder as destination, make sure of the following:
- [Allow] or [Only allow sending to own address or specified folder] in [File Send] is
selected. (See Chapter 4, “Customizing Settings,” in the
Remote UI Guide
.)
- Your home directory attribute is registered on an authentication server. (Consult your
network administrator.)
•
If Active Directory is not used as an authentication server, or you want to manually
specify your folder as destination, the folder specified in [Folder Path] under [Specify
destination folder] is used as the destination when [Send File To Self] is pressed. (See
Chapter 4, “Customizing Settings,” in the
Remote UI Guide
.)
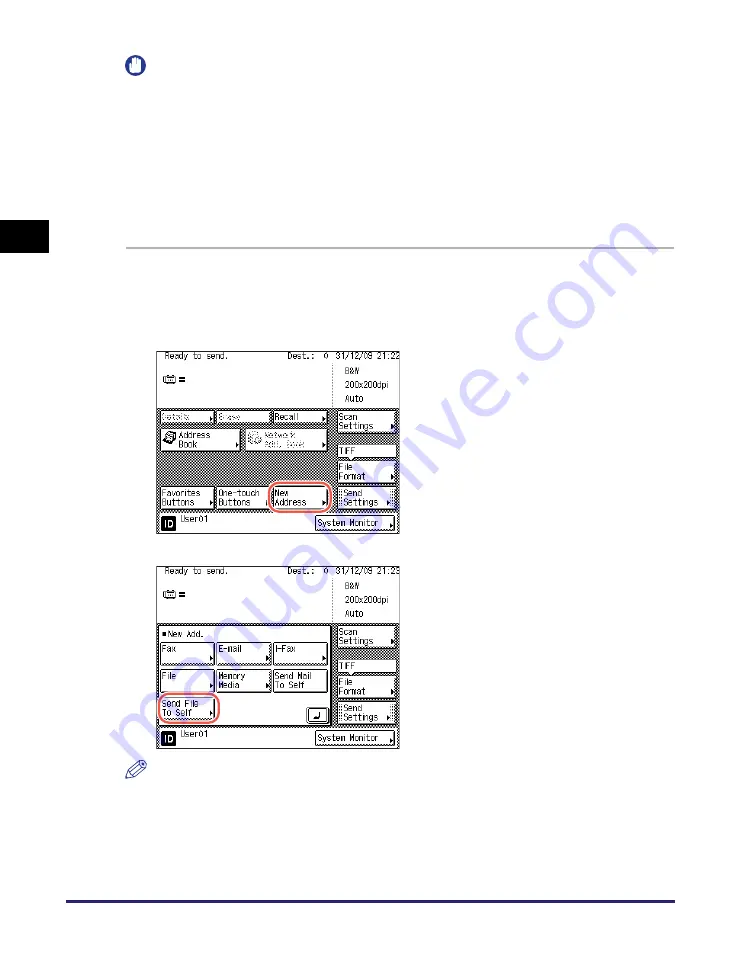
1
Follow
s
tep
s
1 to 6 in “Lo
The top screen (Send) appears.
NOTE
If the settings under <When Sending File to Own Address> are configured to display
an authentication screen, the File screen appears when you press [Send File To Self].
(See Chapter 4, “Customizing Settings,” in the
Remote UI Guide
.) Specify the user
name and password
➞
press [OK].
2
Pre
ss
[New Addre
ss
].
3
Pre
ss
[
S
end File To
S
elf].
Your folder path appears on the top screen.
Содержание imageRUNNER 2545i
Страница 2: ...imageRUNNER 2545i 2545 2535i 2535 2530i 2530 2525i 2525 2520i 2520 Sending and Facsimile Guide ...
Страница 137: ...Address Book 4 30 Specifying Destinations Easily and Quickly 4 4 Press Reset to return to the top screen ...
Страница 175: ...LDAP Server 4 68 Specifying Destinations Easily and Quickly 4 ...
Страница 257: ...Reception Related Items 7 44 Customizing the Machine s Settings 7 ...
Страница 299: ...Self diagnostic Display 9 24 Troubleshooting 9 ...
Страница 319: ...Index 10 20 Appendix 10 U User s Data List 8 8 ...
Страница 320: ...Index 10 21 10 ...


