Scanning
8-7
Basic Scanning Operations
If you select <JPEG>, skip to step 8.
If you specify a file server’s address from
Address Book without selecting the sending
method, settings specified in <STANDARD
SETTINGS> in <TX SETTINGS> in <TX/RX
COMMON SET.> in <TX/RX SETTINGS> are
displayed.
–
–
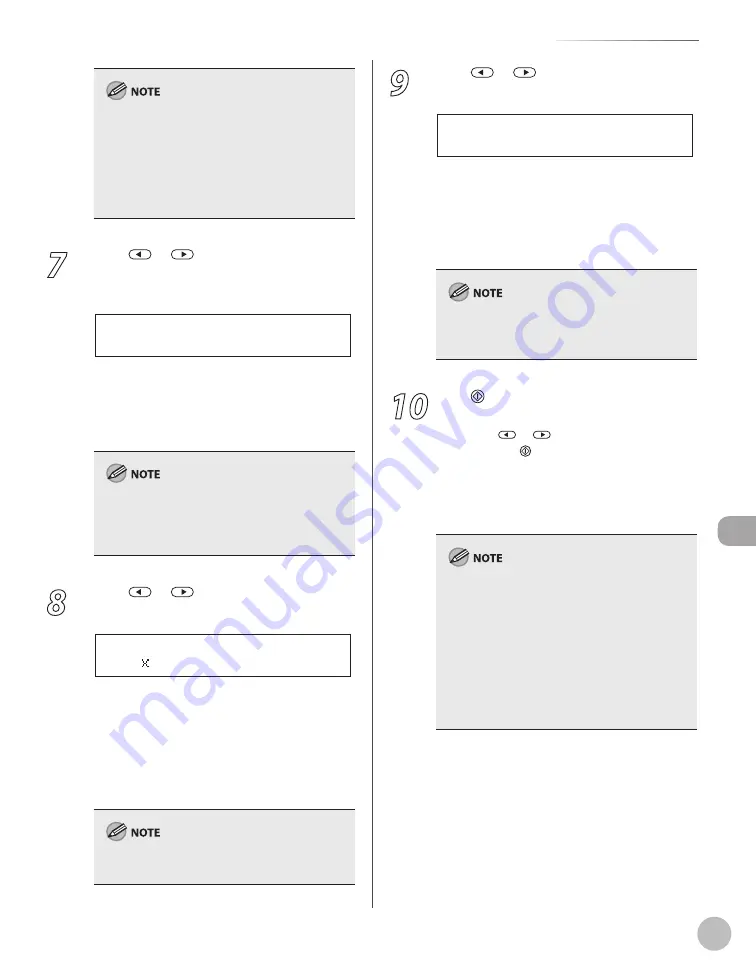
7
Press
or
to select <OFF> or <ON>
for <DIVIDE INTO PAGES>, then press
[OK].
O F F
D I V I D E I N T O P A G E S
<OFF>: Sends multiple images as a single file
without dividing them.
<ON>: Separates multiple images and send
them as separate files.
If you have selected <JPEG> in step 6, this setting
is not available. <DIVIDE INTO PAGES> is
automatically set to <ON> when sending
documents in JPEG format.
8
Press
or
to select the resolution,
then press [OK].
2 0 0 2 0 0 d p i
R E S O L U T I O N
File server (B&W): <200×200dpi>,
<300×300dpi>, <400×400dpi>,
<600×600dpi>, <150×150dpi>,
<200×100dpi>
File server (Color): <200×200dpi>,
<300×300dpi>, <100×100dpi>,
<150×150dpi>
If <PDF(COMPACT)> is selected as the file format,
only <300×300dpi> can be selected.
–
–
–
–
9
Press
or
to select the original
type, then press [OK].
T E X T / P H O T O
O R I G I N A L T Y P E
<TEXT/PHOTO>: For documents that contain
text and photos.
<TEXT>: For text documents.
<PHOTO>: For documents that contain fine
text or photos.
If you have selected <PDF(COMPACT)> as the file
format in step 6, the original type is automatically
set to <TEXT/PHOTO>.
10
Press [Start].
When you place the documents on the platen
glass, press
or
to select the document
size, then press [Start] for each document.
When scanning is complete, press [OK] to start
sending.
Scanning starts, and the scanned data is sent to
the specified file server.
You can also adjust the following scan settings
as necessary.
Density: See “Adjusting Density (Scan to File
Server),” in the e-Manual.
2-sided: See “2-Sided Documents (Scan to
File Server),” in the e-Manual.
You can set the document’s name and the
message body text. (See “Naming a Sent
Document Using a File Server” and “Message,” in
the e-Manual.)
–
•
•
–
–
–
–
Содержание imageCLASS MF5850dn
Страница 34: ...Before Using the Machine 1 9 Operation Panel Send Operation Panel MF5880dn MF5850dn ...
Страница 68: ...Copying 3 3 Overview of Copy Functions p 3 17 p 3 25 p 3 22 ...
Страница 99: ...Copying 3 34 ...
Страница 102: ...Printing 4 3 Overview of the Print Functions p 4 9 ...
Страница 134: ...Fax 6 3 Overview of Fax Functions p 6 19 p 6 59 p 6 55 ...
Страница 198: ...E Mail MF5880dn only 7 3 Overview of E Mail Functions ...
Страница 203: ...E Mail MF5880dn only 7 8 ...
Страница 206: ...Scanning 8 3 Overview of the Scanner Functions ...
Страница 217: ...Scanning 8 14 ...
Страница 233: ...11 6 Maintenance Cleaning the Machine 7 Close the ADF 8 Reconnect the power cord and turn ON the main power switch ...


