Chapter 2
Ink Delivery System Installation
Page 2-11
2.2.3 BK760 System Installation
2.2.3.1
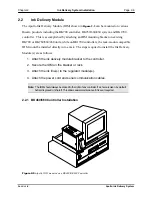
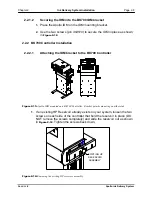
Attaching the IDM bracket to the BK760 Controller
To mount the IDM on a BK760 Controller, the IDM bracket should first be installed.
Please note that the bracket can be extended out to both sides.
1.
Disconnect the monitor’s power cable and temporarily remove it from
the monitor tray.
2.
Loosen and remove the four screws located at the top of the monitor
tray and remove the tray itself.
3.
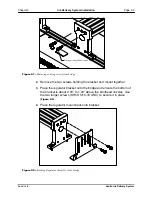
Place the bracket on top extending out to the desired side. Note that
the bracket can be extended to either side of the monitor. If two IDM
brackets are installed, place the second bracket on top of the first
except on the opposite side of the monitor.
4.
Re-install the monitor tray.
5.
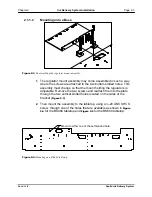
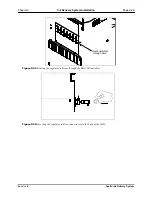
Line up the holes and replace the four screws with the longer 10-32
UNF screws included and tighten it down into place (
6.
Ensure the serial cable and power cable are attached to the back of
the module(s) (
7.
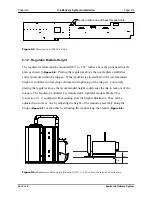
Route the serial cable through the center opening at the back of the
monitor stand to a serial port. See
2.2.3.2
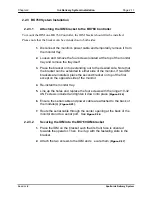
Securing the IDM into the BK760 IDM bracket
1.
Place the IDM on the bracket such that its front face is oriented
towards the operator. Then, line it up with the fastening slots in the
bracket.
2.
Attach the two screws to the IDM and s ecure them (
Buskro Ltd.
Apollo Ink Delivery System
Содержание Apollo BK-IDM-4H
Страница 1: ...Apollo Ink Delivery System Part No 9103326 User s guide V1 2 ...
Страница 5: ...General Information Chapter 1 1 0 General Information Buskro Ltd Apollo Ink Delivery System ...
Страница 46: ...Operating Instructions Chapter 3 3 0 Operating Instructions Buskro Ltd Apollo Ink Delivery System ...
Страница 54: ...Printhead Maintenance Chapter 4 4 0 Printhead Maintenance Buskro Ltd Apollo Ink Delivery System ...
Страница 59: ...Troubleshooting Guide Chapter 5 5 0 Troubleshooting Guide Buskro Ltd Apollo Ink Delivery System ...

