CHAPTER 6 OPTIONS
6-20
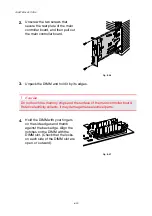
2.
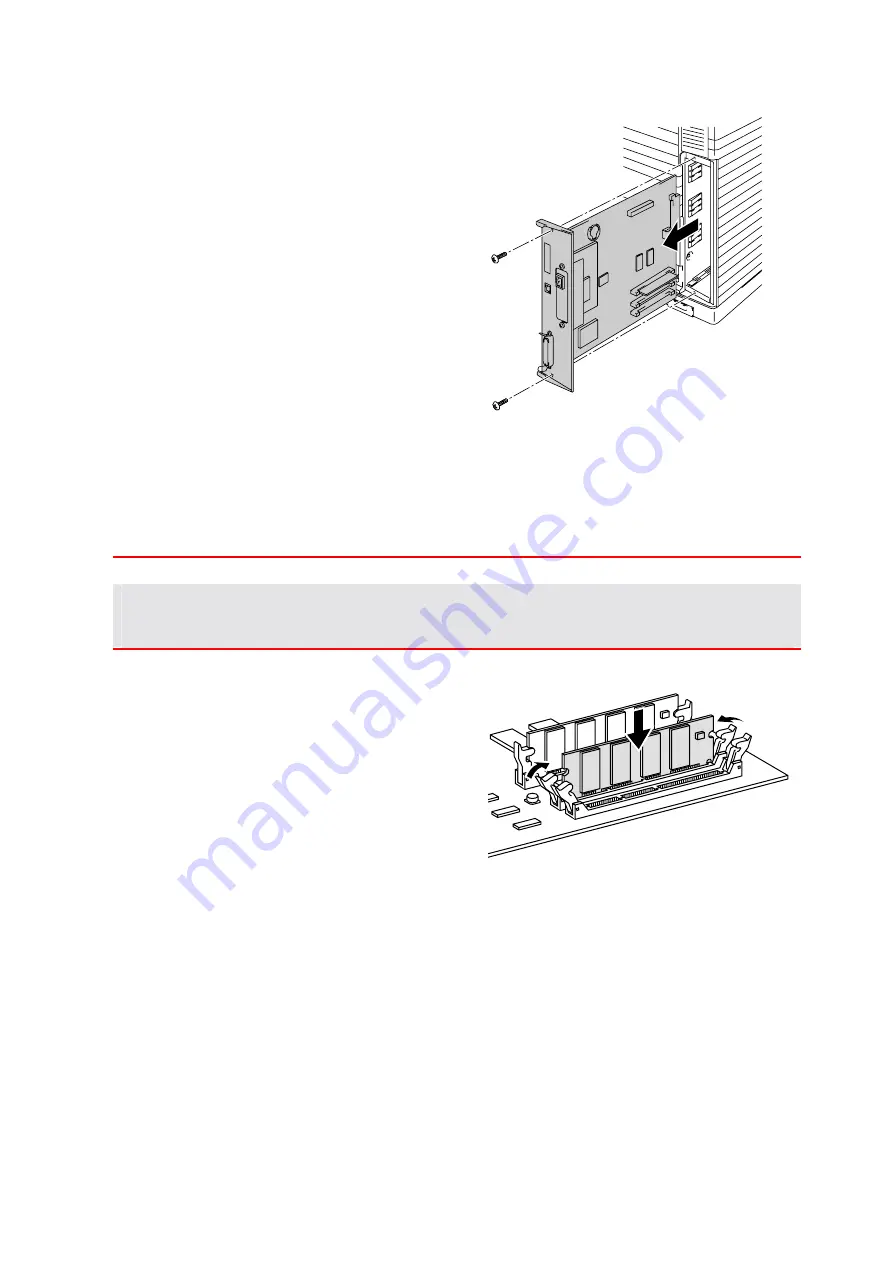
Unscrew the two screws that
secure the rear plate of the main
controller board, and then pull out
the main controller board.
Fig. 6-26
3.
Unpack the DIMM and hold it by its edges.
!
Caution
Do not touch the memory chips and the surface of the main controller board.
If static electricity collects, it may damage these electrical parts.
4.
Hold the DIMM with your fingers
on the side edges and thumb
against the back edge. Align the
notches on the DIMM with the
DIMM slot. (Check that the locks
on each side of the DIMM slot are
open, or outward).
Fig. 6-27
Содержание HL-3450CN Series
Страница 46: ...CHAPTER 2 DRIVER AND SOFTWARE 2 12 Graphics Tab 1 Set the print quality ...
Страница 116: ...CHPTER 5 MAINTENANCE C C CH H HA A AP P PT T TE E ER R R 5 5 5 M M MA A AI I IN N NT T TE E EN N NA A AN N NC C CE E E ...
Страница 156: ...CHPTER 6 OPTIONS C C CH H HA A AP P PT T TE E ER R R 6 6 6 O O OP P PT T TI I IO O ON N NS S S ...
Страница 207: ...APPENDIX A A AP P PP P PE E EN N ND D DI I IX X X ...
Страница 220: ...APPENDIX A 13 I I IB B BM M M M M MO O OD D DE E E PC 8 PC 8 D N PC 850 PC 852 PC 860 PC 863 PC 865 PC 8 Turkish ...

