CHAPTER 6 OPTIONS
6-4
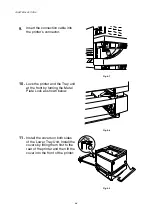
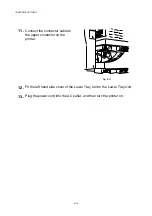
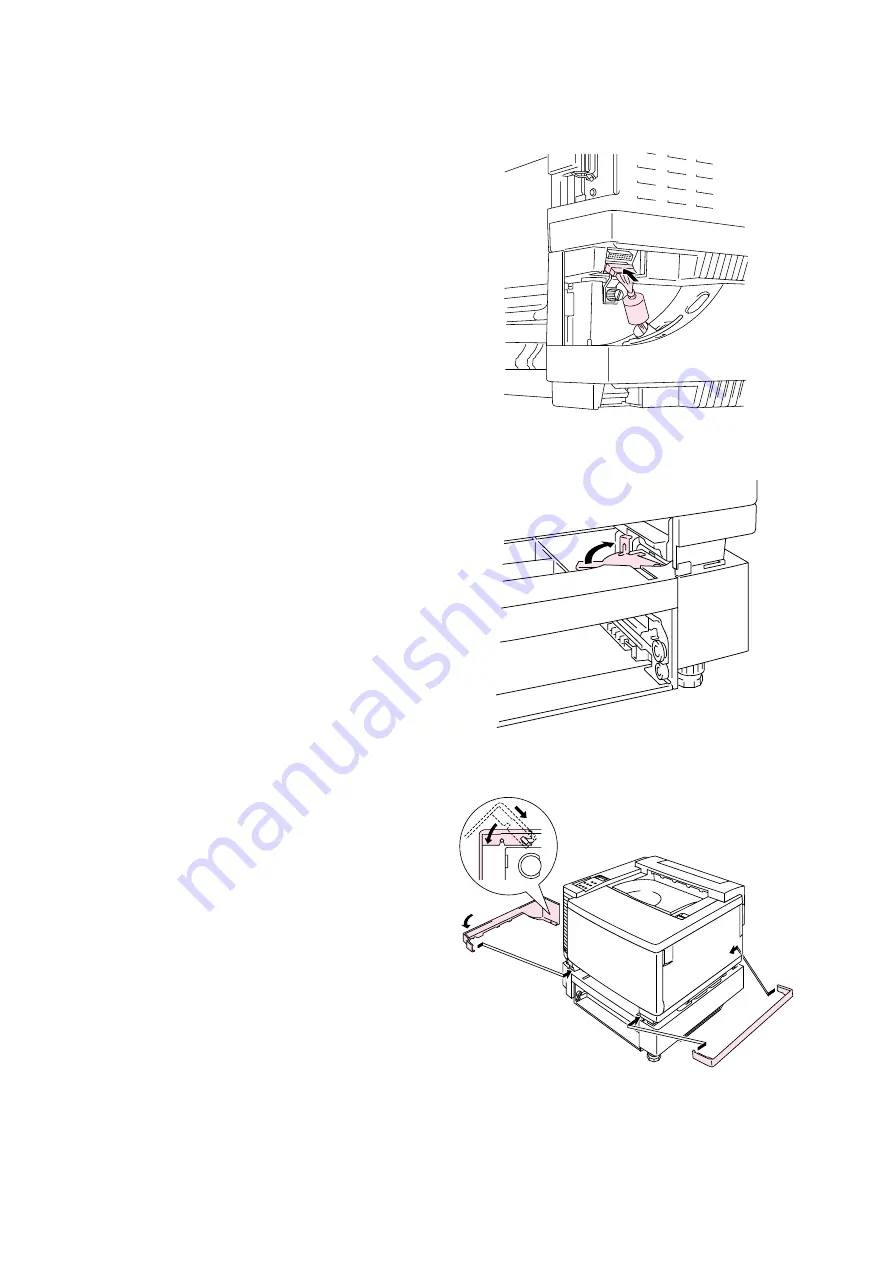
9.
Insert the connection cable into
the printer’s connector.
Fig. 6-7
10.
Lock the printer and the Tray unit
at the front by turning the Metal
Plate Lock as shown below.
Fig. 6-8
11.
Install the covers on both sides
of the Lower Tray Unit. Install the
covers by fitting them first to the
rear of the printer and then fit the
cover into the front of the printer.
Fig. 6-9
Содержание HL-3450CN Series
Страница 46: ...CHAPTER 2 DRIVER AND SOFTWARE 2 12 Graphics Tab 1 Set the print quality ...
Страница 116: ...CHPTER 5 MAINTENANCE C C CH H HA A AP P PT T TE E ER R R 5 5 5 M M MA A AI I IN N NT T TE E EN N NA A AN N NC C CE E E ...
Страница 156: ...CHPTER 6 OPTIONS C C CH H HA A AP P PT T TE E ER R R 6 6 6 O O OP P PT T TI I IO O ON N NS S S ...
Страница 207: ...APPENDIX A A AP P PP P PE E EN N ND D DI I IX X X ...
Страница 220: ...APPENDIX A 13 I I IB B BM M M M M MO O OD D DE E E PC 8 PC 8 D N PC 850 PC 852 PC 860 PC 863 PC 865 PC 8 Turkish ...

