EDITING PATTERNS
Bas
ic Em
b
ro
ide
ry
247
6
d
Press .
Embroidering the Pattern
Repeatedly
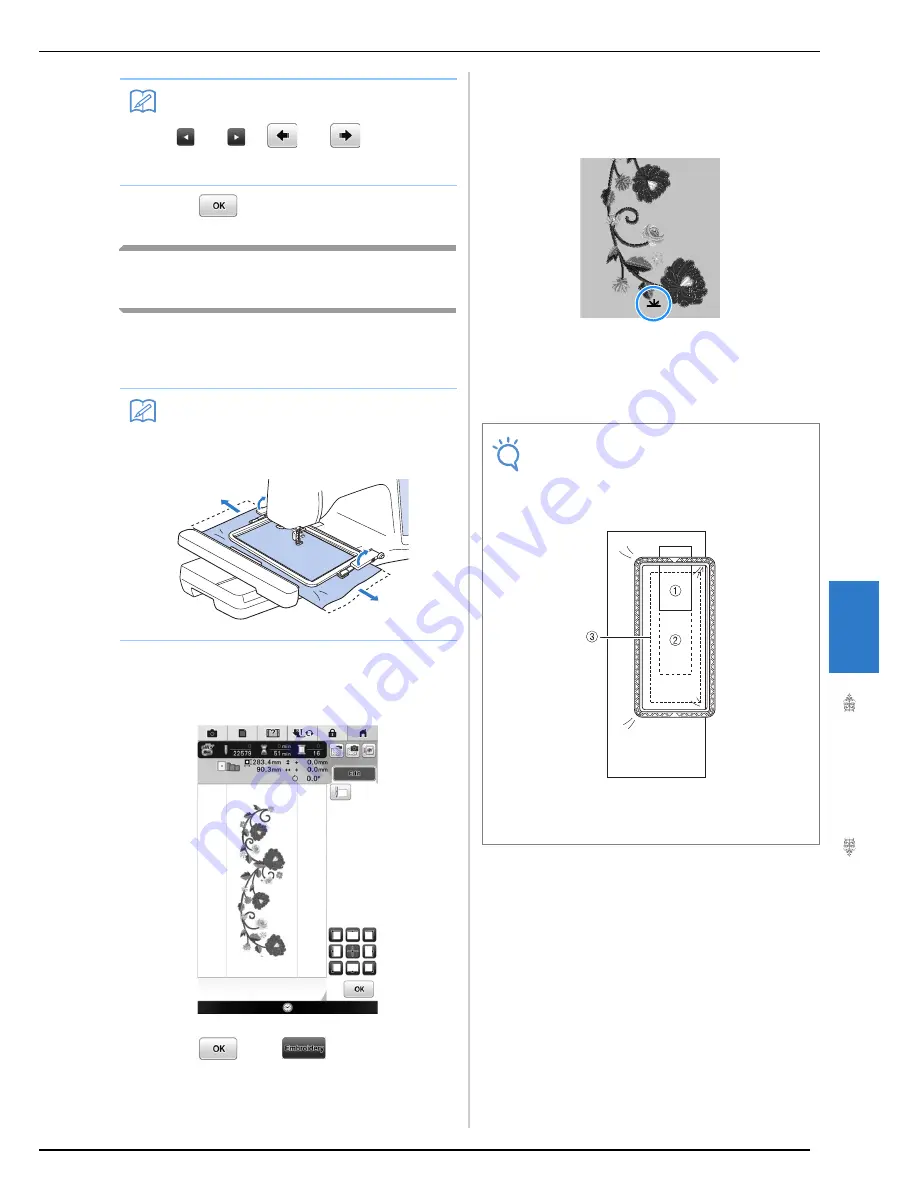
After creating the repeated pattern, rehoop the
embroidery frame and keep sewing for the next
pattern.
a
Select the boarder pattern with the thread
mark at the center of the end of the pattern.
*
Refer to “Assigning Thread Marks” on page 246.
b
Press ,
then .
c
Press the “Start/Stop” button to begin
embroidering.
→
When embroidering is finished, the thread mark is
sewn with the last thread color.
d
Remove the embroidery frame.
e
Rehoop the fabric in the embroidery frame.
Memo
• When there are two or more elements, use
and
or
and
to select a
pattern that you want to assign a thread
mark(s) to.
Memo
• The optional border frame allows you to
easily rehoop the fabric without removing
the embroidery frame from the machine.
Note
• Adjust the position of the fabric so that the
embroidering area for the next pattern is
within the embroidering area of the
embroidery sheet.
a
Pattern embroidered first
b
Position of pattern to be embroidered next
c
Embroidering area of embroidery sheet
Содержание 82-W20
Страница 2: ......
Страница 30: ...NAMES OF MACHINE PARTS AND THEIR FUNCTIONS 28 ...
Страница 82: ...NEEDLE CALIBRATION USING THE BUILT IN CAMERA 80 ...
Страница 170: ...SEWING THE STITCHES 168 ...
Страница 190: ...COMBINING STITCH PATTERNS 188 Press Press ...
Страница 198: ...USING THE MEMORY FUNCTION 196 ...
Страница 210: ...USING STORED CUSTOM STITCHES 208 ...
Страница 264: ...ATTACHING THE EMBROIDERY FRAME 262 b Pull the embroidery frame toward you ...
Страница 286: ...ADJUSTMENTS DURING THE EMBROIDERY PROCESS 284 ...
Страница 338: ...RESUME FEATURE 336 ...
Страница 362: ...ILLUSTRATION SCAN 360 ...
Страница 418: ......
Страница 419: ......


