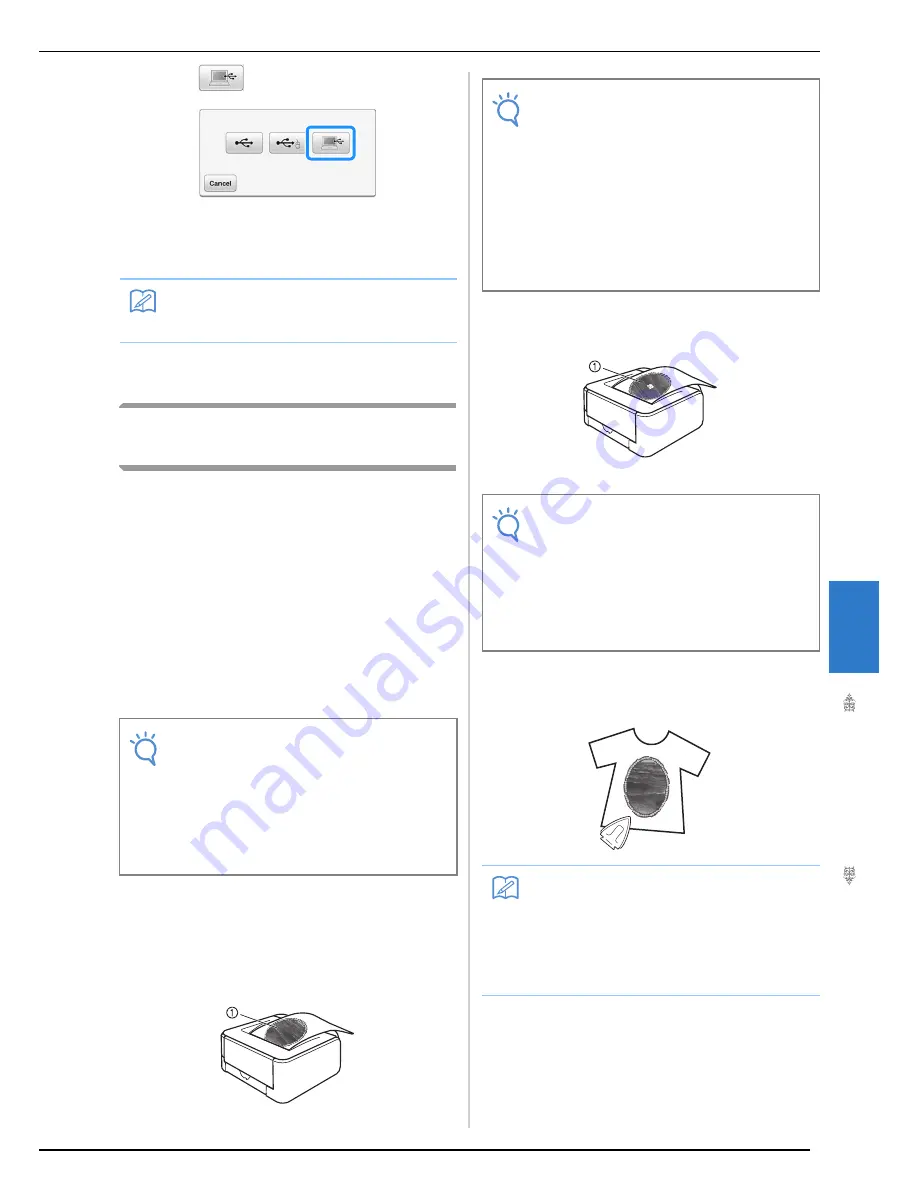
PRINT AND STITCH (COMBINING EMBROIDERY PATTERNS AND PRINTED DESIGNS)
Ad
va
n
ced
Em
br
oi
d
er
y
299
7
c
Press .
→
Two files of the background image and one file for
aligning embroidery into position are copied (PDF
format) into “Removable Disk” under “Computer
(My Computer)”.
d
Copy the image data saved in “Removable
Disk” into a different file before closing.
Printing the Background and
Embroidery Position Sheet
Print the PDF files of the background and
embroidery position sheet. The background file
that is printed differs depending on whether iron-
on paper or printable fabric is used.
To view the PDF file, Adobe
®
Reader
®
is needed. If
it is not installed on your computer, you can
download it from the Adobe Systems website:
http://www.adobe.com/
a
Open the PDF file to be printed, click
“File”-“Print”, and then set “Page Scaling”
to “None (100%)”.
b
Print the background image.
*
When printing onto iron-on paper, print the file
named E_1r.pdf (an image flipped on a vertical axis).
When printing onto printable fabric, print the file
named E_1n.pdf (an image that is not flipped).
a
Background image
c
Print the embroidery position sheet (file
named E_1p.pdf) onto plain paper.
a
Embroidery position sheet
d
If an iron-on transfer sheet is used, transfer
the image onto fabric.
Memo
• Do not disconnect the USB cable from the
machine until data output is finished.
Note
• Print the background and embroidery
position sheet in their original dimensions. If
an image is printed in a different size, the
sizes of the embroidery pattern and
background may not match. In addition, the
built-in camera cannot detect the
embroidery position mark. Make sure that
the print settings are correctly specified.
Note
• Before printing onto iron-on paper or
printable fabric, we recommend performing
a test print to check the print settings.
• For details on printing on iron-on transfer
sheets or printable fabric, refer to the
instructions for the iron-on transfer sheets
and printable fabric.
• Some printers will automatically print an
image flipped if an iron-on transfer sheet is
selected as the paper. For details, refer to
the instructions for the printer being used.
Note
• When printing the PDF file for the
embroidery position sheet, specify the
highest image quality possible for full-color
printing. In addition, we recommend
printing on matte paper. If this is not done,
the built-in camera may not be able to
correctly detect the embroidery positioning
mark.
Memo
• For details on transferring from iron-on
transfer sheets, refer to the instructions for
the iron-on transfer sheets.
• If necessary, cut the iron-on transfer sheet
to the size of the pattern before transferring
the image.
Содержание 82-W20
Страница 2: ......
Страница 30: ...NAMES OF MACHINE PARTS AND THEIR FUNCTIONS 28 ...
Страница 82: ...NEEDLE CALIBRATION USING THE BUILT IN CAMERA 80 ...
Страница 170: ...SEWING THE STITCHES 168 ...
Страница 190: ...COMBINING STITCH PATTERNS 188 Press Press ...
Страница 198: ...USING THE MEMORY FUNCTION 196 ...
Страница 210: ...USING STORED CUSTOM STITCHES 208 ...
Страница 264: ...ATTACHING THE EMBROIDERY FRAME 262 b Pull the embroidery frame toward you ...
Страница 286: ...ADJUSTMENTS DURING THE EMBROIDERY PROCESS 284 ...
Страница 338: ...RESUME FEATURE 336 ...
Страница 362: ...ILLUSTRATION SCAN 360 ...
Страница 418: ......
Страница 419: ......


