LabelMark 3.1 User Guide
Enter the dimensions as shown in the example below and then select
Rotated
so your labels will
print properly.
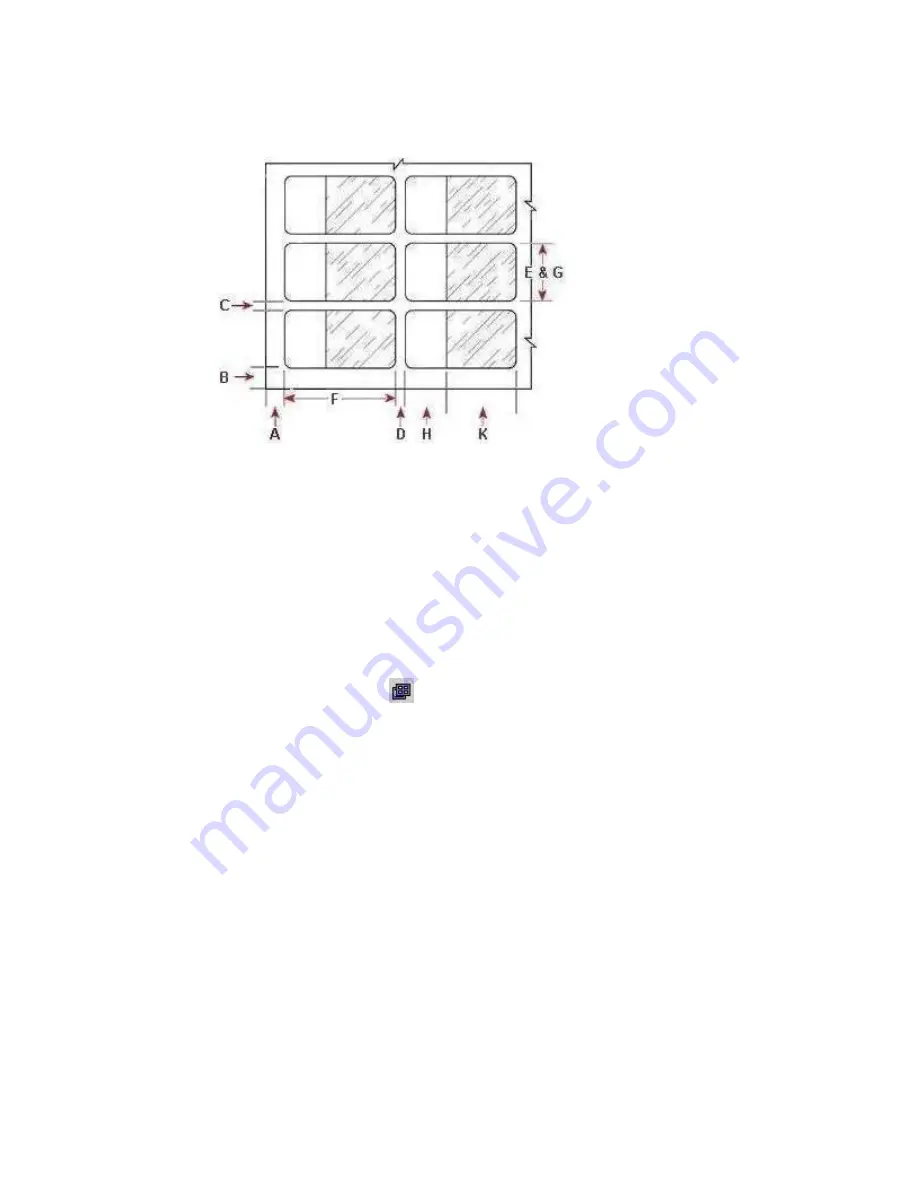
Landscape View of Rotated Sheet-Fed Part Layout
A – Top margin
B – Left margin
C – Horizontal gap
D – Vertical gap
E – Label width
F – Label height
G – Printable width
H – Printable height
K – Overlaminate
Note:
X- and Y-
Offset are zero for
this example.
6. Click
Save Part to Database
to create a new custom label part that you can use in other label
files.
LabelMark
prompts for a part name and ensures that you do not overwrite a master part
name.
Note:
The part you create will appear in the parts list the next time you create a new label file.
7. Click
Close
when finished.
Deleting a Custom Label Part
To delete a custom label part:
1. Click
the
Label Part Setup
icon
on the
Standard
toolbar.
42
Advanced
LabelMark
Techniques
Содержание LabelMark 3.1
Страница 1: ...LabelMark 3 1 User Guide...
Страница 2: ......
Страница 6: ......
Страница 26: ......
Страница 72: ......
Страница 102: ......
Страница 104: ...LabelMark 3 1 User Guide 98 Symbols Guide...
Страница 105: ...Symbols Guide Symbols Guide 99...
Страница 106: ......


