–
Feed the cable through the cable gland or conduit hole near where the 2-pin terminal
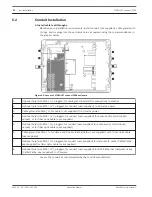
plug connector for the washer pump connections will be installed on the PCBA (item 2).
–
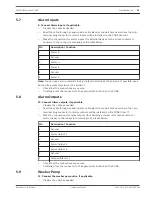
Make the connections to the connector according to the table below.
Pin
Description / Function
1
Relay Normally Open
2
Relay Common
–
Check that the connections are secure.
–
Carefully press the connector to the appropriate location on the PCBA.
Audio In and Out
Note: Audio OUT is not available in initial production units. A firmware update, expected in
mid-2015, is required.
12. Connect Audio IN and OUT, if applicable.
–
Prepare the cable as needed.
–
Feed the cable through an appropriate cable gland or conduit hole near the connectors
for Audio IN and Audio OUT.
–
Connect the cable for Audio IN (9 kohm typical, 5.5 Vpp max. 25) to the second audio
connector (item 6).
–
Connect the cable for Audio OUT (3.0 Vpp at 10 kohm typical; 2.3 Vpp at 32 ohm typical;
1.7 Vpp at 16 ohm typical) to the outermost connector (item 5).
–
Check that the connections are secure.
Local Storage Media (CF Card)
13. Install a CF card to save recordings locally, if applicable.
!
Caution!
Bosch recommends disconnecting power to the unit whenever inserting or removing a CF
card.
Carefully slide a CF card into the card slot (item 9) as far as it will go until it locks into place.
!
Caution!
If the card is formatted already, all existing data will be deleted from the card. Before
inserting the card, check whether the card contains any data that must be backed up.
(To remove a CF card, push carefully in the direction opposite of insertion until the
mechanical catch releases, and then remove the card.)
Final Steps
14. Verify power to the device.
–
Connect the device to the power source.
–
If desired, test the washer by pushing the button on the PCBA (item 4) to activate the
washer pump. Note that for MIC7000, the software in the camera prevents the washer
from running more than 10 seconds continuously to prevent emptying the washer bottle.
15. Complete the installation.
–
Re-attach the enclosure lid.
–
Tighten the four (4) lid screws to 1.5 – 3 N m (13 – 26.5 in. lb) to ensure that the
enclosure is watertight.
5.10
5.11
5.12
26
en | Installation
VIDEOJET connect 7000
2014.10 | 1.4 | F.01U.291.524
Operation Manual
Bosch Security Systems
Содержание VIDEOJET connect 7000
Страница 1: ...VIDEOJET connect 7000 VJC 7000 90 en Operation Manual ...
Страница 2: ......
Страница 58: ......
Страница 59: ......


