MT2136
3-11
MT2136G CE WITH ATHENA CONTROL - M3163 REV C
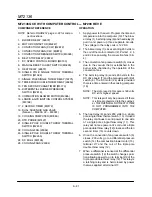
COMPONENT REFERENCE
NOTE: Refer to FIGURE 7 page 3-28 for compoĆ
nent locations.
1. BLOWER SWITCH (M0153)
2. TEMPERATURE CONTROLLER (M3155)
3. MOTOR CONTACTOR (M2247)
4. HI/LO LIMIT BOARD (M3150)
5. CONVECTION FANS (Clockwise - M2873,
CounterĆclockwise - M2872)
6. THERMOCOUPLES (Dual lead - M3151,
Single - M3152)
7. HEAT SWITCH (M0152)
8. CONVECTION PRESSURE SWITCH (M0595)
9. COMBUSTION MOTOR (M2386)
10. BURNER PRESSURE SWITCH (M3330)
11. TPDT RELAY/LATCHING RELAY (M6519)
12. 10 SECOND PURGE TIMER (M3173)
13. SPST RELAY (16775)
14. SPST N.C. THERMAL SWITCH
(M1362, L140Ć20F or M2734, L165Ć30F)
15. SPST N.C. THERMAL SWITCH
(M1362, L140Ć20F or M2734, L165Ć30F)
16. IGNITION CONTROL MODULE/
LANDIS & GYR (M3168)
17. 2 SECOND PURGE TIMER (M3172)
18. PILOT VALVE (LP - M6001, Natural - M6000)
19. MAIN VALVE (LP - M6001, Natural - M6000)
20. IGNITION ALARM LIGHT (16037)
21. COOLING FANS (23034)
22. SPST N.O. THERMAL SWITCH
(M0635, F110Ć20F)
23. SPST N.O. THERMAL SWITCH
(M0635, F110Ć20F)
24. CONVEYOR SWITCH (M0152)
25. TIME DISPLAY (M3154)
26. 10k
W
POTENTIOMETER (M3145)
27. DC SPEED CONTROL BOARD (M3147)
28. 180 VDC MOTOR (M3128) (M3147)
29. #10 HALL EFFECT PICKUP (M3147)
OPERATION
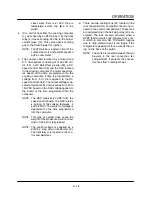
1. Turn the blower switch (1) to ON. The N.O. conĆ
tacts close, the N.C. contacts open. 220 or 240
VAC runs to terminal L1 of the temperature
controller (2), the coil of the motor contactor (3)
and terminals #2 and #7 of the hi/lo limit board
(4). Terminal #7 is an output. It remains powĆ
ered after the oven is shut down to keep the
convection fans (5) operating until the unit
reaches 57-77
C (135-170
F) as sensed by
the thermocouples (6).
NOTE: Two thermocouples are located beĆ
tween the middle convection fans in
the rear of the oven. One thermocouple
provides DC millivolts to the Hi/Lo limit
board. The other provides DC milivolts
to the temperature controller. Check
thermocouples with a millivolt meter.
2. Turn the heat switch (7) to ON. Power goes to
the common terminal of the temperature conĆ
troller (2) and terminal #5 of the Hi/Lo limit
board (4). A switch is made between terminals
#5 and #6 of the Hi/Lo board. This switch
opens if the oven cavity temperature exceeds
316
C (600
F). Terminal #6 of the Hi/Lo board
is an output and sends power to a convection
pressure switch (8). The switch reacts from a
vacuum created by the convection fans. If the
switch is closed, power runs to the combustion
motor (9), the common terminal of the burner
pressure switch (10), and terminal #7 of a
TPDT relay (11).
NOTE: This relay acts as a latching relay and
remains powered up even after the
burner pressure switch changes state.
The burner pressure switch should be made
between common and N.C., sending power to
terminal #4 and the coil of the latching relay.
3. When the combustion motor (9) reaches full
speed, the burner pressure switch (10) toggles
between common and N.C. to common and
N.O. Power goes to terminal #9 of the latching
relay (11). This relay is latched due to voltage
passing from terminal #7 through a set of
closed contacts to terminal #4 to its coil. A set
of contacts are also closed between terminals
#9 and #6 of the same relay, sending power
to a 10 second purge timer (12). When the timĆ
Содержание MT2136 Series
Страница 4: ...INTRODUCTION CHAPTER 1 ...
Страница 15: ...MT2136 1 11 35 30 35 29 39 28 38 33 34 31 37 36 26 27 32 EXTERIOR COMPONENTS FIGURE 3 ...
Страница 17: ...MT2136 1 13 CE GAS BURNER COMPONENTS Control Box not Shown 16 17 FIGURE 5 ...
Страница 18: ...INTRODUCTION 1 14 CONTROL PLATE ASSEMBLY 18 25 16 26 21 19 20 24 23 22 EXCLUSIVE TO CE 40 41 42 43 FIGURE 6 ...
Страница 19: ...MT2136 1 15 This page intentionally left blank ...
Страница 20: ...ASSEMBLY CHAPTER 2 ...
Страница 23: ...MT2136 2 3 This page intentionally left blank ...
Страница 24: ...OPERATION CHAPTER 3 ...
Страница 49: ...MT2136 3 25 16 17 18 19 20 21 12 13 13 13 4 7 15 3 2 1 14 8 9 10 6 11 5 5 FIGURE 4 ...
Страница 50: ...OPERATION 3 26 16 17 20 19 18 15 3 12 13 13 13 4 14 7 1 2 8 9 10 6 11 5 5 FIGURE 5 ...
Страница 51: ...MT2136 3 27 22 23 24 25 26 21 19 18 18 18 4 7 1 3 2 20 5 5 11 12 13 14 15 16 8 17 6 9 10 FIGURE 6 ...
Страница 52: ...OPERATION 3 28 25 26 27 29 28 2 24 23 22 21 21 21 3 1 7 20 4 16 17 18 19 14 15 8 10 6 11 12 13 9 5 5 FIGURE 7 ...
Страница 53: ...MT2136 3 29 1 17 3 2 4 16 16 16 15 21 5 13 14 14 10 18 19 6 7 8 20 9 12 11 FIGURE 8 ...
Страница 54: ...OPERATION 3 30 1 18 16 16 16 16 17 15 22 5 3 2 4 13 10 19 20 6 7 8 21 9 12 11 14 14 FIGURE 9 ...
Страница 55: ...MT2136 3 31 1 21 21 21 17 16 22 18 20 19 14 3 2 4 11 6 13 12 15 10 7 8 9 5 FIGURE 10 ...
Страница 56: ...OPERATION 3 32 1 8 8 8 8 6 7 16 15 17 18 3 2 4 11 5 9 9 12 13 14 FIGURE 11 ...
Страница 57: ...MT2136 3 33 1 6 9 8 19 22 21 7 16 17 2 3 4 18 5 10 14 20 12 11 13 15 25 25 25 24 FIGURE 12 ...
Страница 58: ...OPERATION 3 34 1 FIGURE 13 ...
Страница 60: ...CALIBRATION AND ADJUSTMENT CHAPTER 4 ...
Страница 77: ...MT2136 4 17 This page intentionally left blank ...
Страница 78: ...TROUBLESHOOTING CHAPTER 5 ...
Страница 86: ...TECHNICAL APPENDIX CHAPTER 6 ...


