background image

  57

  Playing a disc

Eng
lish

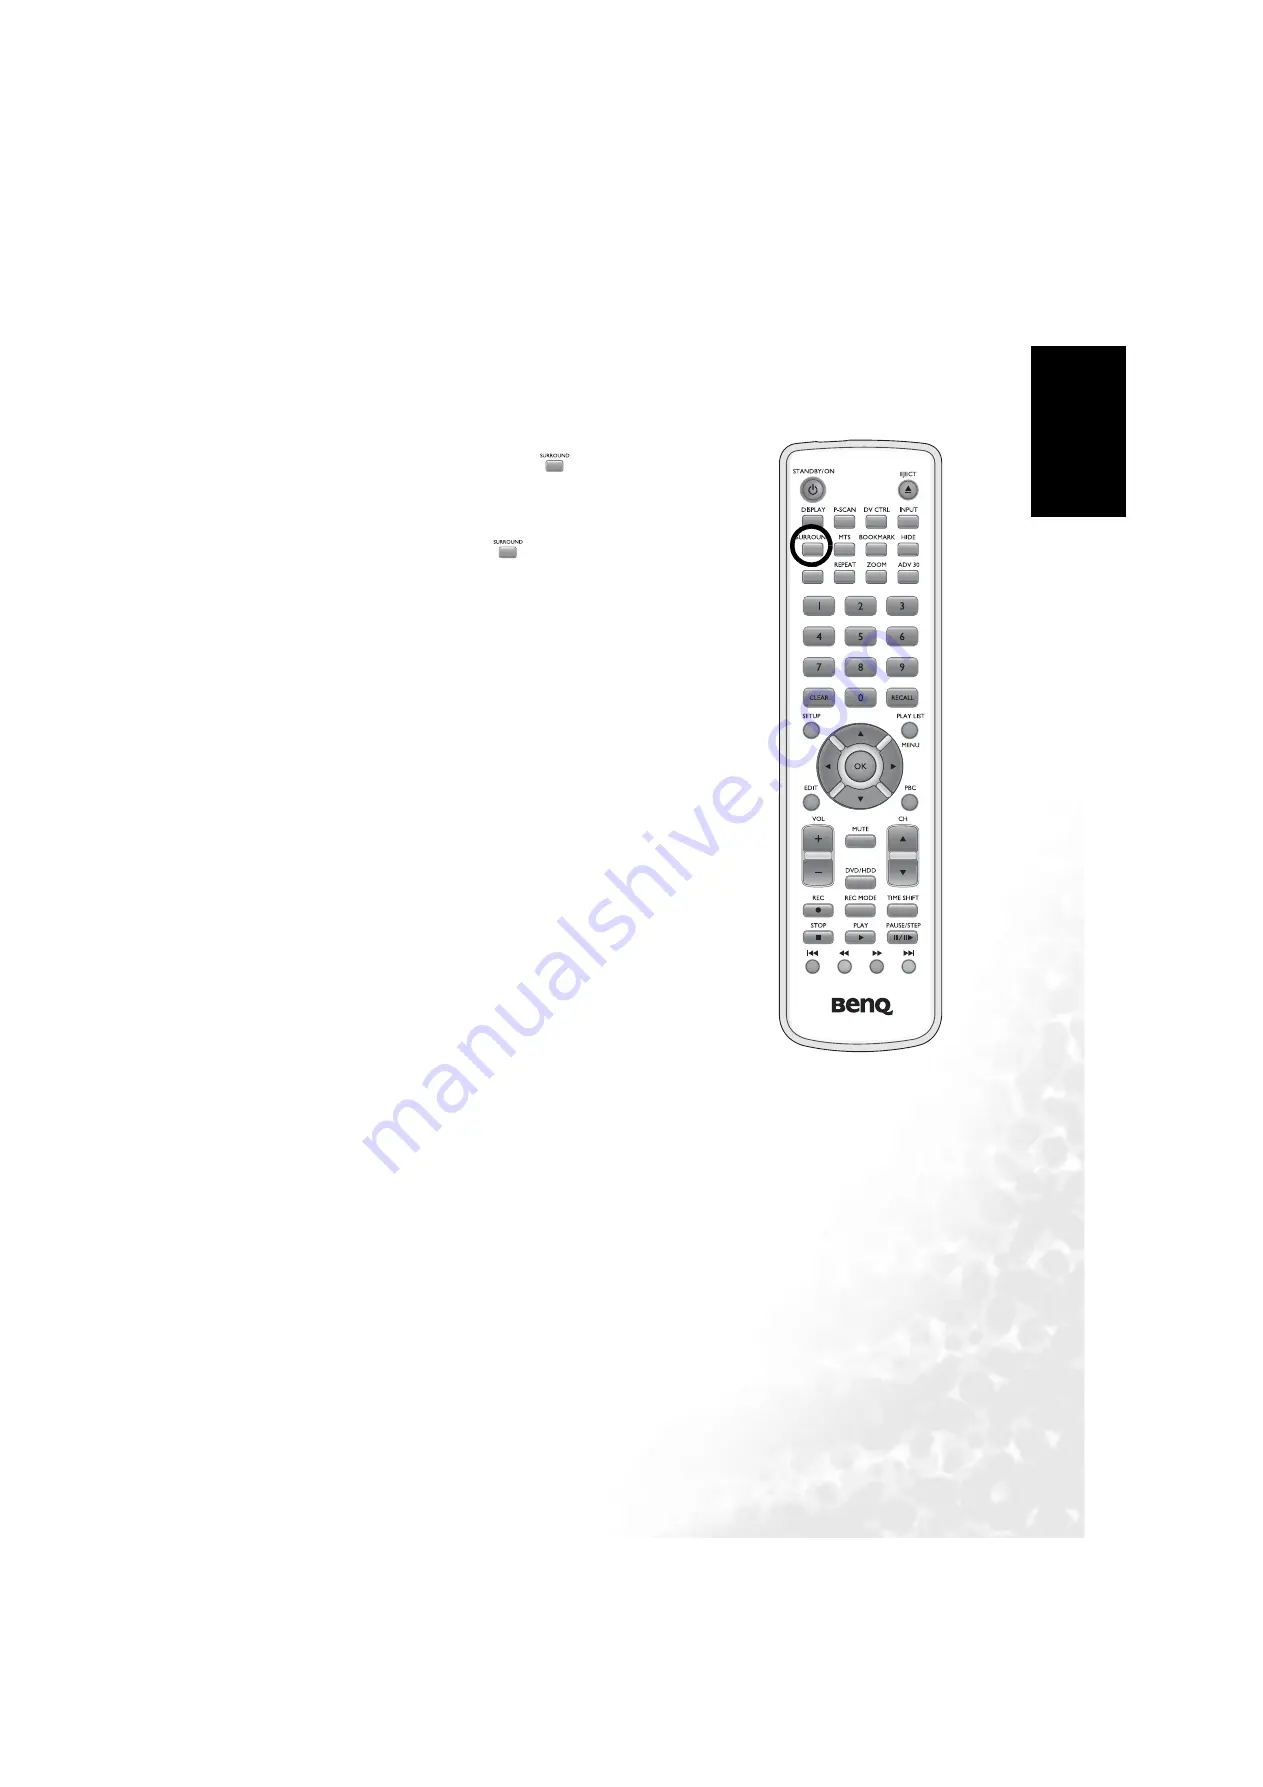
Surround sound effect

Some DVD videos provide Surround sound effect. You can set the DVD Recorder to play the 
sound effect following the steps below.

1. While playing a disc that provides Surround sound 

effect, press the 

Surround


button on the 

remote control. The appearance of a ’

Surround

’ 

icon indicates that the Surround sound effect has 

been activated.

2. Press the 

Surround


button again to deactivate 

Surround sound effect.

Содержание DE350

Страница 1: ...Welcome English DE350 DVD Recorder User s Manual ...

Страница 2: ...anel of the device as poor ventilation over a long period may result in damage to internal components and device failure Do not change the mains plug to a different type or allow the power cable to be damaged The mains plug on the power cable can used as a power disconnection device and must remain readily accessible at all times Disconnect and isolate the device from the power supply when it isn ...

Страница 3: ...TV using an A V cable 17 Connecting the DVD Recorder to the TV antenna cable 18 Connecting the DVD Recorder to your surround sound system 19 Connecting the DVD Recorder to your stereo sound system 21 Connecting an A V device to the DVD Recorder 22 Connecting a VCR to the DVD Recorder using an S video cable 23 Connecting a VCR to the DVD Recorder using an A V cable 24 Connecting a Camcorder to the ...

Страница 4: ... of selected photos 60 How to delete photos from a slide show 61 How to set up slide show play speed 61 Using the DV pass through control function 62 Using the time shift function 63 Recording 64 Record mode 65 Changing record mode 66 Manual recording 67 Sleep mode recording 69 Pausing recording 70 Schedule recording 71 General Information 71 Setting up schedule recording 72 Changing or erasing sc...

Страница 5: ...ences 95 System Setup 96 Guide Language 96 Set Time 96 System Info 96 Factory Reset 96 Video Setup 97 TV Signal 97 Channel Scan 97 Channel Setup 97 Screen Format 97 Video Output 97 Audio Setup 99 Dolby Digital 99 DTS 99 MPEG 99 Sampling Freq Frequency 100 Vocal 100 DRC 100 Record Setup 101 Record Quality 101 DVD Auto Chap Chapter 101 Schedule Rec Record 101 Disc Setup 102 Audio Language 102 Subtit...

Страница 6: ...arental control 106 Changing the access control country setting 107 Changing deleting the parent control password 108 How to change parent control password 108 How to delete parent control password 108 Troubleshooting 109 Product Specifications 112 ...

Страница 7: ...al describes all the features of the DVD Recorder Refer to it whenever you need assistance and please pay attention to all notes cautions and warnings Features Real time recording using a DVD RW DVD R disc or the built in hard disk Built in TV tuner for recording from TV CATV programs Recorded discs can be played on most DVD players Schedule recording Records two channel audio in MPEG 1 Layer II o...

Страница 8: ...DVD which means you can erase data previously recorded on the disc and record new data on the disc Playback DVD The BenQ DE350 DVD Recorder is equipped with a region code copyright protection mechanism appropriate for the region where you purchased the unit In some countries you can only play DVDs with a region code which matches that of your DVD Recorder DVD R DVD RW DVD R and DVD RW must be reco...

Страница 9: ...for Recording TV Antenna DV input IEEE 1394 Firewire S Video input Analog composite video input Analog audio input Outputs TV Antenna loop through S Video output Analog composite video output Component video output Digital audio output Analog audio output ...

Страница 10: ...ogram 5 Next Press to jump to next chapter track 6 Stop Press to stop playing or recording 7 Play Press to play a disc 8 Previous Press to jump to previous chapter track 9 Disc tray Place disc face down label side up here 10 DV input For connecting to a DV or other devices using IEEE 1394 FireWire 11 Audio input right channel For connecting to the audio output right channel terminal of other devic...

Страница 11: ...other devices 8 Audio Out Left channel White For connecting to the audio input left channel terminal of other devices when using component output 9 Audio output Right channel Red For connecting to the audio input right channel terminal of other devices when using component output 10 11 12 Component output Red Blue Green For connecting to the component progressive scan video input terminal of other...

Страница 12: ...ol function on or off Input Press to switch between signal sources Surround Press to turn toggle surround sound effect on or off MTS Press to switch audio between Stereo SAP and Mono modes when viewing TV CATV programs Bookmark Press to insert a bookmark when viewing a disc Hide Press to hide newly inserted chapter A B repeat Press to access the A B repeat function Repeat mode Press to select a re...

Страница 13: ...rm a selected item in the Setup menu Edit Press to show hide the Edit menu PBC Press to display the PBC disc menu of the VCD that is being played Volume Press to increase or decrease audio volume Mute Press to turn off sound temporarily Press again to resume sound DVD HDD Press to toggle recording media between DVD and the HDD Channel Press to select the previous or next channel Record Press to st...

Страница 14: ...e currently playing content Press this button again to display the video image frame by frame Reverse Press to fast reverse the media content at different rewind rates Forward Press to fast forward the media content at different forward rates Previous Press to jump to the previous title chapter while playing a DVD Next Press to jump to the next title chapter while playing a DVD ...

Страница 15: ...c is being erased BLANK DISC The disc inserted is either new or has been completely erased no recordings PROTECTED The disc is protected against recording CHxx Current TV channel where xx represents the channel number DISC FULL The disc is full There is no space for new recordings DISC ERR An error occurred when the title was being written BLOCKED It is not possible to close open the disc tray 6 L...

Страница 16: ...lable selected 17 Lit when an MPEG audio signal is available on the digital audio output 18 Lit when the number displaying above it is the remaining playback time of the disc being played 19 Lit when a PCM audio signal is available on the digital audio output 20 Lit when a DTS audio signal is available on the digital audio output 21 Lit when 2 channel stereo audio is available on the analog audio ...

Страница 17: ... by pressing the Setup button on the remote control Navigating the Setup menu Press the Down or Up button on the remote control to move the highlight bar to the desired item Press the Right button on the remote control to enter activate the currently selected highlighted menu item Press the Left button on the remote control to return to the parent menu Press the OK button on the remote control to ...

Страница 18: ...audio settings Launch the Display menu by pressing the Display button on the remote control Navigating the Display menu Press the Down or Up button on the remote control to move the highlight bar to the desired item Press the Right or Left button on the remote control to select an option Press the OK button on the remote control to confirm the selection ...

Страница 19: ...o display the disc contents then launch the Edit menu by pressing the Edit button on the remote control When playing an unfinalized DVD R or DVD RW disc the following title chapter Edit menu will display on screen if you press the Edit button Navigating the Edit menu Press the Down or Up button on the remote control to move the highlight bar to the desired item Press the OK button on the remote co...

Страница 20: ...and projectors use component video natively so if available on your display device this should be your connection method of choice Better video quality The S Video method provides a better quality analog video than standard A V If you have both A V and S Video input terminals on your display device you should elect to use the S Video option Least video quality You at least need a display device TV...

Страница 21: ...terminals on the rear of the DVD Recorder labelled COMPONENT 2 Connect the other end of the component cable to the appropriate component video sockets on the TV 3 Take a suitable stereo audio cable not provided and connect one end to the OUT terminals on the rear of the DVD Recorder labelled AUDIO 4 Connect the other end of the audio cable to the appropriate audio input sockets on the TV or sound ...

Страница 22: ... terminal on the rear of the DVD Recorder labelled S VIDEO 2 Connect the other end of the S Video cable to the appropriate S Video socket on the TV 3 Take a suitable stereo audio cable not provided and connect one end to the OUT terminals on the rear of the DVD Recorder labelled AUDIO 4 Connect the other end of the audio cable to the appropriate audio input sockets on the TV or sound system The fi...

Страница 23: ...s how you can connect to the TV How to connect the DVD Recorder to a TV using the A V cable 1 Take the provided A V cable and connect one end to the OUT terminals on the rear of the DVD Recorder labelled VIDEO 2 Connect the other end of the A V cable to the appropriate composite Video A V sockets on the TV The final connection path should be like that shown in the following diagram A V cable Conne...

Страница 24: ...other channel or is turned off How to connect the DVD Recorder to the TV antenna cable 1 Locate the TV antenna cable on the rear of the TV and unplug it from the TV 2 Plug this cable into the rear of the DVD Recorder in the socket labelled ANTENNA 3 Take the separate TV RF fly lead cable supplied connect one end to the DVD Recorder in the socket labelled TV and the other end into the appropriate s...

Страница 25: ...layed which contains suitable digital audio tracks How to connect to a digital audio decoding device using a coaxial digital cable 1 Take a suitable coaxial digital audio cable not provided and connect one end to the COAXIAL terminal on the rear of the DVD Recorder labelled DIGITAL AUDIO OUT 2 Connect the other end of the digital coaxial audio cable to an appropriate audio input socket on your sur...

Страница 26: ...abelled DIGITAL AUDIO OUT 2 Connect the other end of the digital optical audio cable to an appropriate audio input socket on your surround sound system decoding device You will need to select this input on the sound system when playing DVDs The final connection path should be like that shown in the following diagram Digital optical audio cable Connect the digital optical audio cable to the digital...

Страница 27: ...audio cable not provided and connect one end to the OUT terminals on the rear of the DVD Recorder labelled AUDIO 2 Connect the other end of the audio cable to appropriate audio input sockets on the rear of your stereo sound system You will need to select this input on the sound system when playing audio DVDs or CDs The final connection path should be like that shown in the following diagram Audio ...

Страница 28: ...e on page 24 Temporary connections The BenQ DE350 DVD Recorder also has two video input connectors on the front panel for temporary connection of Audio Video A V equipment like a video camera using either Digital Video IEEE 1394 Firewire or Composite video A V See Connecting a Camcorder to the DVD Recorder using a DV cable on page 25 or See Connecting a Camcorder to the DVD Recorder using an A V c...

Страница 29: ...he appropriate S Video socket on the rear of the VCR 3 Take a suitable stereo audio cable no supplied and connect one end to the IN terminal on the rear of the DVD Recorder labelled AUDIO 4 Connect the other end of the audio cable to the appropriate audio output socket on the rear of the VCR The final connection path should be like that shown in the following diagram Audio cable Connect the audio ...

Страница 30: ...le only one is supplied and connect one end to the IN terminals on the rear of the DVD player labelled VIDEO 2 Connect the other end of the A V cable to the appropriate A V sockets on the rear of the VCR The final connection path should be like that shown in the following diagram Connect the A V cable to the composite video output terminals on the VCR A V cable ...

Страница 31: ...onnect a DV Camcorder using a DV cable 1 Locate a suitable DV IEEE 1394 cable not supplied and connect one end of it to the appropriate socket in the front panel of the DVD Recorder 2 Connect the other end of the DV cable to the appropriate DV socket on the Digital Camcorder The final connection path should be like that shown in the following diagram Connect the DV cable to the DV output terminal ...

Страница 32: ...ing an A V cable 1 Locate a suitable A V cable only one is provided and connect one end of it to the appropriate A V sockets in the front panel of the DVD Recorder 2 Connect the other end of the A V cable to the appropriate A V sockets on the Camcorder The final connection path should be like that shown in the following diagram A V cable Connect the A V cable to the audio output and video output t...

Страница 33: ...sing the DVD Recorder you will also need to connect the TV antenna cable to the DVD Recorder BEFORE proceeding any further The DVD Recorder initial startup will attempt to search for and store all TV channels it finds on the antenna connection You can sort and edit this list using the OSD Setup menu commands at any later time that suits you See Connecting to a display device TV or projector on pag...

Страница 34: ...ted in the battery compartment 4 Refit the cover of the battery compartment by aligning the lugs and sliding it into position Tips for using the remote control Point the front end of the remote control directly towards the front panel of the DVD Recorder not the TV screen If you can t see the front panel of the DVD Recorder the remote control will likely not work properly with it Do not use the re...

Страница 35: ...the DVD Recorder English Connecting power 1 Locate the power cord from the package 2 Connect the DVD Recorder to mains power using the power cord 3 Press the power button on the front panel to turn on the DVD Recorder ...

Страница 36: ... 2 You will then be asked to select a TV input source This step allows you to select the correct type of TV antenna cable you have connected to the DVD Recorder If TV signal is connected to the DVD Recorder press the OK button on the remote control If CATV cable is connected to the DVD Recorder press the Up or Down button on the remote control to move the highlight bar to CATV and then press the O...

Страница 37: ...formation 3 Press the Right button to highlight Start and then press the OK button Set the Time manually Note The clock settings do not take effect until you select Save at the end of this procedure Press the Up or Down button on the remote control to move the highlight bar to Manual and then press the OK button Now you are ready to set the Month How to set the Month Press the numbered buttons to ...

Страница 38: ... so enter a leading zero 0 for the hours 1 to 9 Press the Right button on the remote control to move the highlight bar to the m Minute item and then press the numbered buttons to enter the minute so enter a leading zero 0 for the minutes 1 to 9 Tip You can also use the Up or Down buttons to adjust the value For example To enter the time 4 15 press 0 4 1 and 5 To enter the time 12 34 press 1 2 3 an...

Страница 39: ... channel settings 1 Press the Setup button on the remote control to launch the Setup menu 2 Press the Up or Down button to select the Video Setup icon 3 Press the Right button and then press the Up or Down button to select Channel Scan 4 Press the Right button to highlight Start and then press the OK button to begin channel searching The DVD Recorder will store all channels that it finds This may ...

Страница 40: ... the list is indicated by the position number CH xxx where xxx represents the three digit channel position number This number is recorded in the name of a video when a DVD recording is being made from the ANTENNA input How to add delete channels 1 Display the channel frequency list See How to view a listing of stored TV channels above 2 Press the Right button to move the highlight bar on the chann...

Страница 41: ...he initial setup 1 Press the Setup button on the remote control to launch the Setup menu 2 Press the Up or Down button to select Disc Setup icon 3 Press the Right button and then press the Up or Down button to select a category Language categories Audio Language DVD playback audio language Subtitle Lang DVD playback subtitle language Menu Language DVD Recorder Setup menu language 4 Press the Right...

Страница 42: ...to manually alter the Setup clock you can use the numbered buttons on the remote control to enter the time and date directly into the DVD Recorder 1 Press the Setup button on the remote control to launch the Setup menu 2 Press the Up or Down button to select System Setup icon 3 Press the Right button and then press the Up or Down button to select Set Time 4 Press the Right button and then refer to...

Страница 43: ...See Loading a disc on page 38 and Playing a disc on page 39 Note When turning on the DVD Recorder please wait approximately 10 seconds for the unit to initialize before it outputs a signal to your display device Once a disc has been loaded If the word PIN displays on the front display panel The disc is locked for adults only See Parental control on page 104 for details If the disc won t play and r...

Страница 44: ... screen open for editing or playback If the disc is a recordable DVD which is not editable has been protected or finalized the DVD Recorder will play the Picture Index list on screen only for playback Editing will be disabled If the disc is a new DVD R disc you will be prompted to format the disc Press the OK button on the remote control to start formatting the disc If the disc is a prerecorded DV...

Страница 45: ...he Stop button on the remote control or the Stop button on the DVD Recorder How to eject a disc 1 To open the disc tray press either the Eject button on the remote control or the Eject button on the DVD Recorder Tip To navigate around a playing disc see Operations while playing a disc on page 47 Note To view disc information title chapter play time during playback press the Display button on the r...

Страница 46: ...used disc press either the Play button on the remote control or the Play button on the DVD Recorder The current title chapter and playing time information will display momentarily on screen How to stop playing a DVD 1 To stop playing a disc press either the Stop button on the remote control or the Stop button on the DVD Recorder The current title chapter and playing time information will display o...

Страница 47: ...display on the screen 7 Press the Play button to play the play list 8 To stop playing the play list press the Stop button How to start playing a music CD 1 To start playing a stopped or paused disc press either the Play button on the remote control or the Play button on the DVD Recorder If the screen is on the Track and Length information will display on screen How to play a specific track on the ...

Страница 48: ...ress the OK button to delete all marked tracks from the Play List Note You can also highlight Delete All to delete all tracks from the play list Pressing the Clear button on the remote control when the track you wish to delete from the play list is highlighted allows you to delete the track directly How to stop playing a music CD 1 To stop playing a disc press either the Stop button on the remote ...

Страница 49: ...an 16 File format mp3 Filename length no more than 256 characters Albums folders and tracks 32 albums and 999 titles max Sampling frequency 32 44 1 and 48 Hz music recorded with other sampling frequencies will be skipped Bit per second 32 64 96 128 192 and 256 kbps ID3 label Ver 1 and 1 1 In later versions directory names will be displayed as album names and filenames as tracks Important note for ...

Страница 50: ...d play a play list Note To be able to create and play a play list the screen must be turned on 1 Press the Up or Down button on the remote control to highlight the track you wish to add to the play list 2 Press the OK button to mark the track 3 Repeat step 1 and 2 to mark multiple tracks 4 Press the Right button and then press the Up or Down button to highlight Add 5 Press the OK button to add all...

Страница 51: ...ress the OK button to delete all marked tracks from the Play List Note You can also highlight Delete All to delete all tracks from the play list Pressing the Clear button on the remote control when the track you wish to delete from the play list is highlighted allows you to delete the track directly How to stop playing an MP3 CD 1 To stop playing a disc press either the Stop button on the remote c...

Страница 52: ...rder If the DVD Recorder does not play the disc automatically press the Play or button to start playing 2 Press the PBC button on the remote control The PBC menu displays on screen 3 Press the Previous or Next button or the numeric keys on the remote control to select an item on the menu If the PBC menu includes a title list you can select the desired title directly from the menu You can press the...

Страница 53: ...ted If not press the Up or Down button on the remote control to highlight it 3 Press the Left or Right button to select a different title How to select a chapter on a DVD 1 While playing a DVD press the Display button The Display menu displays on screen 2 Press the Down button to highlight the Chapter icon 3 Press the Left or Right button to select a different chapter How to move around within a p...

Страница 54: ...o 8 bookmarks Note Bookmarks cannot be saved If the disc is removed from the DVD Recorder or the DVD Recorder is turned off bookmarks will be erased automatically Skipping to bookmarked scenes 1 Press the Bookmark button on the remote control The Bookmark icon will display on screen 2 Press the Left or Right button to select a bookmark and then press the OK button to confirm Deleting bookmarks 1 P...

Страница 55: ... Press the Play button to resume normal speed Slow forward and reverse 1 While playing a disc press the Pause step button once to pause 2 Press the Forward button for slow forward or press the Reverse button for slow reverse Press the button again to select a speed 3 Press the Play button to resume normal speed Note Audio is disabled when a disc is playing either in fast or slow mode Searching the...

Страница 56: ...ng a disc English Still picture 1 To pause disc playing or recording press the Pause step button on the remote control 2 To resume playing or recording a paused disc press the Play button on the remote control ...

Страница 57: ...desired chapter title or disc and start playing it 2 While playing press the Repeat mode button to select the following repeat modes the corresponding icon and word will display on screen Chapter Repeat a chapter for DVD only Title Repeat a track or a title Off no repeat 3 To switch off the repeat and resume normal playback press the Repeat mode button repeatedly until the repeat icon is displayed...

Страница 58: ...sition you wish to start the repeat sequence The icon A will display on screen 2 When you reach the position you wish to stop the repeat sequence press the A B repeat button again The A B icon will display on screen The sequence will start playing repeatedly 3 To stop repeat play press the A B repeat button until the repeat icon is displayed together with the word OFF ...

Страница 59: ...Press the Down button to select the Camera angle icon If you are unable to select the Camera angle icon The scene you selected was recorded with only one camera and the camera angle function is unavailable Refer to your DVD cover for availability and details of multiple camera angles 3 Press the Left or Right buttons to select the desired angle 4 After a short delay the DVD Recorder will start pla...

Страница 60: ...zoom function 1 While playing a disc press the Zoom button on the remote control 2 Press the Zoom button several times to select the zoom in rate 200 400 or 800 3 Press the Up Down Left and Right buttons to pan the enlarged image 4 Press the Zoom button several times to switch off zoom ...

Страница 61: ... the Setup menu 1 While playing a disc press the Setup button on the remote control and the Setup menu will display on screen 2 Press the Up or Down button to select the Disc Setup icon and then press the Right button 3 Press the Up or Down button to select Audio Language and then press the Right button 4 Press the Up or Down button to select the desired audio language and then press the OK button...

Страница 62: ...ontrol and the Setup menu will display on screen 2 Press the Up or Down button to select the Disc Setup icon and then press the Right button 3 Press the Up or Down button to select Subtitle Lang and then press the Right button 4 Press the Up or Down button to select the desired audio language and then press the OK button 5 Press the Setup button on the remote control to close the Setup menu Changi...

Страница 63: ...r to play the sound effect following the steps below 1 While playing a disc that provides Surround sound effect press the Surround button on the remote control The appearance of a Surround icon indicates that the Surround sound effect has been activated 2 Press the Surround button again to deactivate Surround sound effect ...

Страница 64: ...use this function to skip commercials when playing a recording or disc 1 While playing a disc or recording press the 30 second advance button on the remote control 2 Press the 30 second advance button again if you wish to skip another 30 seconds forward ...

Страница 65: ...nd then press the OK button 3 The highlight bar will appear in the file view area on the left side of the screen automatically Press the Up or Down button to select a photo The thumbnail of the selected photo will appear in the preview area on the right side of the screen 4 Press the OK button to view the selected photo full screen 5 When viewing a photo you can press the Right button to rotate it...

Страница 66: ...he Up Down Right or Left button to highlight the photo you wish to add to the slide show 2 Press the button to mark the photo 3 Repeat step 1 and 2 to mark multiple photos 4 Press the Right button and then press the Up or Down button to highlight Add 5 Press the OK button to add all marked photos to the slide show Note You can also highlight Add All to add all tracks to the play list 6 Press the U...

Страница 67: ...le photos 5 Press the Right button and then press the Up or Down button to highlight Delete 6 Press the OK button to delete all marked photos from the Play List Note You can also highlight Delete All to delete all tracks from the play list Pressing the Clear button on the remote control when the track you wish to delete from the play list is highlighted allows you to delete the track directly How ...

Страница 68: ...r has been connected to the CAM2 input terminal on the front panel of the DVD Recorder and the power has been turned on 1 Press the Stop or Stop button if a disc is playing in the DVD Recorder 2 Press the Input button on the remote control several times until the DV camcorder icon displays on screen 3 Press the DV control button 4 Now you can use the Play Pause step Reverse Forward and Stop button...

Страница 69: ...TV select TUNER 3 Press the Time shift button The video image on the screen will become still However the video signal keeps broadcasting and the DVD Recorder starts recording the signal to the buffer area on the built in hard disk 4 Press the Play or Play button to start playing the recorded signal from the buffer area on the built in hard disk You will continue from the time when the time shift ...

Страница 70: ...sk at several different times until the disk is full including over previous recordings However compared to DVD R and DVD RW type discs due to the physical vulnerability of the hard disk it is comparatively fragile and not suitable to preserve data for a extended period of time It is recommended that you back up the recordings on the hard disk onto DVD R or DVD RW type discs using the Dubbing func...

Страница 71: ... total disc playing time of your DVDs recorded using the DVD Recorder You should set the record mode before starting a recording as the mode cannot be changed during a recording session The possible record modes are Note HQ is the default record mode when you use the record function The maximum allowed length of an individual recording on the hard disk is 12 hours Quality Level Recording time hour...

Страница 72: ...record modes The record mode and available time for record on the selected medium will display momentarily on screen How to change the record mode using the Setup menu 1 Open the Setup menu by pressing the Setup button 2 Press the Up or Down button to select the Record Setup icon and then press the Right button 3 Press the Right button and then press the Up or Down button to select the desired rec...

Страница 73: ... R is selected for recording place an unfinalized suitable DVD in the disc tray If a video source was being displayed it will stop being displayed while the DVD Recorder checks the newly inserted disc The message READING will show on the front display panel When read the OSD on screen display will display listing any previous recordings on the disc Should any other messages display on screen the d...

Страница 74: ...ress either the Stop button on the remote control or the Stop button on the DVD Recorder When you stop recording the title is closed and the file details are written to the medium The DVD Recorder creates the table of contents of the recording ...

Страница 75: ... medium for recording 2 If DVD RW or DVD R is selected for recording place an unfinalized suitable DVD in the disc tray 3 Press the Input button several times to select the video input source you wish to record 4 When you re ready to start recording press either the Record button on the remote control or the button on the DVD Recorder The Record icon will display on screen 5 To activate sleep mode...

Страница 76: ...time by pressing the Pause step button on the remote control The Pause icon will display on screen 2 To resume recording press the Pause step button on the remote control 3 To stop recording press either the Stop button on the remote control or the Stop button on the DVD Recorder ...

Страница 77: ...y recordings Monday through Friday or for weekly recordings to occur on the same day each week If not previously done to program a recording you must set the medium DVD or HDD for the recording and the date for the recording and the video input you want to record and the start time of recording and the length of the recording and the recording mode Note Before programming a recording please make s...

Страница 78: ...very Wednesday Wkly Thu Start recording every Thursday Wkly Fri Start recording every Friday Wkly Sat Start recording every Saturday 1 Press the Setup button on the remote control The Setup menu will display on screen 2 Press the Up or Down button to select the Record Setup icon and then press the Right button 3 Press the Up or Down button to select Schedule Rec and then press the Right button The...

Страница 79: ...rmat For example to set the length as 20 minutes enter 2 0 9 Press the Right button and move to the Source field Press the Up or Down button to select an appropriate video input for the recording Tip See Manual recording on page 67 for details of how to select a video source 10 Press the Right button to move to the Mode field Press the Up or Down button to select an appropriate record mode Tip See...

Страница 80: ...74 Schedule recording English When the schedule recording function is triggered the message TIMER will show on the front display panel ...

Страница 81: ...above How to change a schedule setting 1 Press the Setup button on the remote control The Setup menu will display on screen 2 Press the Up or Down button to select the Record Setup icon and then press the Right button 3 Press the Up or Down button to select Schedule Rec and then press the Right button The schedule list will appear on screen 4 If more than one schedule setting is displayed in the l...

Страница 82: ...cord Setup on page 101 for details These bookmarks can be changed when the recording has finished The scenes you do not want to see during playback e g commercials can be hidden or skipped During playback you can watch your recording as a continuous sequence without the hidden chapters See How to insert chapter markers during playback on page 78 and Hiding showing chapters on page 79 for details H...

Страница 83: ...or full However you can not mark chapters on DVD R type discs You can set the DVD Recorder to mark chapters automatically when recording Refer to DVD Auto Chap Chapter on page 101 for details while playing a suitable unprotected and unfinalized recordable DVD RW type disc you can set and erase chapter markers within a title as detailed by the following procedure Each disc can have a maximum of 124...

Страница 84: ... highlight on the Insert Chapter item press the OK button to insert a chapter marker 4 Repeat step 2 and 3 to add another chapter marker 5 When you ve finished inserting your chapter bookmarks press the Edit button to close the menu Notes If a displays on screen the disc is write protected or has been finalized Further changes cannot be made Once a disc has been edited the disc edits must be final...

Страница 85: ...button on the remote control The Edit menu will appear on screen 3 Press the Down button to select Hide Chapter and then press the OK button 4 Press the Edit button and then the Play button to end This chapter will be skipped while playing 5 To view the chapter again select Show Chapter in Step 3 How do I select other chapters 1 Press the Display button on the remote control The Display menu will ...

Страница 86: ...ers and hide these chapters directly so the commercials will be skipped when playing the title 1 Play the disc 2 At the beginning of the commercial press the Hide button on the remote control 3 At the end of the commercial press the Hide button again A new chapter will be created and it will be skipped when playing the title ...

Страница 87: ... the Up or Down button to highlight Delete Chapter and then press the OK button to delete the chapter marker 4 Repeat step 2 and 3 to delete another chapter marker 5 When you ve finished inserting your chapter bookmarks press the Edit button to close the menu How do I select other chapters 1 Press the Display button on the remote control The Display menu will display on screen 2 Press the Up or Do...

Страница 88: ...n to select the title you wish to edit 3 Press the Edit button to display the Edit menu on screen 4 Press the Up or Down button to highlight Edit Title Name and the press the OK button to confirm 5 A virtual keyboard will display on screen Use the Up Down Right or Left buttons to highlight a desired character on the virtual keyboard and then press the OK button to enter the selected character 6 Re...

Страница 89: ...rs by following the steps below 1 While playing a suitable disc press the Play list menu button on the remote control to display the disc content menu 2 Press the Edit button to display the Edit menu on screen 3 Press the Up or Down button to highlight Play Full Title and the press the OK button to confirm 4 The DVD Recorder will play the full title including the hidden chapters ...

Страница 90: ...e control to display the disc content menu 2 Press the Up or Down button to select the title you wish to erase 3 Press the Edit button to display the Edit menu on screen Press the Up or Down button to highlight Erase Title and the press the OK button to confirm Can titles be erased from a DVD R disc Titles on DVD R discs are only marked as erased While playing a disc the erased title will be skipp...

Страница 91: ...and unfinalized recordable DVD RW type disc press the Play list menu button on the remote control to display the disc content menu 2 Press the Up or Down button to select the title you wish to protect 3 Press the Edit button to display the Edit menu on screen 4 Press the Up or Down button to highlight Protect Title and the press the OK button to confirm How to unprotect a title To unprotect the ti...

Страница 92: ...otection on the disc erase all content on a DVD RW Finalizing edits Even if one or more titles have been edited a DVD player may still show the original title You can prepare your disc so that a DVD player will read the edited title instead 1 While playing a suitable unprotected and unfinalized recordable DVD RW type disc press the Play list menu button on the remote control to display the disc co...

Страница 93: ...hat disc 1 Press the Setup button on the remote control The Setup menu will display on screen 2 Press the Up or Down button to select the Disc Setup icon and then press the Right button 3 Press the Up or Down button to select Finalize DVD and then press the Right button to highlight Start 4 Press the OK button to start finalizing the DVD R disc Tips If the Finalizing disc message does not display ...

Страница 94: ...he Up or Down button to select the Disc Setup icon and then press the Right button 3 Press the Up or Down button to select Initialize DVD and then press the Right button to highlight Start 4 Press the Left or Right button to highlight Yes and then press the OK button to start initializing erasing the DVD RW disc Tip You cannot erase an empty disc ...

Страница 95: ...D R Disc on page 87 for details of finalizing discs How to protect a disc 1 Load the disc you want to protect into the DVD Recorder 2 Press the Play list menu button to display the disc content menu 3 Press the Edit button to display the Edit menu on screen 4 Press the Up or Down button to highlight Protect Disc and the press the OK button to confirm If you attempt to record on this disc the messa...

Страница 96: ...tiple recordings in a row 1 If a disc is playing press the Stop or Stop button on the remote control to stop playing the disc 2 Press the DVD HDD button and make sure that the HDD icon appears on screen momentarily 3 Press the Play button The HDD recording list will appear on screen 4 Press the Up or Down button to highlight the recording you wish to play The corresponding preview picture will app...

Страница 97: ...preview picture will appear in the background 5 Press the Right button A submenu will display on screen 6 Press the Up or Down button to highlight EDIT NAME and then press the OK button 7 A virtual keyboard will display on screen Use the Up Down Right or Left buttons on the remote control to highlight the character you wish to enter and then press the OK button to enter the selected character 8 Re...

Страница 98: ...on screen momentarily 3 Press the Play button The HDD recording list will appear on screen 4 Press the Up or Down button to highlight a recording you wish to delete The corresponding preview picture will appear in the background 5 Press the Right button A submenu will display on screen 6 With the DELETE item highlighted press the OK button 7 Press the Left or Right button to highlight Yes and then...

Страница 99: ...ake sure that the HDD icon appears on screen momentarily 3 Press the Play button The HDD recording list will appear on screen 4 Press the Up or Down button to highlight a recording you wish to dub The corresponding preview picture will appear in the background 5 Load an appropriate unfinalized and unprotected DVD R or DVD RW type disc into the DVD Recorder Make sure that the remaining time for rec...

Страница 100: ...emote control The Setup menu will display on screen 2 Press the Up or Down button to select the Disc Setup icon and then press the Right button 3 Press the Up or Down button to select Format HDD and then press the Right button to highlight Start 4 Press the OK button and then press the Left or Right button to highlight Yes 5 Press the OK button to start formatting the hard disk ...

Страница 101: ...Security Setup See Parental control on page 104 Record Setup See Record Setup on page 101 Disc Setup See Disc Setup on page 102 How to navigate through the Setup menu 1 Press the Setup button on the remote control The Setup menu will display on screen 2 Press the Up or Down button to select corresponding settings 3 Press the Right button to enter the submenu or highlight corresponding features 4 P...

Страница 102: ...sion number built in hard disk size and remaining disk space in DVD Recorder Factory Reset Allows you to reset all DVD Recorder settings to the original factory values Note This will erase time schedule record and all other user customizable settings To perform reset 1 Select the Factory Reset item from the Setup menu 2 Press the Right button on the remote control to highlight Start and then press...

Страница 103: ...es which were recorded in a widescreen mode 1 Select the Screen Format item from the Setup menu and then press the Right button 2 Press the Up or Down button to select a screen format 4 3 Letter Box full screen for viewing 4 3 aspect ratio movies on a 4 3 aspect ratio screen 4 3 Pan Scan full screen for viewing a 16 9 aspect ratio movie in full height on a 4 3 aspect ratio screen This scales the w...

Страница 104: ...gressive scan is only applicable for NTSC format discs and only when being displayed on a display device which has independent component video progressive scan inputs PAL format discs will not display properly using the Progressive scan setting for Video output on the DVD Recorder If your display device has independent component inputs they may not switch inputs automatically In this case you must...

Страница 105: ...Press the Up or Down button to select Bitstream or PCM 3 Press the OK button to confirm DTS Set the DVD Record to process DTS Digital Theater System contents in PCM or Bitstream mode It is recommended that you select Bitstream mode when playing DVD movies that supports DTS audio 1 Select the DTS item from the Setup menu and then press the Right button 2 Press the Up or Down button to select Bitstr...

Страница 106: ...feature is set to Off the additional vocal track on the karaoke DVD is not played If it is set to On the vocal and music tracks are played simultaneously 1 Select the Vocal item from the Setup menu and then press the Right button 2 Press the Up or Down button to select Off or On 3 Press the OK button to confirm DRC DRC Dynamic Range Compression is a technique that reduces the range between loud an...

Страница 107: ...ord mode 3 Press the OK button to confirm DVD Auto Chap Chapter A chapter marker will be inserted at the set frequency when recording on a DVD R or DVD RW type disc if this function is activated Off Disable the Auto chapters function 5 Min Insert a chapter marker every 5 minutes 10 Min Insert a chapter marker every 5 minutes 15 Min Insert a chapter marker every 5 minutes 1 Select the DVD Auto Chap...

Страница 108: ...ge to be used when playing a DVD 1 Select the Subtitle Lang item from the Setup menu and then press the Right button 2 Press the Up or Down button to select a language 3 Press the OK button to confirm Menu Language Selects the language for DVD Recorder Setup menus 1 Select the Menu Language item from the Setup menu and then press the Right button 2 Press the Up or Down button to select a language ...

Страница 109: ...ght button 3 Press the Up or Down button to select On or Off 4 Press the OK button to confirm Finalize DVD Finalizes a DVD R type disc See Finalizing a DVD R Disc on page 87 for details Note This option is only available if a non finalized DVD R type disc is inserted Format HDD Allows you to erase all recordings on the hard disk at once See Erasing all recordings on the hard disk on page 94 for de...

Страница 110: ...el to the entire disc Therefore if the filter value of some scenes is higher than the setting the entire disc will be locked In the United States the values usually map to the rating system of the MPAA Motion Pictures Distributors Association of America In Canada the values usually map to the rating system of the CMPDA Canadian Motion Pictures Distributors Association Parental control levels The t...

Страница 111: ... et plus Les jeunes de moins de 18 ans devraient voir ce film avec un adulte Pas de location ou de vente aux moins de 18 ans Avis parental impératif Contient probablement de la violence explicite des échanges fréquents de grossièretés de l activité sexuelle et ou des scènes d horreur 7 No one 17 and under admitted Restricted to 18 years and older No rental or purchase by those under 18 Contents no...

Страница 112: ...ill be prompted to enter a 4 digit password Use the numbered buttons on the remote control Note The default password is 1 2 3 4 If no password has been previously set you will be prompted to enter the password again to verify 6 A check mark will appear in front of the level item if successfully set Tip If a DVD scene contains a higher level than the rating set and the DVD Recorder does not find a ...

Страница 113: ...Press the Up or Down button to select the Security Setup icon and then press the Right button 3 Press the Up or Down button to select Country Code and then press the Right button 4 Press the Up or Down button to select a filter level and then press the OK button 5 Press the Right button to highlight the first contry code and then press the Up or Down button to change it 6 If necessary repeat the s...

Страница 114: ...ssword please perform system reset Refer to Factory Reset on page 96 for details and set the password again How to change parent control password 1 Press the Setup button on the remote control The Setup menu will display on screen 2 Press the Up or Down button to select the Security Setup icon and then press the Right button 3 Press the Up or Down button to select Set Password and then press the R...

Страница 115: ...as become confused Disconnect the DVD Recorder from the power supply for 30 seconds then reconnect it to the power supply again If the problem persists reset the DVD Recorder to the default factory settings The DVD Recorder cannot play a disc The child lock my be enabled Refer to Parental control on page 104 for details You may have selected the wrong video input for the DVD Recorder on the displa...

Страница 116: ...nting unintended erasure of a DVD RW Disc on page 89 A finalized DVD R has been inserted Change disc Schedule recording does not work You have set the wrong time or date Check the System clock Refer to Setting the Setup clock on page 36 You have not set the timer properly Check the timer settings Refer to Setting up schedule recording on page 72 A locked disc was inserted Remove disc lock Refer to...

Страница 117: ...played by the DVD Recorder different from its nominated capacity This is because hard disk and DVD Recorder calculate the capacity in different ways As a result the nominated capacity is different from the exact capacity displayed by the OS Example of a 160GB hard disk Exact capacity of a 40GB hard drive displayed in the OS 160 000 000 1 024 1 024 152 58789 GB Furthermore DVD Recorder will reserve...

Страница 118: ...Interlaced Record mode Max playing recording time DVD R DVD RW HDD 160GB 250GB 400GB HQ 1 hour 34 hours 53 hours 85 hours SP 2 hours 68 hours 106 hours 170 hours LP 3 hours 102 hours 159 hours 255 hours EP 4 hours 132 hours 212 hours 340 hours SLP 6 hours 204 hours 318 hours 510 hours Signal input terminals Analog audio input TV antenna RF input Composite analog video input S Video input IEEE 1394...

Страница 119: ...113 Product Specifications English Specifications may be changed without notice due to constant product improvements Weight 5 3 Kg Operating temperature 5 35 Operating humidity 25 75 C C ...

Страница 120: ...114 Product Specifications English Memo ...

Отзывы: