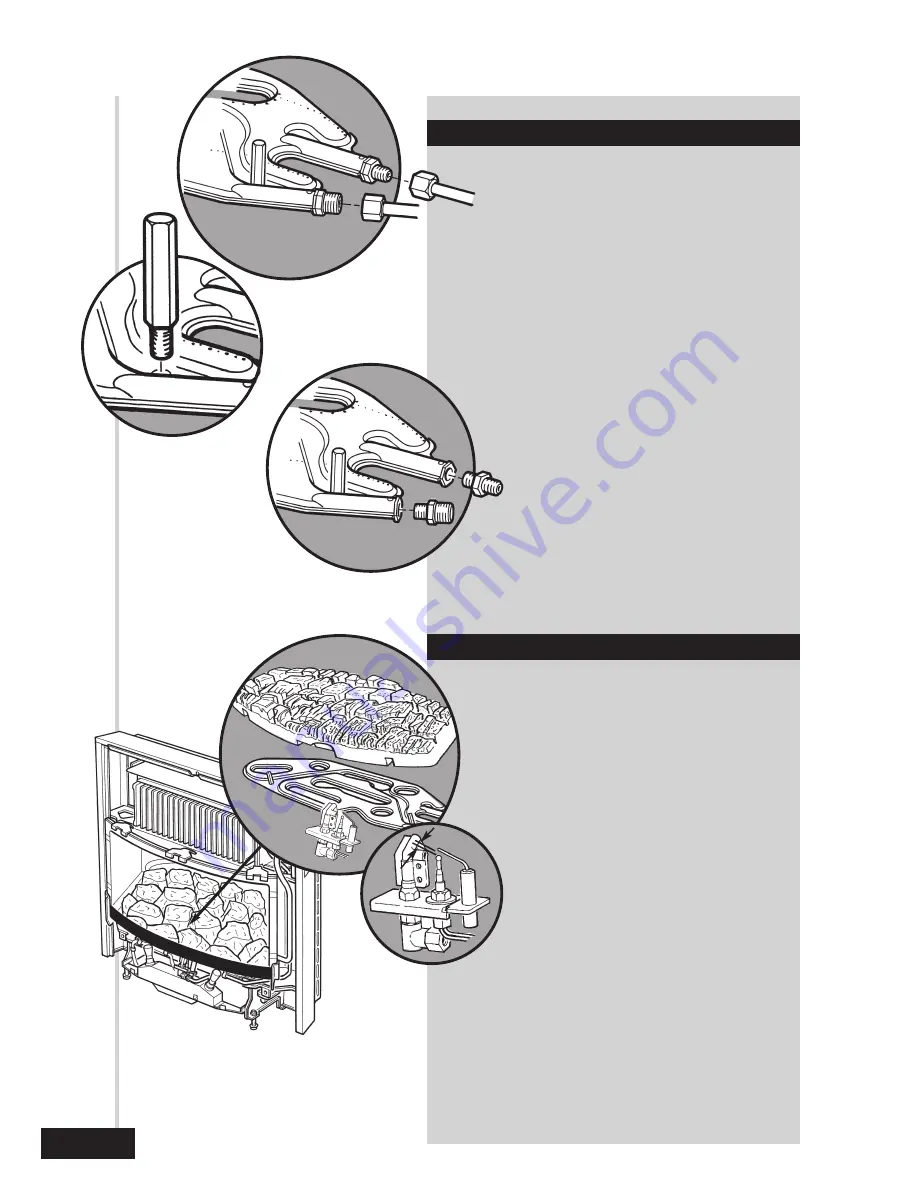
CLEANING THE BURNER/INJECTORS
Release the compression nuts that connect the gas
feed pipes to the injectors on the burner.
The coalbed location pins also secure the burner in
position. Unscrew and remove the pins.
Manoeuvre the burner clear of the fire, taking care not
to damage the pilot assembly.
The injectors can now be removed from the
burner. Using a soft brush, remove any dirt or
debris from the top of the burner and ensure
that the ports and aeration openings are free
from obstruction.
Examine and clean the injectors. Do not
use any hard tools, including pins or wire. Refit
the injectors to the burner.
NOTE:- The larger injector should be fitted into the
front burner inlet position.
Replace the burner in the reverse order of removal.
CLEANING THE PILOT/A.S.D. ASSEMBLY
NOTE:- No attempt should be made to clean the
device using any hard tools, including pins or
wire.
The thermocouple, electrode and pilot burner that
make up the pilot assembly are not replaceable as
separate items. If any part is damaged then the
pilot assembly should be replaced.
During annual appliance servicing the pilot
assembly should be inspected for damage to
any of the component parts and any lint or
debris should be carefully removed from
the aeration hole.
Check that the spark gap between the
electrode and thermocouple is between 2.5
and 4mm.
Some appliances may experience nuisance shut
down of the pilot. A pilot shield kit (Baxi Part No.
237319) is available to prevent this.
22
2.5 to 4mm


