ACTAS software
2-20
5975636 ACTAS 2 170297
Setting margins
(Only available in the "Advanced" menu style)
Margins include the left, right, top and bottom margins.
They are used to center the test picture correctly (see
also Page 2-5).
The left and right margins range from 0 to 20 steps, each
step is 280ns.
The top and bottom margins range from 0 to 40 steps,
each step is 1 scan line.
To set the margins :
u
Press the
<ADJUST>
key to enter the edit mode.
u
Use the '
é
' and '
ê
' keys to select the higher and lower
value comparing with the underlined one.
u
Use the '
ç
' and '
è
' keys to move the cursor left or
right to underline the digit needed to be changed.
u
Press the
<ENTER>
key to save the changes. A
message will be displayed to report the saving pro-
cess. If the
<EXIT>
key is pressed, the changes will
be discarded. A message will be displayed to report
the reverting process.
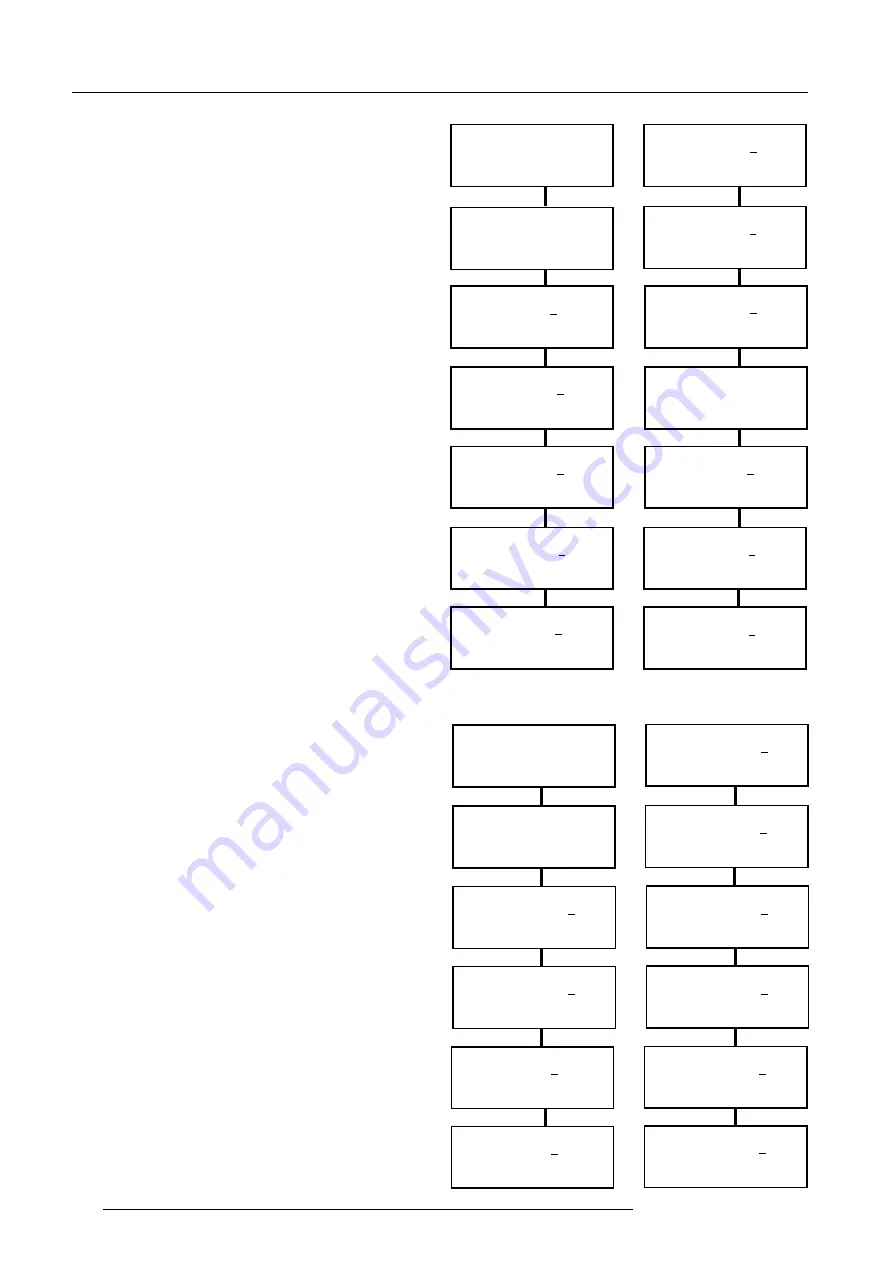
Examples are given, which alters the left margin from 0
to 18 steps and the top margin from 5 to 21. Use the
same method to set the right and bottom margins.
Edit setup nr 6
Flicker coarse 150 Hz
éê
: change /
çè
: other
ENT: save / EXIT: quit
Edit setup nr 2
Flicker coarse 150 Hz
éê
: change /
çè
: other
ENT: save / EXIT: quit
Edit setup nr 2
Flicker coarse _50 Hz
éê
: change /
çè
: other
EXIT: quit
Press '
é
'
Press 'ADJUST'
Press '
é
'
Edit setup nr 2
Flicker coarse _50 Hz
ADJ : edit /
çè
: other
EXIT: quit
Edit setup nr 6
V freq 130 Hz
Saving ...
Edit setup nr 6
V freq 130 Hz
éê
: change /
çè
: other
EXIT: quit
Press 'ENTER'
Edit setup nr 6
Flicker fine
.20 Hz
éê
: change /
çè
: other
ENT: save / EXIT: quit
Edit setup nr 2
Flicker fine
.10 Hz
éê
: change /
çè
: other
ENT: save / EXIT: quit
Edit setup nr 2
Flicker fine
.00 Hz
éê
: change /
çè
: other
EXIT: quit
Press '
é
'
Press 'ADJUST'
Press '
é
'
Edit setup nr 2
Flicker fine
.00 Hz
ADJ : edit /
çè
: other
EXIT: quit
Edit setup nr 6
Flicker fine
.20 Hz
Saving ...
Edit setup nr 6
Flicker fine
.20 Hz
éê
: change /
çè
: other
EXIT: quit
Press 'ENTER'
Edit setup nr 2
Left margin
18
éê
: change /
çè
: other
ENT: save / EXIT: quit
Edit setup nr 2
Left margin
10
éê
: change /
çè
: other
ENT: save / EXIT: quit
Edit setup nr 2
Left margin
_0
éê
: change /
çè
: other
EXIT: quit
Press '
è
'
Press '
é
'
Press 'ADJUST'
Edit setup nr 2
Left margin
18
Saving ...
Edit setup nr 2
Left margin
10
éê
: change /
çè
: other
ENT: save / EXIT: quit
Press '
é
' 8 times
Edit setup nr 2
Left margin
18
éê
: change /
çè
: other
EXIT: quit
Edit setup nr 2
Left margin
_0
ADJ : edit /
çè
: other
EXIT: quit
Edit setup nr 2
Bottom margin 21
éê
: change /
çè
: other
ENT: save / EXIT: quit
Edit setup nr 2
Bottom margin _1
éê
: change /
çè
: other
ENT: save / EXIT: quit
Edit setup nr 2
Bottom margin 5
éê
: change /
çè
: other
EXIT: quit
Press '
ç
'
Press '
ê
' 4 times
Press 'ADJUST'
Press 'ENTER'
Edit setup nr 2
Bottom margin 21
Saving ...
Press '
é
' 2 times
Edit setup nr 2
Bottom margin 21
éê
: change /
çè
: other
EXIT: quit
Edit setup nr 2
Bottom margin 5
ADJ : edit /
çè
: other
EXIT: quit
Press 'ENTER'
Edit setup nr 2
Bottom margin 1
éê
: change /
çè
: other
ENT: save / EXIT: quit
Setting the flicker coarse and flicker fine
(Only available in the "Advanced" menu style)
When test pictures are originated from a fixed source or
a manually controllable source, the flicker coarse and
fine parameters will be shown and can be set. These
values should be set to the exact picture refresh rate
(vertical scan frequency) in order to optimize the
measurement integration interval.
The flicker coarse should be set to the digits before the
decimal point, the flicker fine should be set to the digits
after the decimal point. The flicker coarse ranges from
42 to 150 Hz, the flicker fine ranges from .00 to .99 Hz.
To set the flicker coarse and flicker fine :
- Press the
<ADJUST>
key to enter the edit mode.
- Use the '
é
' and '
ê
' keys to select the higher number
and lower number comparing to the underlined value.
The number can be from 0 to 9.
- Use the '
ç
' and '
è
' keys to move the cursor left or
right to underline the digit needed to be changed.
- Press the
<ENTER>
key to save the changes. A
message will be displayed to report the saving pro-
cess. If the
<EXIT>
key is pressed, the changes will
be discarded. A message will be displayed to report
the reverting process.
Two given examples illustrate how to set the values. Out
of range values will not be accepted.


