


Application of
Assembly
3 - 192
Embroidery unit
Application o
f
Assembly
Application of
Assembly
2
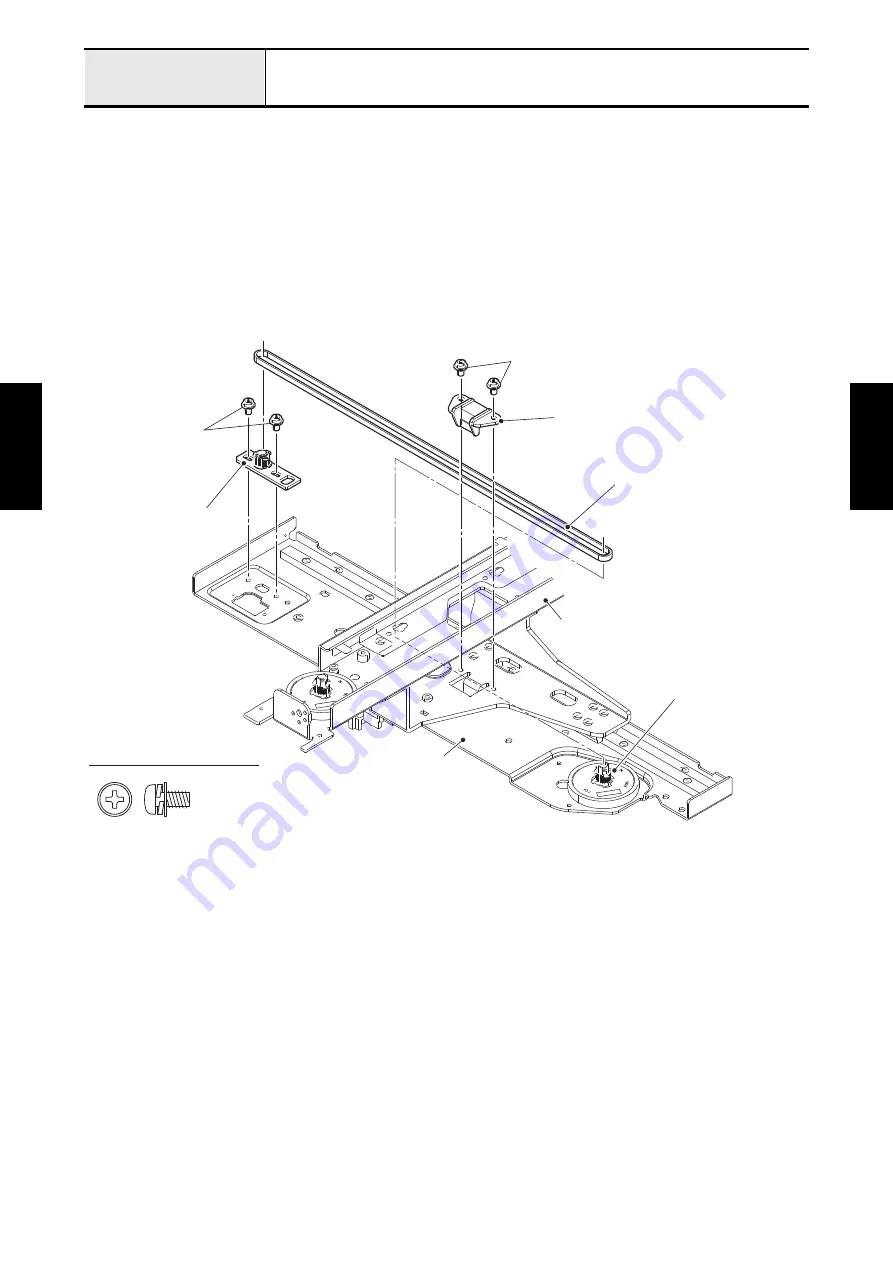
Assembly of Timing belt
1. Set the tension pulley assy to the main frame assy, and tighten the two screws (screw, pan (S/P
washer) M4x8) temporarily. Hang the timing belt 40S2M676 on the tension pulley assy and the driving
pulley.
*Key point
• Fully tighten the screw after performing
"Adjustment of Belt tension (embroidery unit)"
.
2. Attach the X belt presser to the X carriage assy with the screw (screw, pan (S/P washer) M4x8).
*Key point
• Press the timing belt 40S2M676 with the X belt presser, and then check that the gear teeth of X belt presser
is engaged with the gear teeth of timing belt 40S2M676.
Screw, Pan (S/P washer) M4X8
Timing belt 40S2M676
X belt presser
Screw, pan (S/P washer) M4x8
Screw, pan (S/P washer)
M4x8
Tension pulley assy
Driving pulley
Main frame assy
X carriage assy
Содержание BLDY
Страница 1: ...MODEL BLDY BLDY2 Home Sewing Machine SERVICE MANUAL Sep 2014 Jun 2016 Published Revised CONFIDENTIAL...
Страница 2: ......
Страница 3: ...LIST of UPDATE RECORD Date Added Models Contents Changed 4 13 Added 4 52 to 55 May 2015 Jun 2016 BLDY2...
Страница 275: ...Application of Assembly 3 177 Feed module Application of Assembly Application of Assembly Feed module location diagram...