2: I
np
ut
s a
nd O
ut
pu
ts •
1
6
©2012 Axia Audio
backfeed associated with it, this option determines what
audio content is sent back to the source from the console.
•
Disabled
- No backfeed.
•
Auto (Pgm-1/Phone)
feeds the
Program 1
bus
(minus the source) when this source’s fader is ON,
and feeds the Phone bus (minus the source) when the
fader is OFF. Remember, the Phone bus is actually a
special variant of Program 2. The Phone bus is pre-
fader and pre-on/off to allow speaker-phone style op-
eration thru the Operator’s mic.
•
Program 1
always feeds the Program 1 bus, minus
the source, regardless of the on/off state of the chan-
nel.
•
Program 2
feeds the Program 2 bus, minus the
source.
•
Phone
feeds the Phone bus, minus the source. Phone
is a pre-fader and pre-on/off variation of Program 4
•
Talk Only
is a “silent backfeed” that operates when
the
Talk To
function is engaged, creating an IFB to
the source.
Feed to Source Dim gain (codec, Phone, and Studio
Feed only)
Normally, Talkback is sent over dimmed backfeed
audio. If you want a hard interruption (Talkback inter-
rupts Program audio), un-check the
Enable
check box,
which mutes the audio. But maybe your jocks would like
to have just their program audio dimmed, with Talkback
heard over it so they can still monitor air while they’re
being talked to. In this case, input a value by which the
program audio will be dimmed. Adjustment range is 0dB
to -30dB.
live controls
This group of radio buttons configures permits “live”
functions for the
Options
control on each of the con-
sole’s fader strips. Available options will vary depend-
ing on the source type. One setting may be defined as
the
Primary
or “live” control, which means that the
Options
control will vary that setting as soon as you ad-
just the knob. For example, if PANORAMA has been
defined as the Primary function, simply rotating the
Op-
tions
control will pan the source.
The other functions may be enabled or disabled as
desired. Those that are
Enabled
may be chosen by the
operator “on-the-fly” by depressing the
Options
control.
When the control is pressed, the OLED display will list
the options that you’ve checked as
Enabled
in this sec-
tion of the configuration. Pressing the
Options
control
selects the highlighted option and turning the
Options
control will adjust the parameter for that option. De-
pending on the enabled options, the operator will be able
to adjust Source, Gain, Mode, Pan and Backfeed.
Remember to
save your work
! You may also “Save
as Copy” if you intend to set up another, similar source
— you can save a few clicks this way.
Congratulations — you’ve created a Source Profile
You can now bring up your new source on a fader.
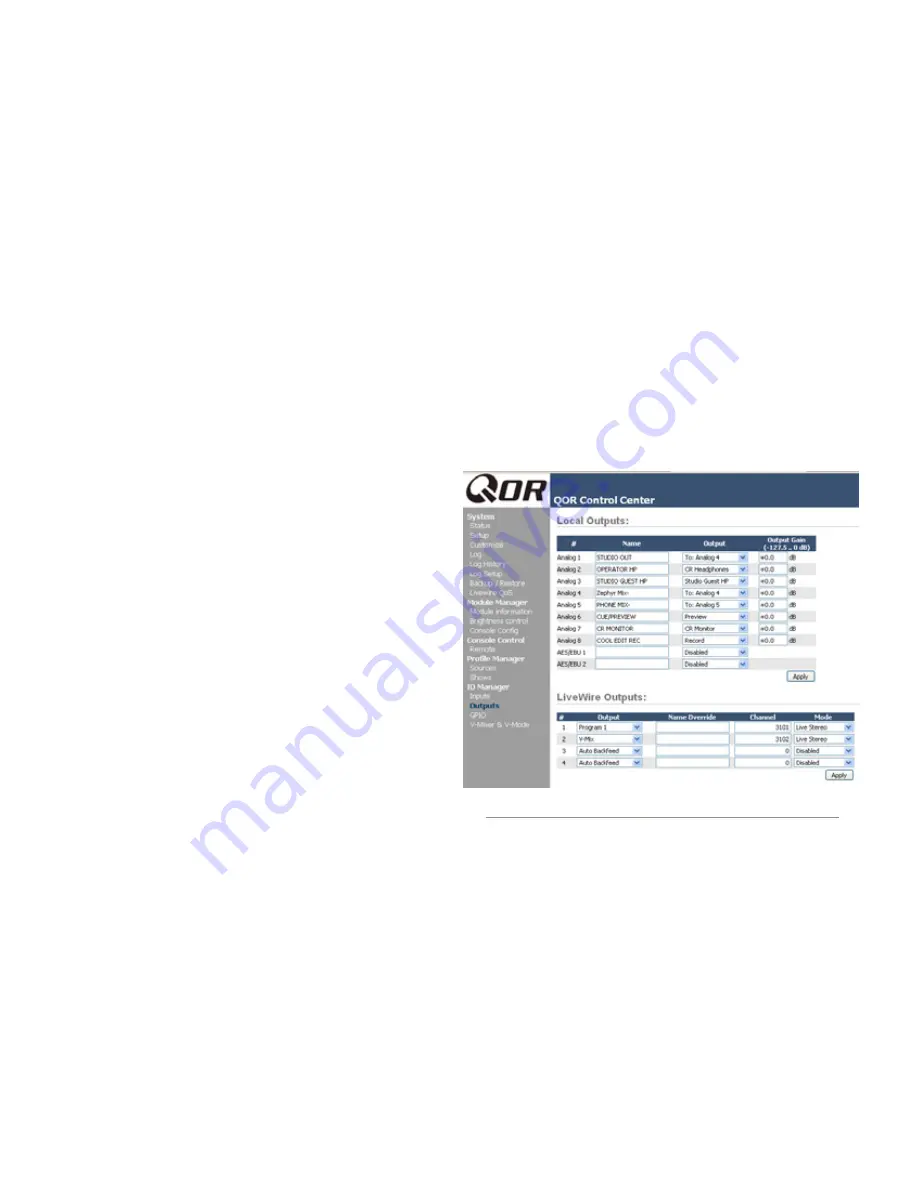
QOR Outputs
Now that we have configured sources, let’s look
at the two kinds of outputs of the QOR, Local and
Livewire (network).
• Local Outputs
- These outputs correspond to the au-
dio connectors on the rear panel of the QOR. These
are used to connect Control Room monitors, Preview
speakers, headphone amplifiers, record devices and,
of course, your air chain equipment and processing.
• Livewire Outputs - This is a group of specified audio
Figure 2-6: Assigning an Output from the list box
Содержание DESQ
Страница 1: ...RAQ DESQ Installation User s Guide Manual Rev 1 January 2012 p n 1490 00086 001...
Страница 8: ...Introduction viii 2012 Axia Audio...
Страница 10: ...Introduction x 2012 Axia Audio Crimping the spade lugs the smell of soldering flux they ll be missed Not much...
Страница 12: ...Getting Started 2 2012 Axia Audio Open box connect Seven pounds of pure power Who needs big consoles...
Страница 30: ...2 Inputs and Outputs 20 2012 Axia Audio CAT 6 small and light yet sound and data pour forth What magic is this...
Страница 61: ...6 Advanced Controls 51 2012 Axia Audio Mimicking nature streams combine to form anew many become one...
Страница 80: ...Axia Audio a Telos Alliance Company 1241 Superior Ave Cleveland Ohio 44114 USA 1 216 241 7225 www AxiaAudio com...


