6: A
dv
an
ce
d C
on
tr
ol
s •
4
9
©2012 Axia Audio
»
Messages, Idle Time, Uptime:
All indicate di-
agnostic information that is related to the CAN-
Bus communications. Tech support may request
this information for troubleshooting purposes.
»
Hardware Revision:
displays the hardware ver-
sion of the module.
»
Firmware Version:
displays the firmware ver-
sion that’s loaded on the module.
»
Upload Firmware Group:
From time to time,
new module firmware may become available
from Axia. You may install new firmware by
choosing Browse and then Upload.
NOTE
: Updating a module takes it offline during
the update process. While audio playing through
the module’s faders will continue uninterrupted,
keep in mind that while updating (usually about
5-10 seconds) you will not be able to adjust gain
or turn faders on or off on the module being
updated.
Brightness control Menu
This menu offers several options for setting the con-
trol surfaces to your studio’s ambient lighting. All val-
ues are expressed in percent. The default setting will be
suitable for most studio environments, however you may
make adjustments as needed.
gPiO configuration Menu
This menu is where you configure the assignments
for the opto-isolated GPIO connections found on the
rear panel of the QOR. For a thorough discussion of
this screen and how to configure GPIO, please refer to
Chapter 5: Configuring GPIO
.
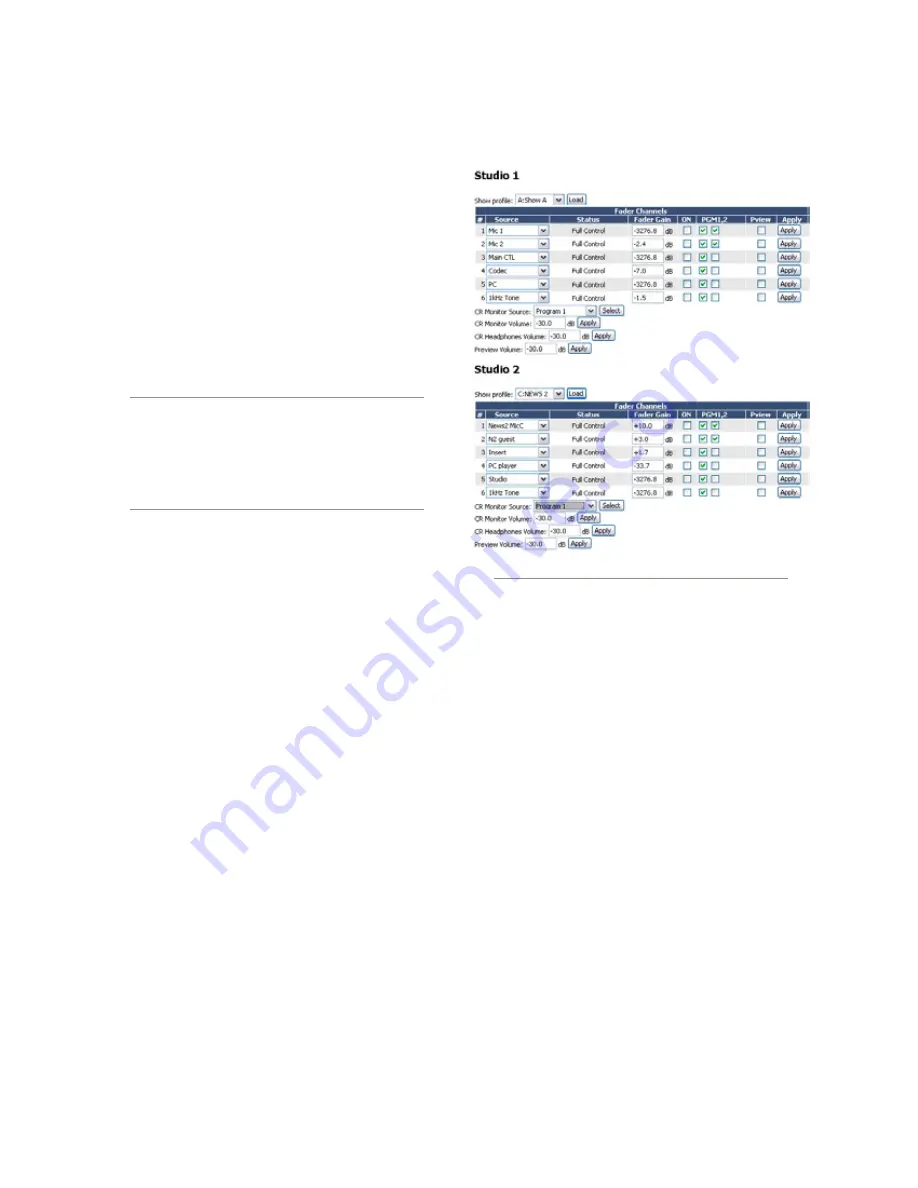
remote
The remote function available through the web in-
terface gives you many of the same controls that are on
the surface:
• You have the option to load a Show profile by se-
lecting the show in the dropdown selector, and then
pressing the
Load
button.
• Each fader channel is shown with an option to change
the source, change the ON state, assignments to the
mixes, and Preview state.
In order to change a state, you must make the selec-
tion to the channel and press the
Apply
button for that
row. This is control of a single channel at a time. Be-
low the Fader Channels section are the controls for the
monitors, where the source and volumes for a monitor
can be adjusted.
Profile Manager Menu
These menus allow you to construct and administer
Show and Source Profiles specific to the console. Refer to
Chapter 2: Inputs and Outputs
and
Chapter 4: Show
Profiles
for details on Source and Show profiles.
iO Manager Menu
These menus allow you to administer your QOR’s
audio Inputs and Outputs. Refer to
Chapter 2: Inputs
and Outputs
for complete details on configuration of
these controls.
Ethernet Switch settings (Preconfigured)
QOR contains an integrated Ethernet switch. This
switch manages the multicast functions of the console
and enables it to be connected to other devices via your
managed Livewire LAN.
Figure 6-5: Remote Screen
Содержание DESQ
Страница 1: ...RAQ DESQ Installation User s Guide Manual Rev 1 January 2012 p n 1490 00086 001...
Страница 8: ...Introduction viii 2012 Axia Audio...
Страница 10: ...Introduction x 2012 Axia Audio Crimping the spade lugs the smell of soldering flux they ll be missed Not much...
Страница 12: ...Getting Started 2 2012 Axia Audio Open box connect Seven pounds of pure power Who needs big consoles...
Страница 30: ...2 Inputs and Outputs 20 2012 Axia Audio CAT 6 small and light yet sound and data pour forth What magic is this...
Страница 61: ...6 Advanced Controls 51 2012 Axia Audio Mimicking nature streams combine to form anew many become one...
Страница 80: ...Axia Audio a Telos Alliance Company 1241 Superior Ave Cleveland Ohio 44114 USA 1 216 241 7225 www AxiaAudio com...


