


• (Optional) Customize your recording settings, such as video resolution, as described in
Enabling and Configuring Recording
on page 79. For example, to increase the recording time
allowed, lower the recording bitrate.
Procedure
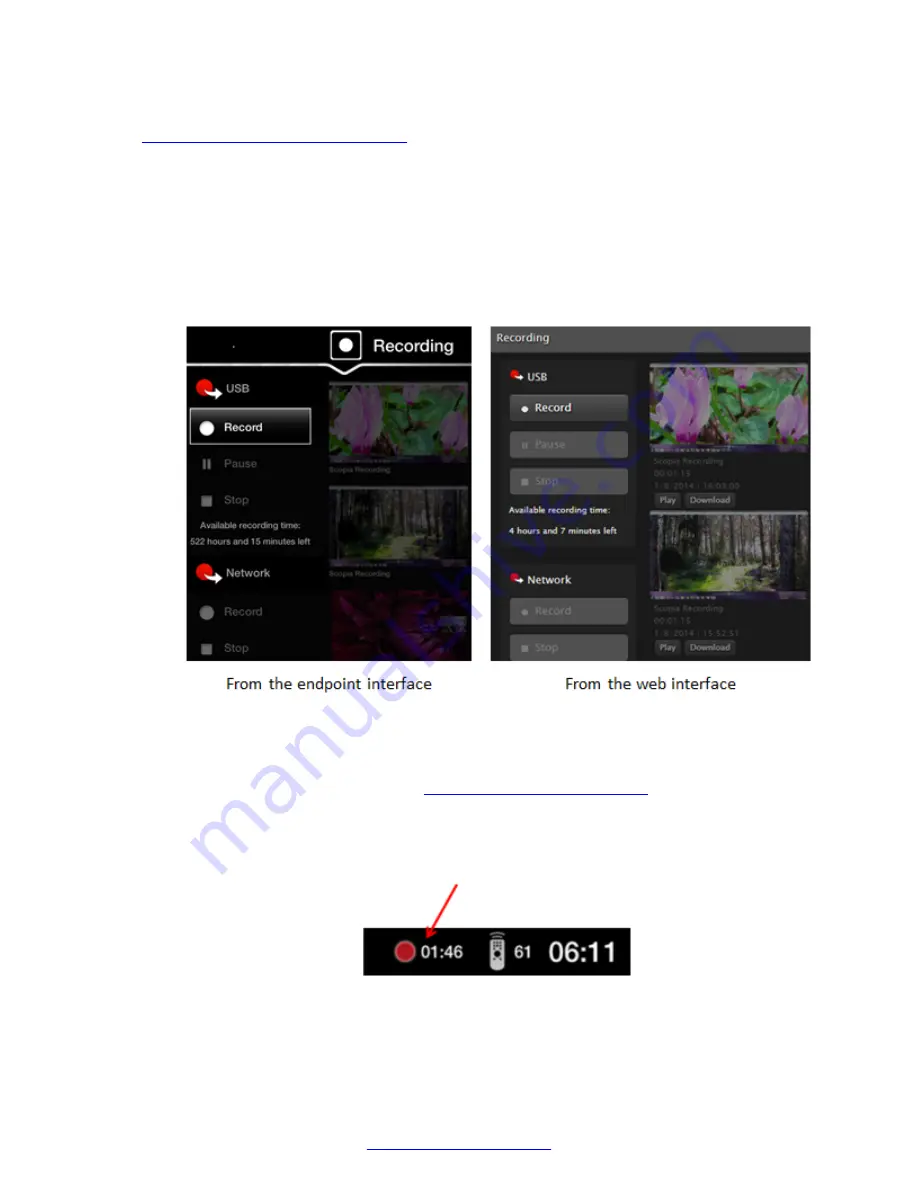
1. Access the
Recording
menu. From the XT Series web interface, select
More Actions
>
Recording
. From the endpoint's main menu, select
Recording
, or during a call, press
ok/
menu
on the XT Remote Control Unit, and select
Meeting Options
>
Recording
.
The
Recording
screen indicates the amount of time you can record based on the available
space on your USB storage device.
Figure 67: Start a recording
2. To start recording, select the
Record
option under your preferred recording location (USB or
the network). For more information about the location options available to you, see the
Before you begin
section above or
on page 79.
The recording icon appears at the top of the monitor, next to the remaining time available for
the recording. You can pause or stop the recording by selecting those buttons in the
recording screen.
Figure 68: Recording icon and time remaining on this USB drive
Recording Meetings
68
Avaya Scopia
®
XT Series User Guide
April 2015
Содержание Scopia XT Executive
Страница 1: ...Avaya Scopia XT Series User Guide For Solution 8 3 2 April 2015 ...
Страница 2: ......