


Solution
Adjust the way the image appears on the monitor. To see your adjustments in real-time, we
recommend performing this procedure from the endpoint itself.
If configuring from the endpoint, you must first enable advanced configuration, as described in
Deployment Guide for Avaya Scopia
®
XT Series
.
1. Access the monitor settings. From the XT Series web interface, select
Administrator
settings
>
I/O connections
>
Monitor
>
Graphic Adjustments
. From the endpoint's main
menu, select
Configure
>
Advanced
>
I/O connections
>
Monitor
>
Graphic
Adjustments
.
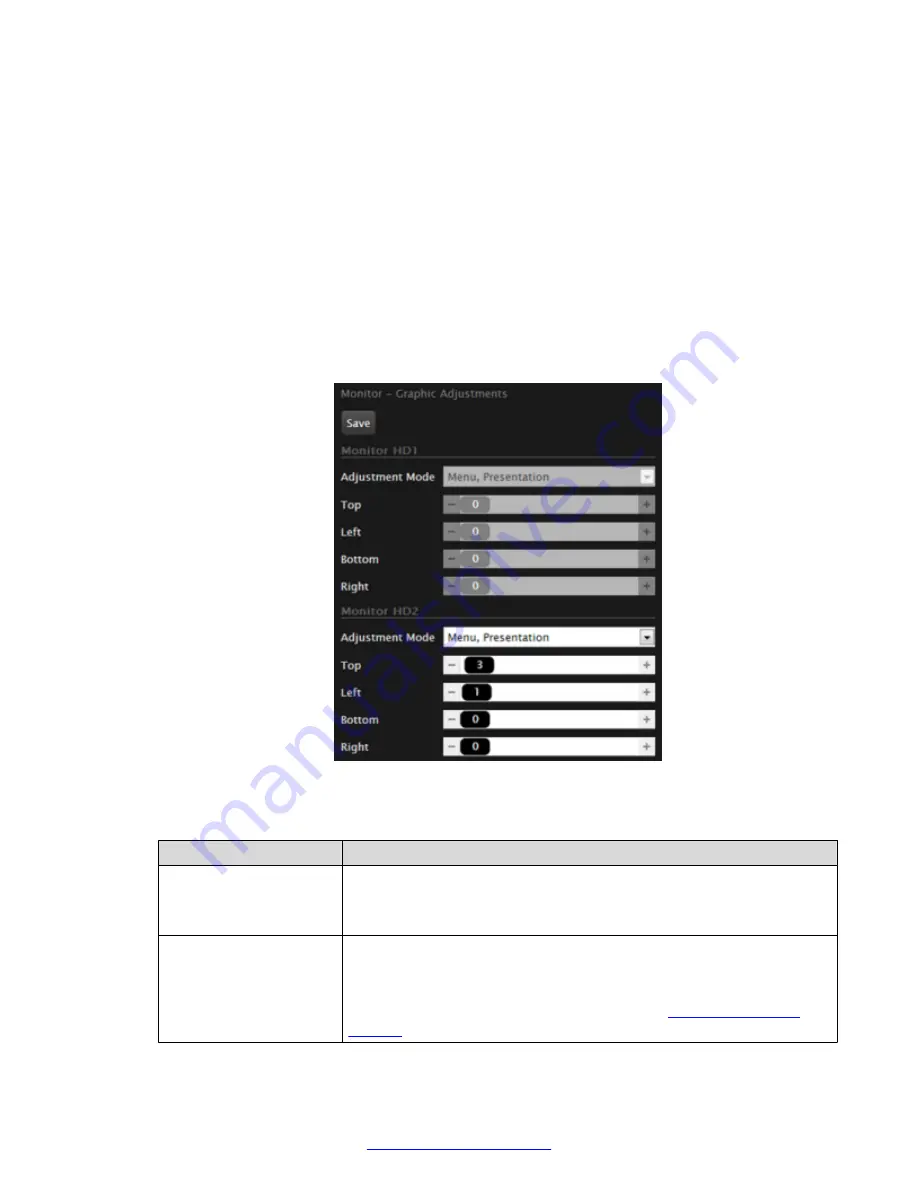
2. Navigate to the monitor requiring adjustment (
Monitor HD1
or
Monitor HD2
).
3. Select your preferred image view mode. On the Scopia
®
XT Executive, use the
Monitor
HD2
area.
Figure 87: Adjusting the monitor
Table 11: Adjustment options for the monitor
Option
Description
Adjustment Mode
Select
Menu, presentation
(default) to adjust both the system menu
and presentation, local or received.
Select
Menu
to adjust the system menus only.
Top, Left, Bottom,
Right
Drag the sliders to the required sizes until the menu or presentation
borders are visible on the monitor.
You can also adjust the image for the monitor displaying the system
menu, in the quick setup wizard as described in
Resolving Monitor Display Problems
April 2015
Avaya Scopia
®
XT Series User Guide
89
Содержание Scopia XT Executive
Страница 1: ...Avaya Scopia XT Series User Guide For Solution 8 3 2 April 2015 ...
Страница 2: ......