


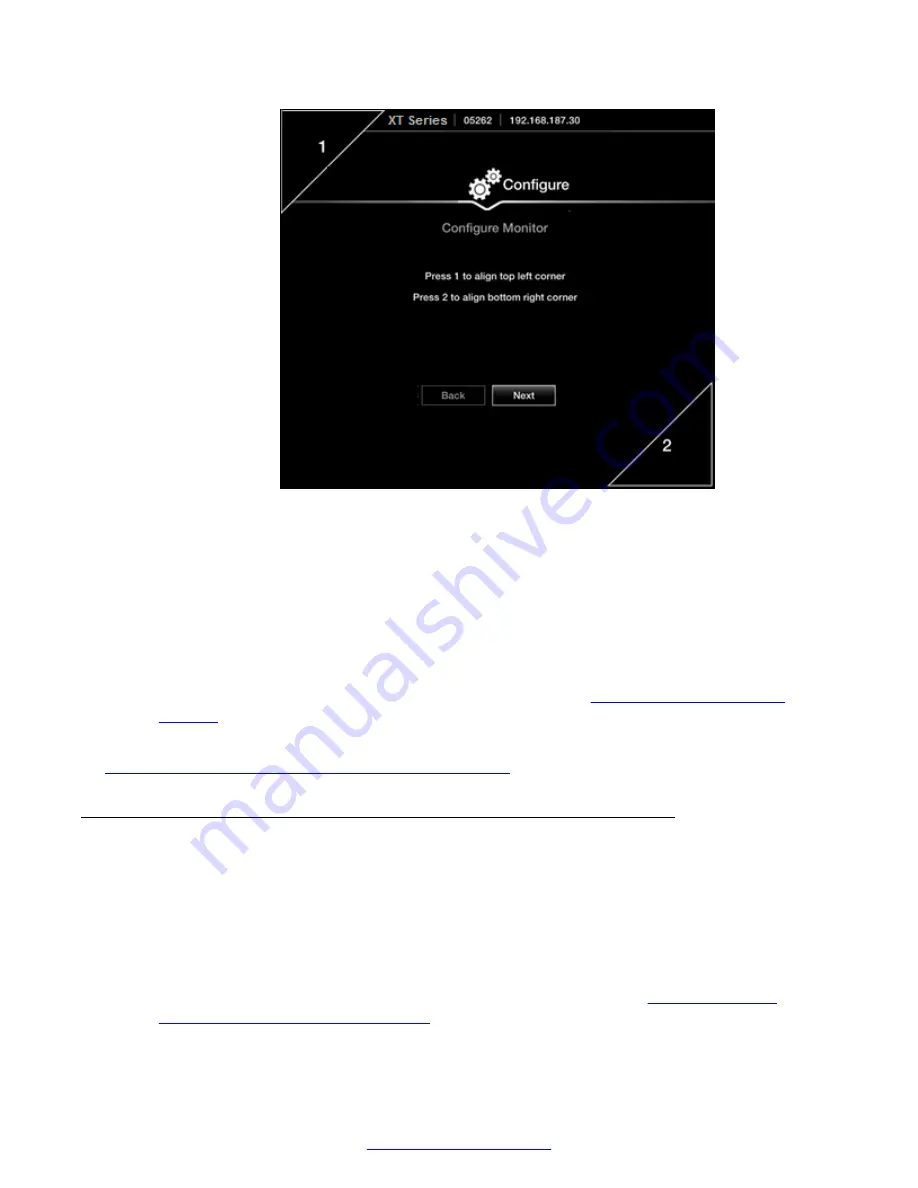
Figure 19: Examining the image position
3. Press
1
to highlight the triangle in the top left corner in blue.
4. Use the arrow keys to position the image, so all sides of the white border of the triangle are
visible in the screen, then press
ok/menu
.
5. Press
2
to highlight the triangle in the bottom right corner in blue.
6. Adjust the image position in the same way, until all sides of the triangle border are visible,
then press
ok/menu
.
7. To continue with the Quick Setup Wizard, select
Next
(see
on page 31).
Related Links
Configuring Basic Settings with the Quick Setup Wizard
on page 27
Configuring Basic Network Settings
About this task
This procedure describes how to set up the basic network settings and the IP address of the XT
Series as part of the Quick Setup Wizard. To modify advanced network settings, see
Deployment
Guide for Avaya Scopia
®
XT Series
.
Procedure
1. Access the Quick Setup Wizard from the endpoint, as described in
Settings with the Quick Setup Wizard
on page 27, and skip to this step.
Configuring Basic Settings with the Quick Setup Wizard
April 2015
Avaya Scopia
®
XT Series User Guide
31
Содержание Scopia XT Executive
Страница 1: ...Avaya Scopia XT Series User Guide For Solution 8 3 2 April 2015 ...
Страница 2: ......