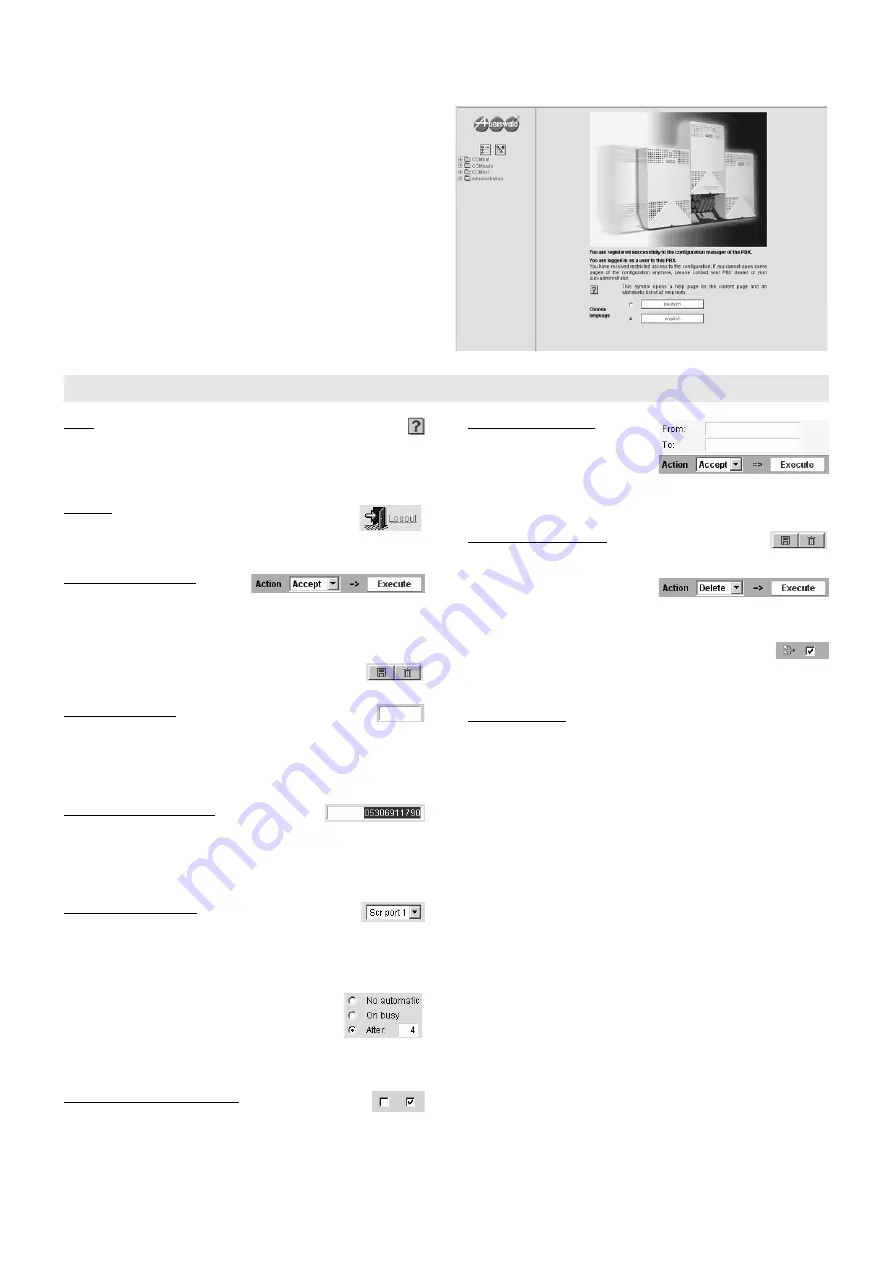
View and change your Settings via Web Interface
Operation Advice
61
햶
The configuration manager will open. Now you can see the
available program items on the left side. By clicking on the plus
sign you can open the folders and look at the underlying config-
uration and information pages.
Help: You can open the online help with the information about
the currently viewed page by clicking on the question mark sym-
bol on each page. Inside the online help additional information or help
files about other pages can be opened via “additional information“ in
an alphabetic ordered list.
Log out: In the bottom left corner there is the button
necessary to close the web interface. Via mouse click
on “Logout“ you can directly return to the registration
page.
Accept entered Data: Before
leaving a page it is necessary –
with some exceptions – to confirm your changes via mouse click on
the field “Execute“ in the action line. This way the displayed data is
stored in the PBX. The successful storage of data is shown by the
flashing save icon right at the top of the page.
To store changes in individual table lines, you can also
click the green save icon in the corresponding line.
Entry in a free field: A free field is available for the entry
of a name or a number. Click with the left mouse button in
the corresponding field and enter a number or a name with the key-
board. Before leaving the page it is necessary to confirm your entries
via mouse click on the field “Execute“ in the action line. The following
signs must not be used: “ “ ' # $ & % < > / \
Change number or name: Click with the left
mouse button twice on the entry to be overwrit-
ten. It will be marked in blue and can directly be overwritten or deleted
with the Delete/Backspace key. Before leaving the page it is neces-
sary to confirm your changes via mouse click on the field “Execute“
in the action line.
Switch-over Functions: Functions that can do more
that switching on/off and have a limited selection of only
some options, a preselection has already been done in the field. To
change this selection, you have to choose from the popup menu via
mouse click. You open the popup menu with the left mouse button on
the arrow.
For some functions there are little circles as
switches additionally to the listed options. The
selected setting is marked with a black point within
the circle. The function is switched over via mouse
click on an empty circle. The activation of a setting
causes the parallel deactivation of all other choices.
Activate/deactivate Functions: A square represent a
switch. An empty square means “out“ or “no“; there
against a little hook means “on“ or “yes“. The selection is done with a
simple click with the left mouse button.
Add entries in the list: To create
new entries in the list, you fill in the
empty entry fields in the bottom
line of the table and confirm your
entries with a mouse click on the
field “Execute“ in the action line. Then one or more lines are added to
the list.
Delete entries in the list: To delete an entry, click the
red recycle bin in the corresponding table line and, sub-
sequently, click the green check mark below.
Alternatively, you select “Delete“
in the action line first instead of
“Accept.“. Then you can mark one or more entries in the first table col-
umn via mouse click to delete them (little hook in the square).
If you like to select all entries you can activate the little
box at the bottom left side of the action bar. Then you
delete the marked entries with a mouse click on the field “Execute“ in
the action line.
Colour schemes: To adapt the interface to the personal taste the
PBX is offering four colour schemes. The may be configured for the
admin under Administration
왘
Server configuration and for the individ-
ual users under COMset
왘
Internal subscriber (scr)
왘
Properties
왘
User settings.
Operation Advice


